Turn A Boring IKEA Doormat Into A Stylish Statement With Just A Little Paint
We may receive a commission on purchases made from links.
The reality is that most of the unique doormats we'd all love to have at our doorsteps don't come cheap. Take, for example, the trending quirky door mats we're seeing everywhere. They're quite something, but for many designs, you can expect a high price tag. The good news is you can get a stylish mat at a thrifty price with a simple DIY that turns a plain IKEA buy into a must-have doormat that adds flair to your home. So, if you've been searching for a cute mat but have not found one that matches both your taste and budget, your first step should be to visit IKEA and purchase the TRAMPA door mat at $12.99. You're going to paint a striped pattern on it to jazz up its rustic look. We love this IKEA hack because it's so easy, even for beginner DIYers.
But before we get started, let's make sure you have the right supplies. First, visit your local crafts store or order some outdoor acrylic paint on Amazon. You will also need a high-quality, dense stencil brush to provide full coverage without leaving lines or bristles on your artwork. These Patelai Wooden Stencil Brushes are a great choice. Other than that, you will need a good rubber coating sealant to coat and seal your art, painter's tape, and measuring tape.
How to elevate your plain IKEA doormat using paint
After gathering your materials, place your tape measure horizontally on the mat's length to find its center. Cut a little painter's tape and use it to mark that spot. Then, without lifting your measuring tape, move three inches away to the right side of your central mark. Vertically run painter's tape down that mark, and repeat that same process to the left of your mid mark. You now have the section where you will paint a bold, thick stripe.
Next, you'll use your sticky tape to mark where to paint two thinner lines of paint on each side of the larger stripe. To do so, apply a strip of painter's tape right next to one of the strips that mark the outer boundary of your bold line, and add another strip next to that one. You should have three strips of painters' tape side-by-side. Pull the middle line of tape out, and you'll have a perfectly measured thinner line to paint on. To create a second stripe, place two more strips of tape side-by-side next to the outer tape strip, and remove the center strip. Repeat this entire process on the other boundary of your bold line.
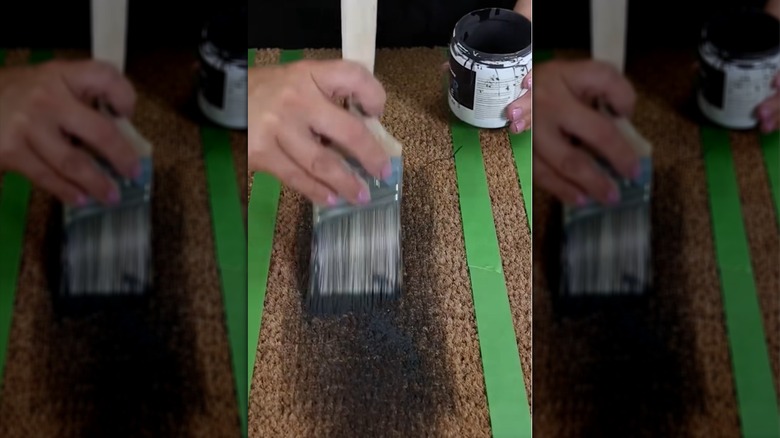
Now you're ready to turn your IKEA doormat from basic to dapper. Use your stencil brush to apply your paint, working your way from top to bottom of your vertical lines so you get nice, even coverage. When you have solid coverage, let it dry and pull up the painter's tape. Finish up by spraying your sealer, then leave your one-of-a-kind doormat to dry completely.
Simple designs create an outstanding doormat
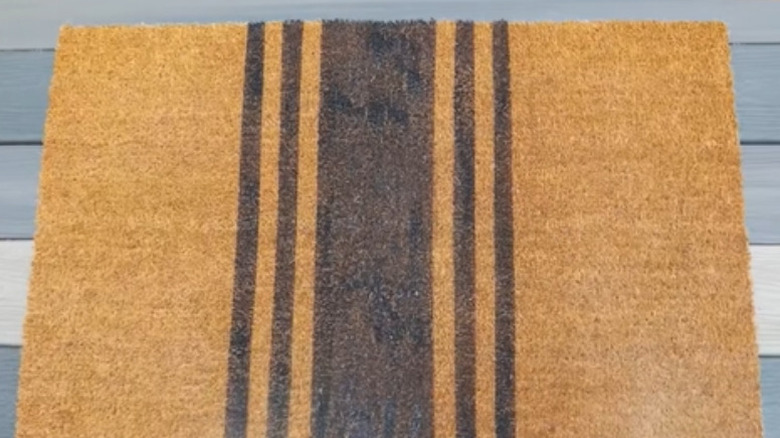
If you know a bit about patterns (especially historic stripes), then you can probably tell that what we've just painted is a version of the classic candy stripe pattern. To make this doormat nail the actual candy stripe pattern, you'll probably want to make these lines diagonal rather than vertical on the door mat. But this is a DIY project, so nothing's cast in stone. Feel free to create other DIY doormats using similar steps to produce different designs, such as regency or hickory stripes.
Feeling more adventurous? Experiment with making varied patterns using the painter's tape, from boxes and triangles to horizontal stripes and zigzag lines. Browse online rug stores to get inspiration for different designs that look easy to execute yet create an outstanding doormat design. One way to keep your designs simple is by going for geometric shapes that can be easily pulled off using painter's tape. Even if you feel like you can't hack other designs, there's always the option of customizing this DIY by simply mixing and matching paint colors. And that's how you create welcome mats for cheap with this super easy IKEA DIY.