How To Create Your Own Faux Pottery Jar With A Few Craft Supplies
You might be surprised to hear that creating your own pottery jar doesn't require you to know how to throw pottery. In fact, it doesn't require any pottery skills at all — just a bit of DIY magic and crafty hands. And sure, this isn't the real deal — it's faux pottery. But it looks just as good, and it does the job.
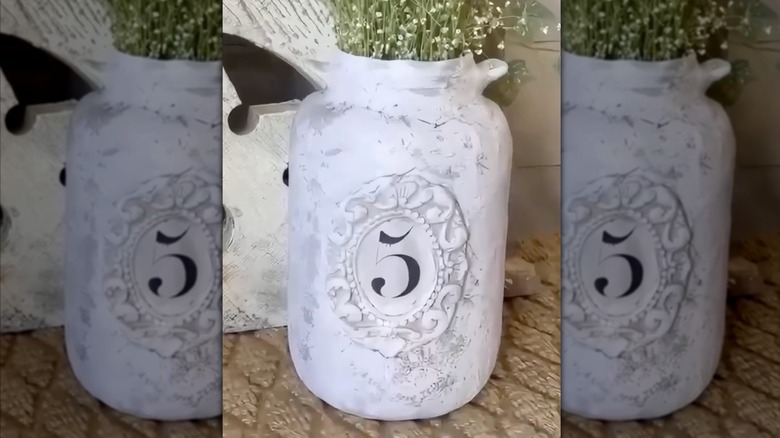
The idea here is to cover a glass jar or vase in modeling clay, securing it in place with Mod Podge. Once the clay is dry, cracks will appear. You can cover those with a bit more Mod Podge, this time using napkins to cover the gaps and give it a uniform textured look. You can add small details, like curlicues or florals, to the pot using silicone molds and more modeling clay. It's a simple technique that allows you to replicate the look of handcrafted pottery with just a few basic supplies, making it a fun and customizable way to add a personal touch to your interior decor.
To do this DIY, you'll need a glass base for the vase. You can purchase a new one at the dollar store, or upcycle glass jars into unique decor from the stash of old jars you already have. In addition, get two packs of DAS air hardening modeling clay (one for the jar, the other for decorative pieces), a sheet of parchment paper to protect your table, and a rolling pin. You'll also need silicone molds of your choosing to shape details, Mod Podge, white napkins, and a paint brush. Mod Podge is typically used for creative ways to use decoupage in DIYs, but it is versatile and can used in many ways. In this case, it acts as a glue and a varnish to hold it together.
Making a pottery jar with modeling clay
For this DIY, lay a sheet of parchment paper on your table and place one pack of modeling clay on top. Using your rolling pin, create a rectangular layer that's less than ½ inch thick. Use your paint brush to apply a thin layer of Mod Podge on the glass jar, and slowly wrap the piece of modeling clay onto it until it's completely covered. With your hand and some water, smooth out any edges or uneven pieces so that the clay lays evenly around the jar.
Next, fill the silicone molds of your choosing with the second pack of clay. Then, make small scratches on the clay that's covering the jar where you plan to apply the molded details. Add some water to the back of those molded clay pieces, and, with your hand, apply them to the scratched areas. Once the clay is dry, cracks might appear. You can leave the piece as is if you like that cracked look, or you can apply white napkins and Mod Podge on them to hide the gaps.
To customize this DIY, you can apply patterned and colorful napkins to the entire thing instead of white ones. Another option is to paint the clay with acrylic paints after applying a layer of Mod Podge as a sealant all over the air-dry clay. The sealant is key to prevent the clay from being too porous and absorbing the paint, helping you achieve a shiny and vibrant look. Finally, consider using this DIY technique for different types of jars, too. You can use it for a vase, a small jar, or a plate. It's a great way to reuse and style thrifted trinket trays, for example.