This Easy DIY Turns Glass Blocks Into A Unique Bedside Table

We may receive a commission on purchases made from links.
Taking on a DIY project can sometimes feel a little daunting, but the benefits are certainly compelling. From saving money on labor costs and products to learning useful skills, personalizing your possessions, and figuring out how to think on your feet, these do-it-yourself undertakings can be good for you in a variety of important ways. And one great home decor item ripe for a DIY project is the bedside table. This piece of furniture can often go unnoticed next to larger bedroom furniture, such as beds and wardrobes. However, using a little creativity and some unique materials, you can create something that really stands out. This glass block bedside table is the perfect example of that.
For this particular bedside table design, you will need some glass blocks. These can be sourced from a variety of home improvement stores and online retailers. As the glass blocks will make up the body of your bedside table, you may want to consider whether you'd like to use only the clear block option or add a mix of frosted, wavy, or ribbed blocks to increase visual interest. You will also need some clear silicone sealant, like this Akfix silicone sealant caulk, and some painter's or masking tape. If you would like to add another material on top of the glass blocks to ensure a super even surface that will hold drinks and decor, you may also want to grab some scrap wood you can use as a tabletop. Once you have all of those materials collected, all that's left is to put them together. So, why not give up trying to select the best nightstand for your bedroom and create your own customized version?
How to create a glass block nightstand
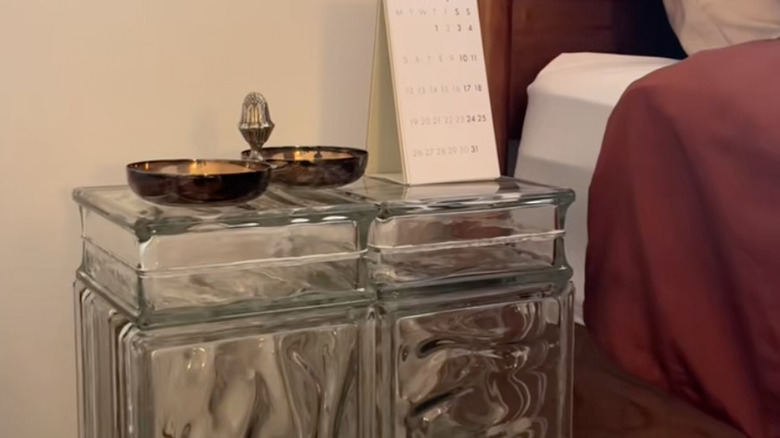
This project is a great way to bring retro glass blocks back into your home, so it is important first to figure out how you want the table to look as a finished product. Try stacking the blocks beside your bed to work out how tall and wide you want the nightstand to be, and to gauge how you want the blocks configured. For example, they can be stacked to create tall, thin walls with a hollow center, or laid flat to make a lower, wider table.
Once you have your plan, clean your blocks to remove any dust or paint. Then stack them, using the clear silicone sealant to affix them together. To prevent the blocks from shifting while the silicone is setting, wrap tape across each gap to hold the tower in place. You can either leave the project there and wait for the silicone to dry before removing the tape, or sand and stain a piece of scrap wood to use as a tabletop. When the sealant is dry and the blocks are firmly joined, you can move it into place in your room (be careful, it will be heavy) and then perfectly style your nightstand for the best effect. This DIY is relatively easy and straightforward, and it is perfect for creating a practical, eye-catching surface beside your bed for drinks, books, and anything else you might need in the night.