14 Scrap Wood DIYs That Turn Cluttered Kitchen Countertops Into Organized Spaces
Cluttered kitchen counters can make even the simplest cooking tasks feel more stressful than they need to be. When oils, spices, cutting boards, and tools are scattered across every surface, it's harder to prep ingredients, follow recipes, and keep your workflow, well, flowing. Instead of feeling like a space for creativity and the joys of home-cooked food, a cluttered kitchen quickly becomes cramped and chaotic. The good news is, getting organized doesn't always require expensive storage options. Employing the right solutions is one of the simplest ways to make your kitchen look organized, and scrap wood makes them more affordable. With the right tools and a creative vision, you can turn these leftover materials into useful storage solutions to keep clutter off your counters and streamline daily cooking tasks.
Whether you have large pieces from a shelving project or tiny scraps from a birdhouse, you can put your scrap wood to use in your kitchen. For example, you might create a compact coffee bar organizer to neatly hold mugs, pods, and syrups in a display that matches your decor. Or, you could build simple risers to add vertical storage for flour and sugar jars, butter, and more. A rotating tray can keep oils organized and easy to access. And that's just the beginning. Scrap wood is the perfect material for crafting storage for cutting boards, spices, and even cookbooks to keep your counters clear and your kitchen running smoothly.
Coffee bar organizer
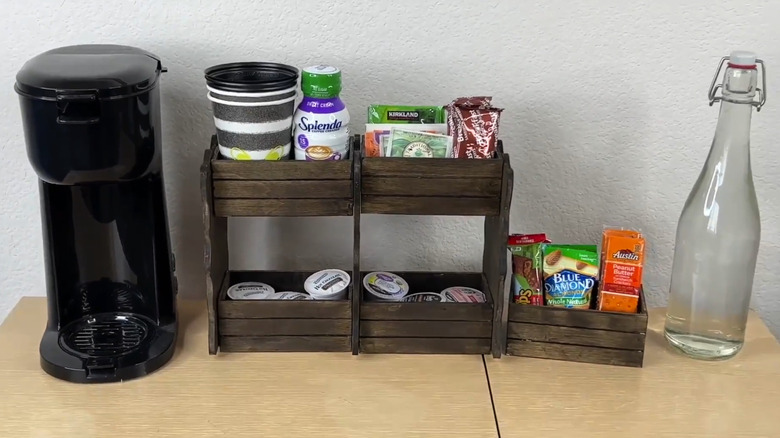
This project is perfect for coffee lovers who have thin craft wood or miniature crates lying around. If you have small wooden crates, all you need to do is stain them. Use hot glue or wood glue to attach them to side panels cut from thin scrap wood, creating a layered organizer to hold coffee filters, pods, tea, and other essentials. If you don't have crates, that's okay! Cut your scrap wood into 1- or 2-inch strips and make your own. You can even use popsicle sticks if you have them.
Coffee filter or napkin holder

Napkin holders are more useful than they get credit for, especially when you're hosting small, informal get-togethers. Coffee lovers also need a place to store their coffee filters where they won't get wet or messy. This simple design works great for both options. Cut your scrap wood into two trapezoid-shaped pieces that are slightly larger than a coffee filter or napkin. Attach them to a 1½- to 2-inch thick piece on either side to form a funnel shape. Secure the holder to a flat base and enjoy.
Coffee syrup risers
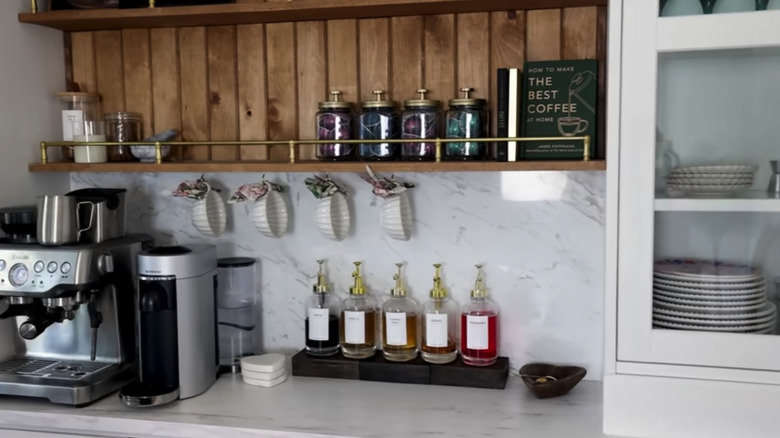
Whether you need a place to organize your coffee syrup collection or keep your coffee grounds in glass jars to save money when styling your at-home coffee bar, these simple risers may be the solution you are looking for. If you have extra 2-by-4s or 4-by-4s lying around, simply cut them to fit your space and stain them your preferred wood finish. You can also use a few different-sized blocks to create a more dynamic setup. Place them near your coffee maker, and stack your syrups or storage jars however you like.
Cookbook stand
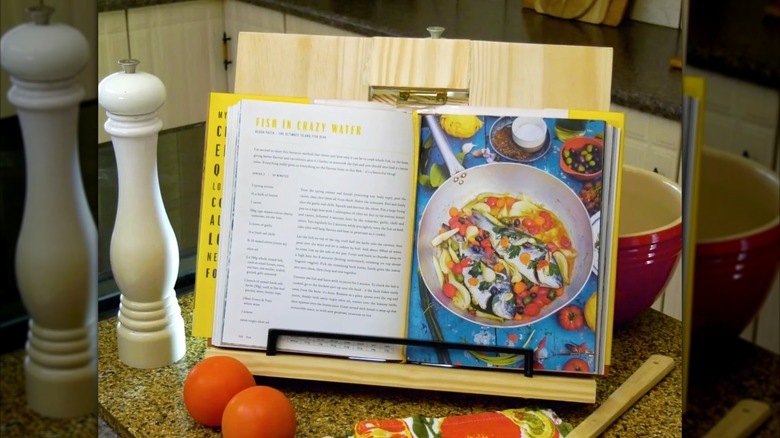
If you hate sticky pages in your cookbooks or have a bad habit of dribbling egg whites across your phone screen, this project is for you. Create a simple cookbook or phone stand with a beginner-friendly DIY to streamline cooking. The simplest way to make one is to cut 45-degree angles on both ends of a 1-by-4 board to create a trapezoid shape. Attach this angled piece to a flat board so it sits flush on the counter and supports the stand. Then add a small block of wood with a lip or rail at the front to hold the book or device in place.
Cutting board organizer
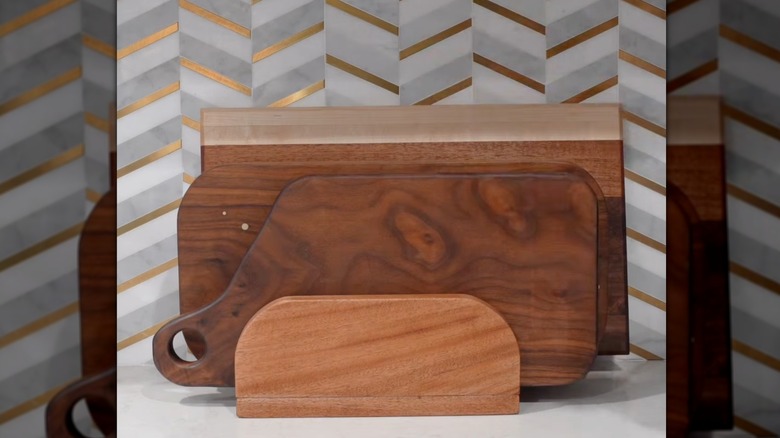
Every cook needs a few cutting boards, but they can be awkward to store in cabinets and take up space on the counter. Leaning them against the wall can be just as much of a hassle if you have oddly shaped boards. Use your scrap wood to make a stand that keeps your cutting boards organized and easy to access without clutter. Start with a flat, sturdy base that can support the weight of multiple cutting boards. Attach 2- to 3-inch tall dividers to the base using wood glue and screws, spacing them evenly to create slots for each board.
Dish soap shelf
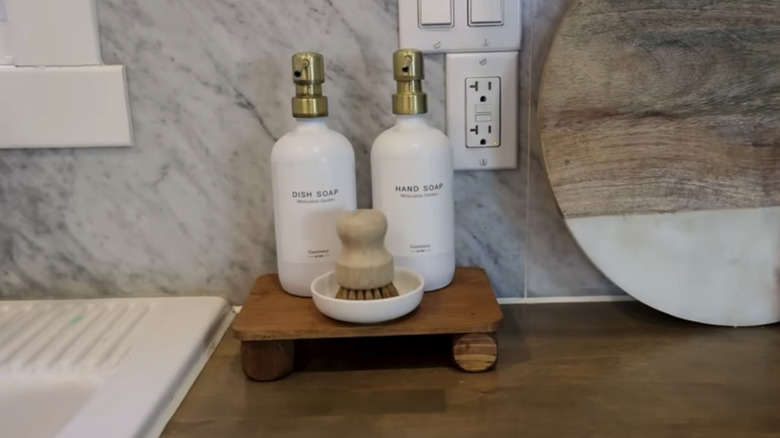
Nobody likes cleaning up soap rings or dropping a soap bottle into a sink full of dirty dishwater. Luckily, you can prevent water from building up around your bottle and keep it secure by making a small dish soap shelf with a bit of scrap wood. Use a small plank for the base and four 1-inch blocks for feet. You can cut shallow grooves in the base to allow water to drain, especially if you're also storing bar soap. Stain or seal the wood to protect it from moisture, then attach the feet with wood glue.
Egg tray
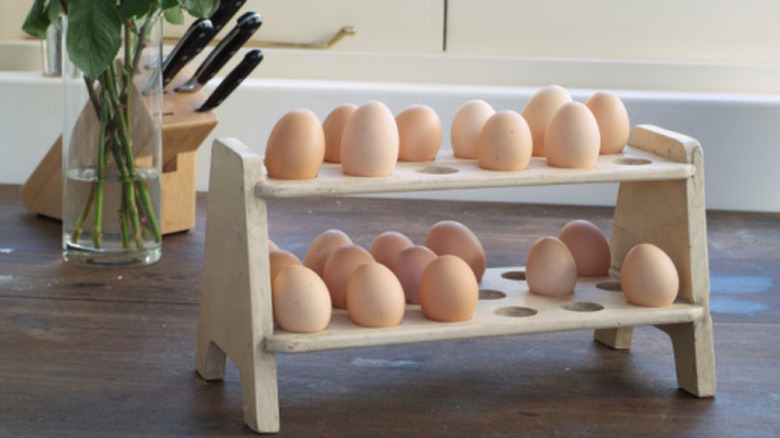
When you're gathering ingredients for a recipe that includes several eggs, placing them directly on the counter isn't ideal. A wooden egg tray keeps them contained and out of the way until you need them, without the risk of them rolling onto the floor, and it can be made with scrap wood. To make the tray, drill 1¼-inch-wide shallow holes along a board, spacing them evenly based on how many eggs you want it to hold. Using wood glue and screws, attach the board to two side panels, which act as raised feet to keep the eggs stable.
Recipe box
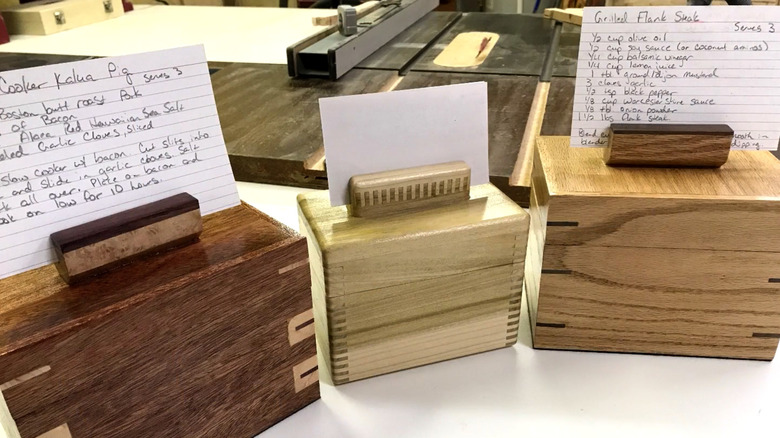
If you prefer recipe cards to cookbooks, or have some precious heirloom recipes, they can easily get lost when tucked away in a cabinet. You also face the same issue as leaving a cookbook on the counter while cooking: messy pages. A recipe box can keep your cards clean and counters neat. Use scrap wood and wood glue to build a box, then attach a lid with small hinges. As an added feature, you can install a recipe card holder by attaching a small wood piece with a notch to the top to hold a card upright while you cook.
Rotating oil tray
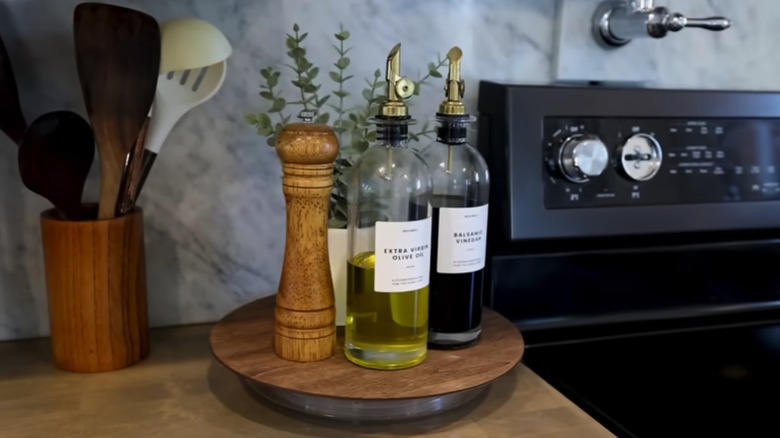
In any home kitchen, you'll likely find a collection of items near the stove, particularly different types of cooking oil. When you're in the middle of a complex recipe, digging through your collection to find the right oil can be frustrating. This DIY rotating oil tray is an easy solution that you can make with some scrap wood and a Storage Essentials turntable from Dollar Tree. Cut your scrap wood into a circle at least 10 inches in diameter. Stain it your favorite color and use hot glue to attach the wood to the top of the turntable.
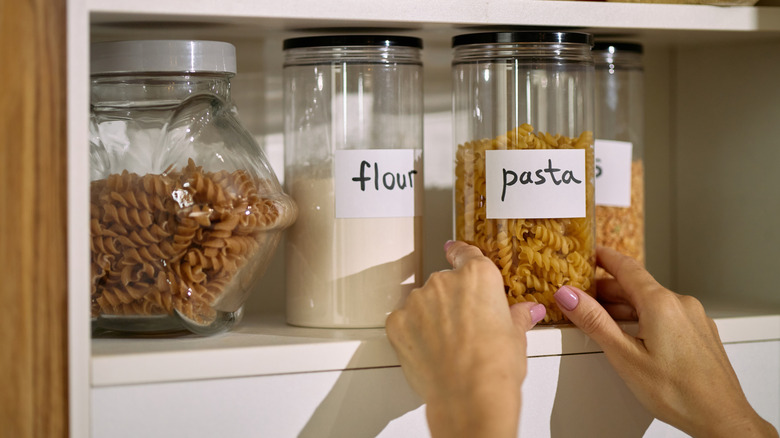
Simple risers
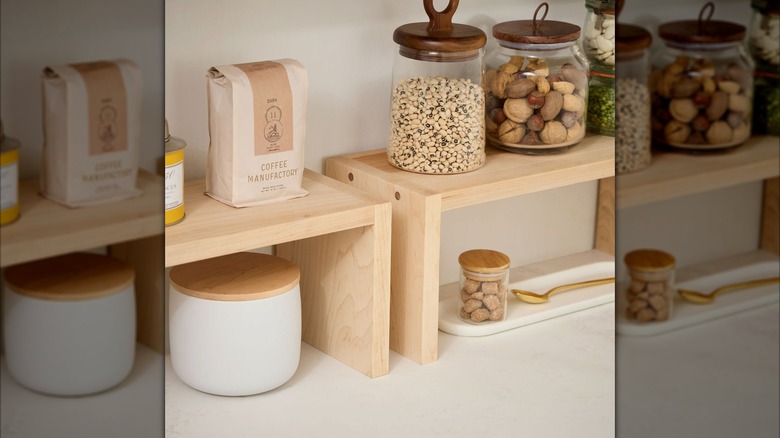
If you're looking for a beginner-friendly countertop storage solution that can make the most of your space, simple risers are a great option. Risers can add additional storage space to your counters by creating vertical storage, and they're so easy to make. Start by selecting the wood piece for the top shelf. Cut two equal pieces to use as legs. You can position the legs as side panels or attach them underneath at each end for a more rustic look. Use wood glue and screws to secure the legs in place. Finish it with your favorite stain or wood oil.
Spice shelf
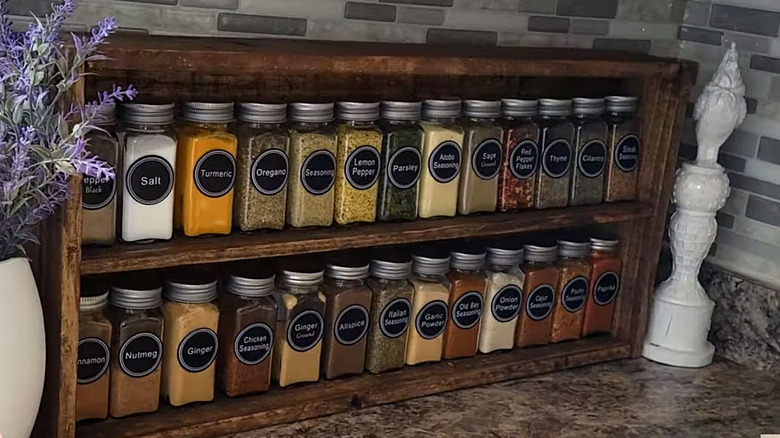
Quick access to spices when you're cooking can take the stress out of searching for ingredients. Building a spice shelf for your countertop is similar to building risers, but with a few key differences. You can choose from two styles: stair-step shelving or vertical shelving. Stair-step shelving consists of two or more risers of varying heights arranged in tiers so each row of spices is visible. Vertical shelving is similar to a single riser but includes a base and additional shelves stacked upward for storage. Either option can be made using scrap wood planks, wood glue, screws, and stain.
Tiered organizer
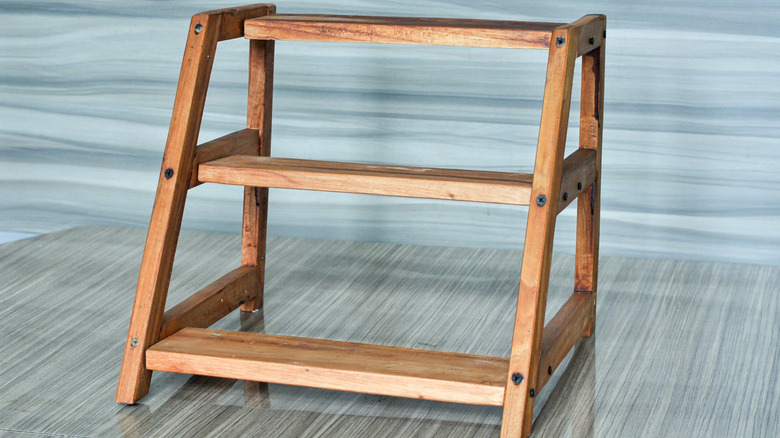
A tiered organizer is another cute, simple way to increase your countertop storage space without compromising on style. You can use scrap wood to build a tiered shelf to hold jars, small utensils, or even plants while saving valuable workspace. There are two common types of countertop tiered shelves you can make. The first uses rectangular planks attached to triangular side panels or frames, giving it a step effect. The second uses circular shelves connected through a dowel that runs through the center of each tier to hold them together. Both options can be customized to match your space and style.
Tiered vegetable or fruit crate
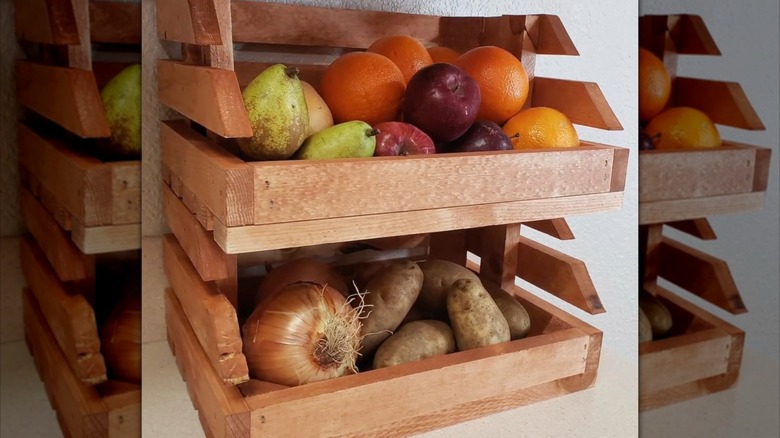
Food storage is a common problem in small kitchens, which can make it feel difficult to keep fresh fruits and veggies on hand. A fruit bowl may take up too much space for too little storage, and standing baskets can crowd limited walking space. This tiered vegetable and fruit crate solves the problem by providing more storage in a compact space. You can build this with leftover wood crates or flat wood pieces. Use equally sized thin wood planks to build three-sided crates, then stack and secure them on top of each other for stable vertical storage.
Wooden roller dispenser
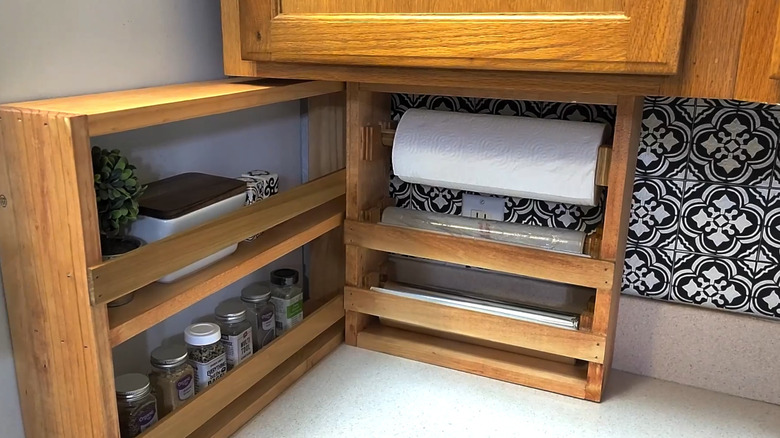
This roller dispenser DIY can save you time during cleanup and takes up very little counter space. Build a basic rectangular frame using scrap wood. Then, attach U-shaped supports or notched wood pieces to the inside of the side panels to hold wooden dowels in place. These dowels will hold your different rolls. For cling wrap or foil, add a front panel with a small cutting edge, such as a saw blade or the metal strip from the original box, securely attached on the inside to safely cut the material. Install your rolls and enjoy!