12 Common Downsides Of Propagating Plants In Water
We may receive a commission on purchases made from links.
Propagating can feel like a cheat code for budget-conscious plant parents; it's like getting more plants for free! And water propagation can seem like a simple, almost foolproof way to do it, because all you need is a glass, water, and time. But, it's not as easy as it seems, and not all plants are successfully propagated in water, so knowing how to get it right requires learning a little bit of botany. Don't worry, though; science degrees are totally optional, because we're here to help.
So, let's break down 12 of the problems you could run into with water propagations. We'll look into what makes each so problematic, and give you some tips for avoiding it in your propagations, or fixing propagations already in the water. Whether you're hoping to create a houseplant hoard, saving the last of a beloved dying plant, or just thinking of a thoughtful gift to give someone you love, learning how to prevent these pitfalls will ensure you look like a plant propagation hacker in no time.
Not all plants will successfully root in water
Water propagation might seem like an easy way to make more of whatever plant you want, but there are only certain houseplants that can be propagated in water, while others do better with different methods. Generally speaking, houseplants with more flexible stems, like philodendrons, begonias, and pothos, take to water well, while plants with woody stems, like rubber trees or dracaenas, may rot.
If you're not sure which type of plant you've got, experiment and try propagating it in different ways. Some plants are really easy to propagate from cuttings, so they will do well in soil, water, or division, making it easy to test success rates. However, if you've already tried water propagation and your plant isn't looking too hot, cut off any brown, mushy parts and try another method, like putting it in a 50/50 perlite and vermiculite mix instead. The perlite and vermiculite work great for fussier plants because they hold water while still allowing oxygen to get in, which roots need for growth.
Only healthy cuttings will be able to root
We know it's heartbreaking when a houseplant gets sick and trying to propagate a cutting becomes a last ditch effort to save it. However, if the plant had a disease or is too dry, your chances of successfully propagating a cutting in water will drop significantly. In the end, you might end up with brown mush in your water and a sad, dead plant.
The best way to guarantee a successful propagation is by using cuttings that are fresh and still plump with water. Cuttings begin to lose water almost instantly once they're severed, so water your plant a day before taking the cutting to ensure it is healthy and strong. If you're propagating a cutting from someone else, that's okay. Check its leaves to make sure they're healthy, then put the cutting wound down in some moist sphagnum moss, and wrap it with plastic wrap to keep the moisture in, then propagate it as soon as you can. If your plant is diseased, you can give propagation a try, but it might be better to just focus on healing the mother plant. However, if the disease has been wreaking havoc for too long, it might be time to say goodbye and get rid of the dying plant.
You'll need to stay on top of the water levels
Successfully propagating plants in water requires sunlight so the plants can photosynthesize while they spend energy growing new roots. The downside to that, of course, is that sunlight evaporates water and a clear jar full of water can become empty faster than you might think. While water propagation is pretty easy to do, it still requires upkeep, and maintaining adequate water levels for your cutting is key.
Even if you don't notice a significant drop, it's still important to add fresh water to your prop cup from time to time. Stagnant water loses oxygen content, which your plants need to thrive, so topping up or changing the water completely once a week helps keep your cutting happy. Make sure not to drown any leaves or flowers, though, as that can lead to rot.
Moisture-loving diseases are more likely to spread
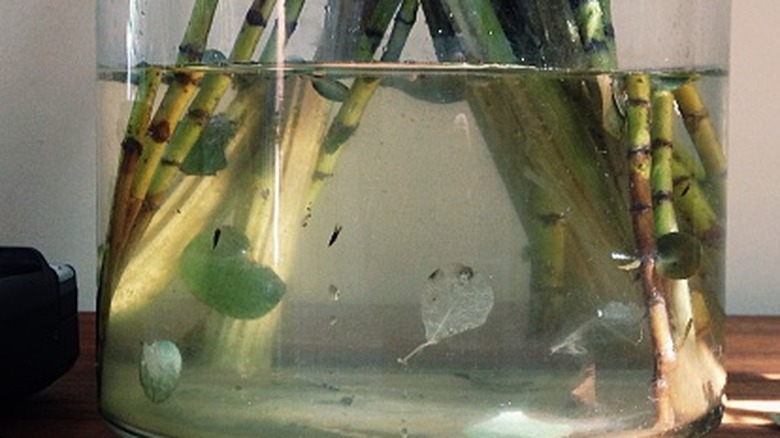
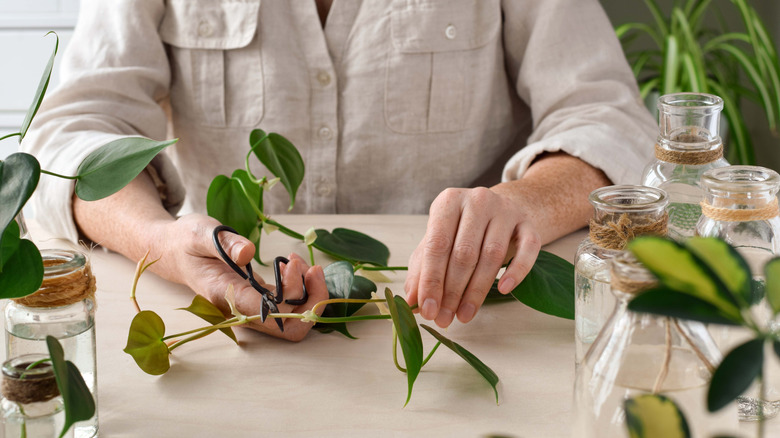
Fungi and bacteria can be problematic for freshly-cut stems, as the open wound acts like, well, an open wound. Consequently, if you accidentally introduce bacteria that thrives in moisture, you could be setting your propagation up to fail because you've just submerged the bacteria into its favorite thing. That's why you should only use sterilized pruners and jars to water propagate cuttings.
Cleaning and disinfecting your tools is easy: Just rub them with alcohol wipes, or a cloth dampened with isopropyl alcohol. You can get them in most cleaning supplies aisles, but we like to use MED PRIDE Sterile Alcohol Prep Pads because they come pre-moistened, are cheap, and make it easy to wipe everything down. Once you make a cut, you can add rooting hormone if you want — just don't dip it into the jar, as you could cross-contaminate things. Instead, pour a little out and dip your cutting in that, then dispose of whatever is leftover. Also, refresh the water in your prop jar every week or so to prevent the water from becoming a breeding ground.
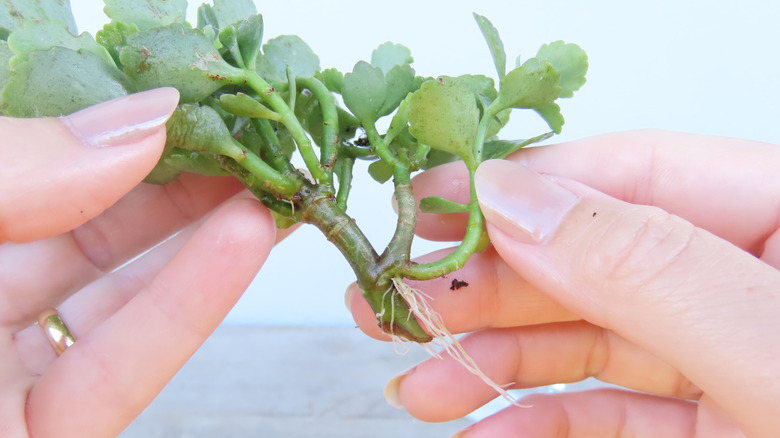
The water roots will be weak and poorly adapted for soil
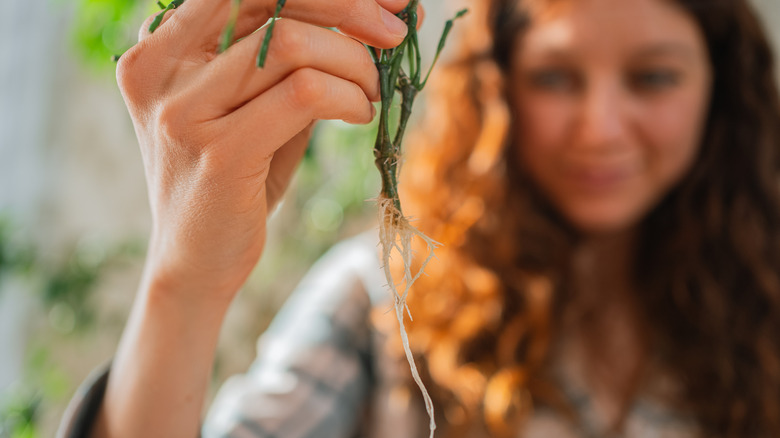
If you've ever done a water propagation before, then you've probably noticed the roots on your new plantlet are white and stringy. These are known as "water roots," and they act differently than roots that have grown in soil. So, if you think your cutting is ready to move from the water and into soil, you've got to do it right or your new plant could go into transplant shock.
Reducing transplant shock after propagation isn't difficult, it's just a little more involved than sticking your plantlet into a pot of soil and calling it a day. Your goal is to strengthen the root system so that it adapts to its new medium, and that requires a gradual transition. First, it's a good idea to wait until the roots are around 4 inches long, so that you know your plant is strong and healthy. Use a pot that's big enough to accommodate the roots, but not so big that they could become waterlogged, and make sure the pot has drainage holes. Use potting soil that has additives like perlite or coco coir, so that air can move through it and prevent the soil from getting compacted. Then, water the plant until water comes out of the drainage holes and place your new plant in a spot that has the right amount of lighting for the species. From there, you'll want to keep the soil moist, but not completely saturated, until your new roots have established, which typically takes a few weeks.
Not all plants root at the same time
If you're trying to propagate several different plants, then you might be surprised to see your pothos is ready to go after a few days, while your ZZ plant takes a few weeks. Be prepared to care for your cuttings for at least a month to be safe. If you rush it out of the water too quickly, your plant could become stressed or develop transplant shock and may die, because it doesn't have the roots it needs to thrive.
Your cutting develops roots best when it has access to auxin, a plant hormone. Your plant will produce this naturally, but if you want to help things by adding a rooting hormone, look for ones that contain IBA (indolebutyric acid) and NAA (naphthaleneacetic acid), which are synthetic versions. Bonide Bontone II Rooting Powder is probably the most popular, but we also really like Hormex Rooting Powder because it comes in different strengths, so fussier cuttings can get a higher dose (though in our experience, the #3 is a safe bet for most houseplants). Give your plant a few weeks to root — just be sure to refresh the water occasionally. If after a month you don't see any root development, you may want to try another method of propagation or use a stronger rooting hormone.
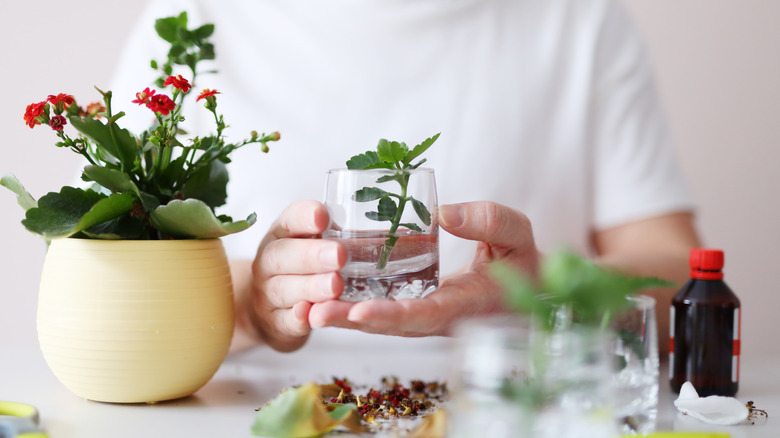
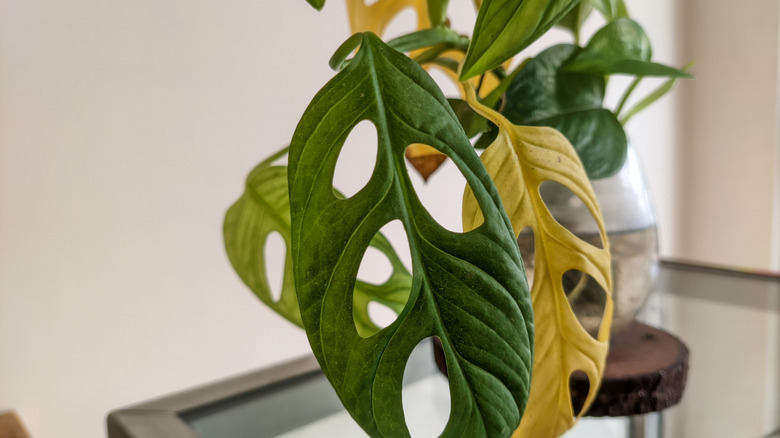
Lower leaves and flowers will need to be removed before propagating
You might think ensuring your cutting has as many leaves as possible will help boost its propagation success, assuming more leaves means more photosynthesis. But, cuttings that have leaves that sit in the water can develop rot and contaminate the water. Flowers are also problematic, as they direct energy away from root production, so they will need to be removed, too.
We know it hurts, but getting rid of the excess foliage will be a good thing for your new cutting, we promise. Make sure to sterilize your pruning shears before cutting, so that you don't introduce any bacteria or fungi into the wound. Also, be sure to remove any leaves or flowers that have died or are drying up, as they can end up accidentally rotting in your prop cup if you're not careful.
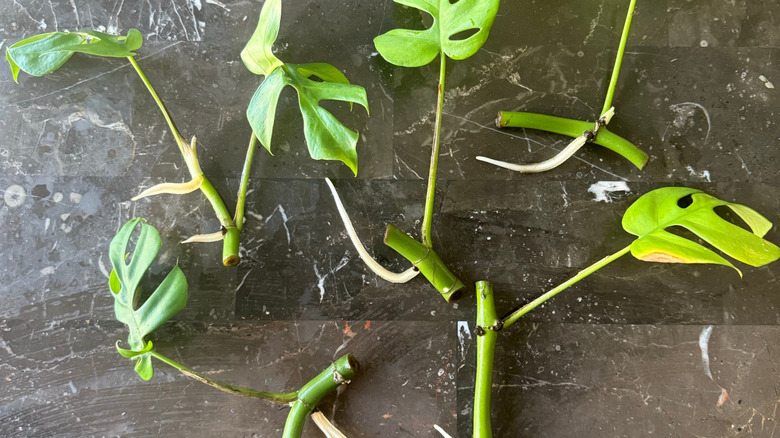
Some cuttings will be too big or too small to propagate
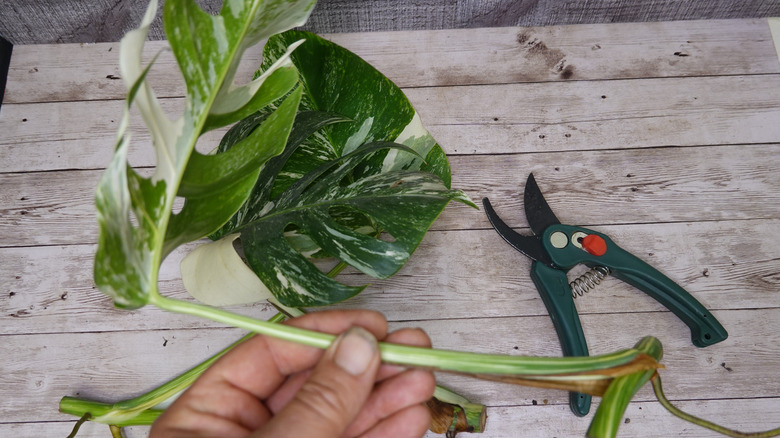
Size matters when it comes to water propagation. You might find a piece of stem on the ground and think it's possible to propagate it, but stems that are too small might not be able to reach the water without being completely submerged. On the other hand, cuttings that are too big can be too large for your prop jar or tip over if not balanced properly. Monsteras cuttings are a big culprit of this in our experienc, so make sure your cutting is sized just right.
Generally speaking, a healthy cutting that's 4 to 6 inches long is your best bet for successful propagation. However, the size of your cup or jar matters, too. Make sure the cutting can be supported by the rim so that it doesn't drown, but not so big that you need to bend or break the stem to have the node reach the water.
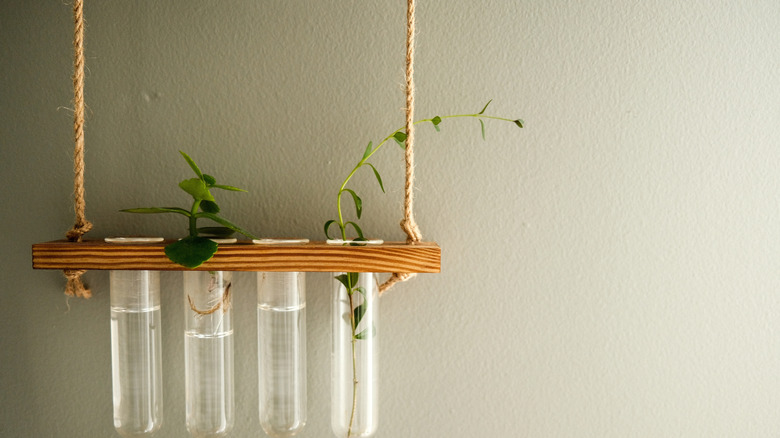
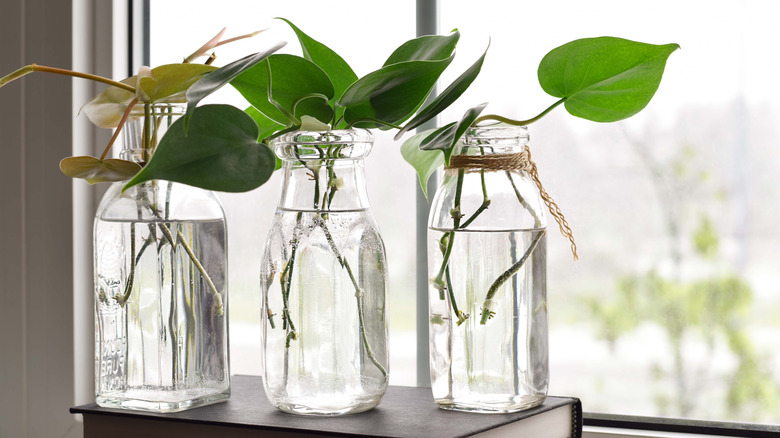
Water propagation makes humidity, temperature, and light requirements much more precise
Clear jars are one of our favorite things to use for water propagation, because it's easy to watch the roots grow without disturbing the plant. However, that clear glass can end up being a problem if you're not careful, because it lets sunlight right through, and can cook delicate water roots. While water propagation is pretty easy and hands-off, you still need to set your cutting up properly by giving it the right amount of light, humidity, and ambient temperature.
You can always use semi-opaque jars to help block some sun, just keep in mind it might take longer for roots to form since they're getting less light. You can also hedge your bets by placing your prop jar in front of an east-facing window instead of a west-facing one, as light will be less intense there. But check for drafts and dry air, too, as plant cuttings do best when they're in a room that stays between 65 and 75 degrees Fahrenheit. Your plant will also need humidity, but the water in your prop cup should be enough to keep it happy — just be sure to top it up once in a while to replace whatever evaporated. Humidity is key for propagating tropical houseplants, so make sure your jar isn't near a vent or draft that can pull moisture away.
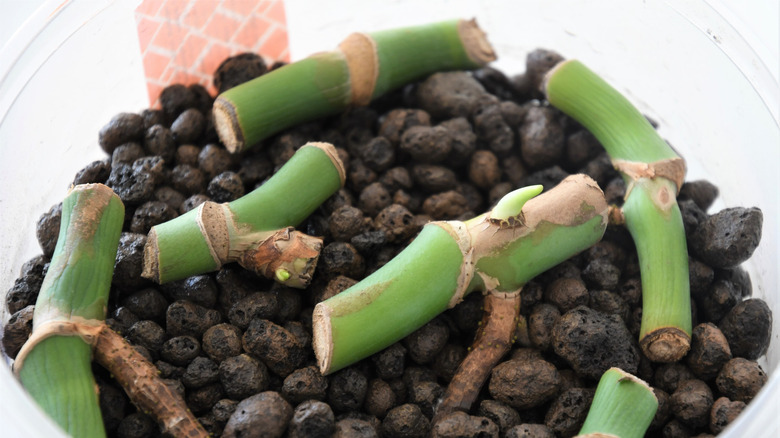
A node is required for most water propagations to be successful
You might be excited to find a leaf on the ground from a new-to-you plant, but you could just end up disappointed instead. Water propagation typically requires your cutting to have at least one node that it can grow roots from. While it's not impossible to propagate without a node — snake plants are sometimes propagated by leaf cuttings — it's a lot harder, particularly in water.
A node is the knobby thing on your plant's stem where leaves shoot off from, and you'll want to make your cut under the node, not through it. This is why monstera deliciosas can be hard to water propagate, as their big leaves are usually pretty far away from the node, so they need a deeper jar with a wide enough mouth to accommodate for it. If you don't have a node, you may be able to still propagate your plant; you'll just need to do it another way. For example, some begonias can be propagated by placing a healthy leaf on moss in a covered, clear box. You can also try propagating your plant by division, grafting, or doing it the old fashioned way with seeds.
Your propagation water may develop algae
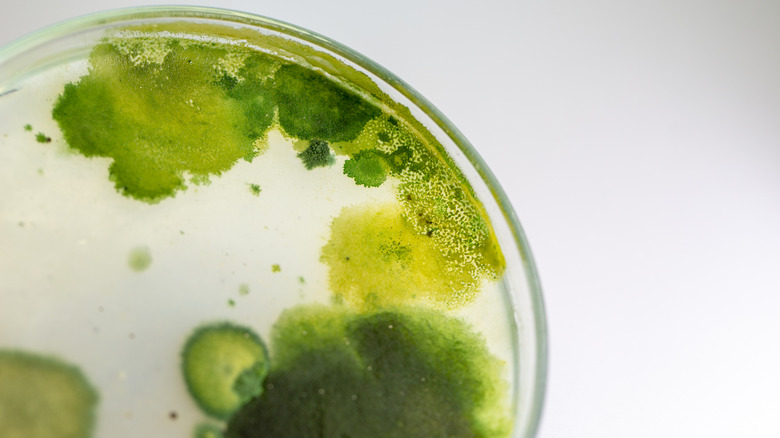
While we all love making more plants, some types aren't invited to the propagation party, but they'll still find a way through. Algae is a big one and it can form in water propagations easily if you're not careful. Algae will eat up all of the oxygen in the water before your plant cutting ever has a chance, starving it until it's dead.
There are two ways to prevent algae. The first is by using a semi-opaque jar instead of clear. Just be aware that your cutting's roots will take a little longer to grow, since they're getting less sunlight. The other is by changing the water regularly, as algae grows best in stagnant water. If your prop jar already has an algae bloom, in our experience the best bet is to remove the cutting quickly and wipe it down with a clean paper towel to remove any algae stowaways, then put it in a clean new jar with fresh water.
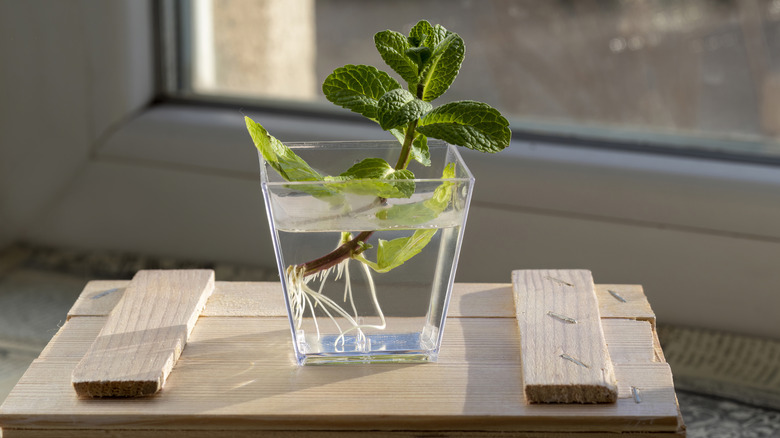
Water propagation might not work for a cutting without leaves
So, let's say you've got a plant cutting with a node but it's either missing leaves or the ones it has look pretty rough; can you still propagate it? Probably, but it's a good idea to try a method instead of water propagation, since it won't have the leaves it needs to photosynthesize. Without photosynthesis, your cutting won't have the energy it needs to grow roots. Plus, leaves with stems coming off the node help keep the cutting elevated, so that it doesn't completely submerge itself in water and drown.
Our favorite method for propagating a leafless node is known as "wet stick propagation," and can be really successful for tropical houseplant nodes that lost its leaves. Start by cutting the stem off of either side of the node; you just want the node "chunk." Air roots are okay, but they might be in your way, so it's up to you if they should stay. Next, get a clean sauce cup that has a lid, like these 2 Ounce Amazon Basics Disposable Plastic To-Go Cups and Lids, and fill it halfway with perlite. Moisten the perlite a little, being careful not to saturate it, then lay your node on top, snap the lid on it, and put it under a grow light. The lid traps the moisture in the perlite, giving your node the humidity it needs. Within a week or so, you should see little stems growing out of the node. Keep the node in the cup until a leaf begins to form, then transfer it to something a little bigger that's still able to trap humidity, while giving the stem room to grow. Once it grows a leaf, you've now got everything you need to successfully water propagate your cutting.