Calling All Maximalists: The Super Affordable Way To DIY The Checkerboard Look
We may receive a commission on purchases made from links.
If you're a maximalist, you're probably a lover of bold and playful patterns. The issue is that unique pieces with these out-there patterns and colors often come with a premium price. That's because it's easier for companies to mass-produce simple, neutral pieces that lots of people will love. But if you've got maximalist tastes and an IKEA budget, don't worry. You can incorporate maximalism in your home by turning basic furniture pieces into bright checkerboard-pattern showstoppers using duct tape.
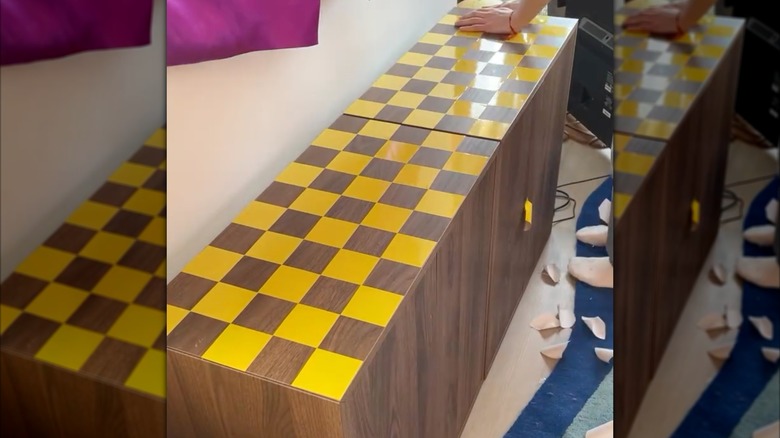
You read that right, duct tape. No need to splurge on the new fancy furniture to use checkerboard patterns in home decor. Instead, you just need a roll of colorful duct tape. The idea comes from Instagram creator @homewithjuan, who used bright yellow tape on a brown wooden dresser. There are tons of colors available, such as baby pink, bright blue, or neon green (like in this 12-pack rainbow colored duct tape from SWRT). Choose yours based on what you like, and what will contrast nicely with the base color of your piece of furniture. That base will be visible, since it will be the other checkerboard color peeking through wherever there is no duct tape.
This DIY works particularly well with square and flat furniture pieces. This is because square angles are easier to work with to create a checkerboard. In addition, these pieces will make applying the duct tape easier, since curved surfaces would create wrinkles in it. You can do this with a basic LACK IKEA side table, or the brand's famously square MALM chests of drawers. You can also use this method to upcycle a dresser or table you already own, giving it a second life.
How to DIY a colorful checkerboard with duct tape
While this DIY doesn't require complex skills or fancy tools, it does require some patience. Since you're creating the checkerboard from scratch with individual squares of tape, you'll need both focus and time. Here, the key is to cut identical squares of tape. The best method is to use the width of the tape roll as the side of the square. That way, you just need to cut pieces across in order to create squares. Cut the first square with a ruler, then use it as a stencil to cut the others.
Once you've got plenty of square cutouts, time to apply. Use your furniture as a guide, working along the side slowly to make sure all squares are perfectly parallel to each other. You'll now repeat this step until the entire piece is covered in squares, creating a checkerboard.
One word of caution with this DIY: the glue on the back of duct tape is fairly strong, and it can damage surfaces. It isn't like painter's tape, which is designed not to pull paint and varnish when removed. Instead, duct tape can damage the color and leave a residue. So while this project may not feel permanent because it doesn't require any cutting, drilling, or painting, it's not quite reversible either. It's best to do this maximalist project if you're really sure you'll like it, or to do it on pieces that aren't too valuable. For example, it's perfect to transform a thrifted second-hand side table that already has some damage, which the tape can cover and distract from.