Turn Your Cardboard Trash Into Eco-Friendly Custom Tiles
We may receive a commission on purchases made from links.
Every day, about 90,000 tons of cardboard are thrown away across America, adding up to more than 30 million tons a year. Much of this cardboard ends up in the landfill, while the rest is processed into new paper. You can save some of this would-be trash for eco-friendly home projects. The next time you need tiles — whether you're decorating an IKEA side table or crafting coasters — consider making custom ones from cardboard instead of splurging on ceramic. By repurposing cardboard instead of buying new ceramic, you're cutting down on waste and avoiding the energy-intensive process of manufacturing traditional tiles.
For this project, it's important to start with a flat cardboard base. You'll also need a ruler, an X-Acto knife, and modeling clay, like this DAS Air-Hardening Modeling Clay from Amazon, to cover the cardboard. Instead of buying clay, you can also make a similar version at home by mixing together baking soda, cornstarch, and water on the stovetop. You'll also want construction putty for texture, stencils for precision, and paint – acrylic works the best and can hold up outdoors.
Although the tile-making process is simple, it also requires patience. Keep in mind that modeling clay can take over a day to air-dry or between one and two hours in a 200-degree oven. The putty, too, may require a few days to fully solidify. That said, the finished product — which can give your home a Mediterranean-inspired look — is worth the wait.
How to transform your cardboard into decorative tiles
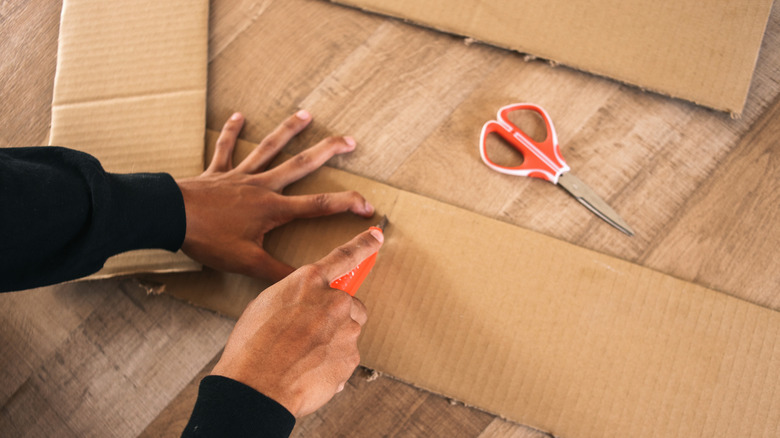
To begin the process, measure out equal square "tiles" and cut them out of the cardboard with an X-Acto knife. The size of these squares is up to you. For instance, larger tiles are best for a DIY placemat that will protect your table, and smaller ones work for more intricate mosaics. With the help of a rolling pin, flatten out your modeling clay, making sure there's enough to fully wrap around each tile. Cut off the excess with a pair of scissors.
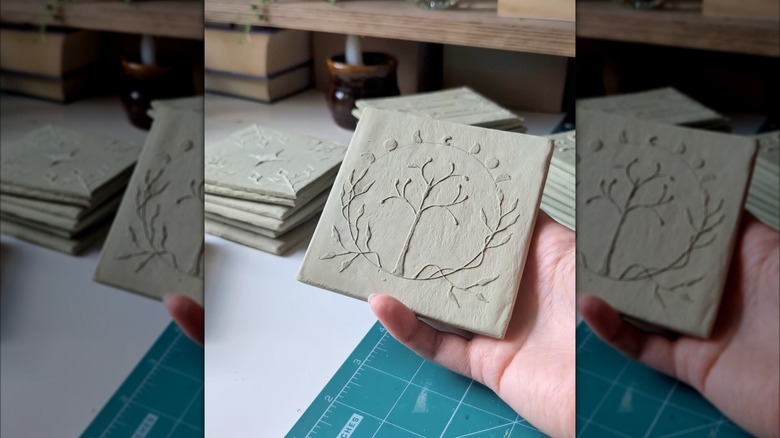
Let the clay-covered tiles fully dry, flipping them over halfway through to expose the underside to air. It takes about a day for a thin layer of modeling clay to harden, but this can vary by product. Next, you can add raised patterns to your tiles with construction putty and stencils. Smooth the putty over the stencil with a knife, then carefully remove and clean the stencil. Keep in mind that stencil paste should be given one to two hours to dry, depending on how thick it is — patience is key. If you don't have putty, you can also create a similar effect with a hot glue gun.
Finally, using a brush or sponge, apply acrylic paint to your tile's nooks and crannies. Applying paint with a dabbing method will give your tiles a more authentic, weathered look. And there you have it, a custom, eco-friendly design feature that could easily be mistaken for ceramic while keeping cardboard out of the landfill.