Turn An Old Cookie Tin Into A Stylish Storage Solution

After packing away the tree ornaments or the menorah, one of the last holiday items to return to storage is the cookie tins. No matter how many containers-full we distribute to friends and family each year, it seems like an equal amount comes back to us. Save one of them from gathering 11 months of dust by transforming it into year-round storage that's as cute in June as it is in December. Flip a good-sized round cookie tin into a jute-wrapped basket with wood handles and feet in no time. If you don't want to dig through the crawlspace to find one right now, it's pretty easy to score a thrifted cookie tin.
Along with a tin between 8 and 12 inches in diameter, you'll need 6- to 9-millimeter jute rope, two 2-inch wooden rings, four large wooden beads, and a reliable hot glue for crafting, such as Gorilla Hot Glue Sticks. With a textural exterior and real-wood accents, this cookie tin upgrade will keep the secret that it's not store-bought. You won't need the tin's lid for the basic version of this project — instead, save it to DIY this gorgeous kitchen decor piece.
Jute is classic and rustic, but the same process with other materials will yield an entirely different aesthetic. White cotton rope adds a nautical feel to the project. For some tasty maximalist eye candy, cover the tin with chunky, jewel-toned yarn made from old saris. Also, this project doesn't involve the tin's lid, but you can just as easily cover it with coiled rope if you want a container with a cover.
Coil up a jute rope container
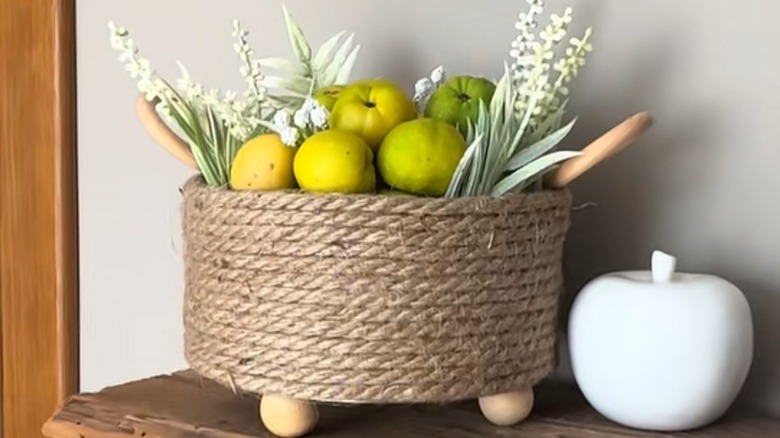
Fire up the glue gun and seal the end of the rope with glue to prevent fraying. Begin attaching the rope around the base of the tin, working upwards until you reach about ⅔ up the side. At this point, add the wood ring handles if you want. Cut a 4-inch piece of the rope you're using, and unravel it without fully separating the strands. Loop the strands through the ring, and attach the ring by gluing the strands to the side of the tin. Continue coiling and gluing the rope around the tin until you've completely covered the sides. Seal the cut end of the rope again with glue, then glue it to the container. Note: if you want your container to have a lid, don't add jute to the area around the tin's mouth and side that the lid will cover.
Invert the tin to affix the four bead "feet". Place them in an evenly spaced square. As is, your homespun container is ready to add to your home's cozy look and feel. However, if you want it to have a matching lid and you have plenty of rope left over, it's not hard to do. It's worth taking the time to find the center of the lid so your coils have the best chance of being even. Start your coil there after sealing the rope's end with hot glue, curving the rope as tightly as possible for the first few rotations. Continue coiling and gluing along the lid's edge until you reach the lip.