Turn An Old Shoe Box Into A Clever Way To Keep Jewelry Organized
We may receive a commission on purchases made from links.
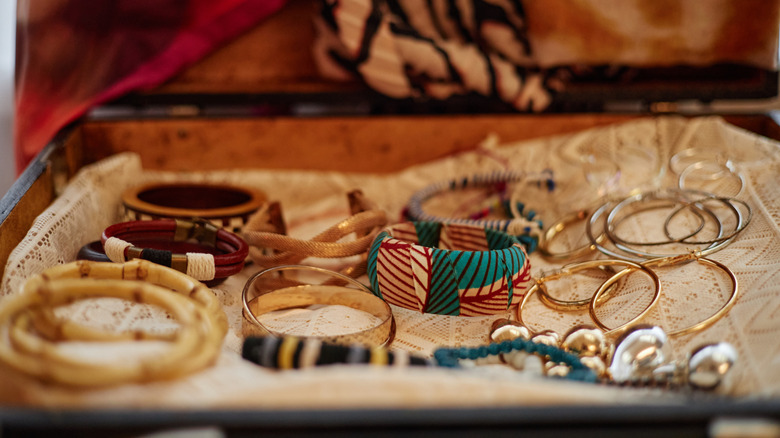
Anyone with a jewelry collection knows the struggle of preventing it from becoming a disorderly mess. With a little effort, rings and earrings can be easier to store. And using a T-bar stand or a few smart storage solutions for necklaces can keep even the daintiest of chains from getting knotted. But when it comes to bangles and bracelets, they can be especially tricky to keep organized. These pieces stack awkwardly, slide around, and somehow always end up jumbled and scattered everywhere. Try to find the one you want to wear before walking out the door, and you can expect to be a few minutes late.
Instead of continuing to battle it out with your drawer or buying yet another fancy organizer, why not make one yourself? Luckily for you, there are many creative ways to repurpose old shoeboxes, and a bangles box is among them. With a few horizontal rods inside the box, each piece will have its own spot to slide on and off. Keeping everything visible, separated, and easy to grab, you can say goodbye to searching through clutter.
To bring this DIY to life, you'll need a few basics you likely already have at home: a ruler, scissors, strong glue, like E6000 or a hot glue gun, and cardboard from any spare box. For the structure, buy wooden dowels, like these Lugailly Wooden Dowel Rods, or fashion your own rods using paper towel rolls (more on that later). Lastly, all you need are the materials to decorate your jewelry box to your heart's desire!
How to upcycle an old shoe box for jewelry organization
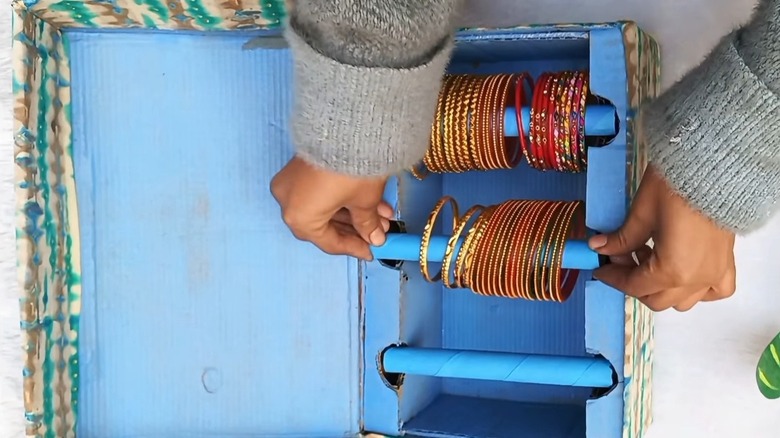
First, measure the interior walls of your shoe box. Using those dimensions, cut out a cardboard panel for each shorter side and two for each longer side. Glue each panel onto the respective walls. Do this by using a narrow strip of cardboard, about 1 inch wide and of the same length, to connect the two pieces across the top with glue, creating a small "roof" structure on each long side.
If you're making your own rods, cut a paper towel roll vertically in half and roll it tightly until it reaches your desired thickness. Then, glue or tape the edges. Otherwise, just cut your dowels down to the needed length. From there, draw three evenly spaced half-circles along each cardboard "roof," and another half-circle directly below each, on the wall itself. The half-circles should be just a bit bigger in diameter than your rods. Once drawn, cut them out carefully. These hollow spaces will set your rods into place.
Now comes the fun part: making it pretty! Paint the inside and outside, or cover them in fabric or contact paper, trimming around the cutouts as needed. Add some personal touches, be it with lace, brooches, craft jewels, bows, or stickers. Before adding each rod, paint or cover it. And voila! You've just found a way to declutter and organize jewelry to free up space. The best part? You can customize this DIY for other items. For instance, you can use smaller rods for rings, glue ribbons to the top lid to pin earrings, or add dividers for a more classic layout, adjusting spacing for clunkier pieces.