Creative Ways To Repurpose Old Shoeboxes

Getting a new pair of shoes can be exciting. However, more often than not, the shoebox they came in ends up in the trash can or recycling bin, contributing to our planet's overfilling landfills. Before you simply toss that shoebox next time, why not repurpose it into something new? Shoeboxes are a nice size for many other purposes — from organizing crafting supplies, keeping desks and dressers from getting cluttered with small items, and so much more.
With a few minor modifications, you can turn the old box into something that will add functionality, style, or even a bit of fun to your home. Not only will you be keeping it out of a landfill, but you'll also be saving yourself some money by making something you'll use instead of buying it at the store. Keep reading to learn about some of the best ways to repurpose unwanted shoeboxes. But don't limit yourself to the ideas shared below; once you start getting inspiration about using these containers, you'll realize that the possibilities are nearly endless.
Keep your cords organized
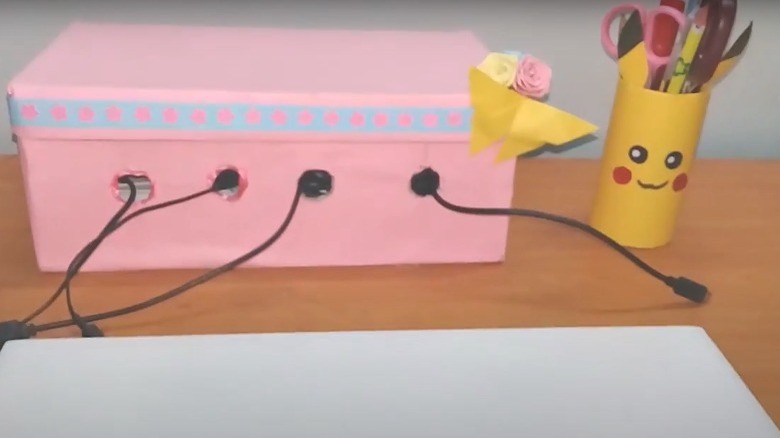
Between your computer, cellphone, smartwatch, speaker, and all the other electronic devices on your desk, you may be constantly looking at a jumbled sea of charging cables and cords. While all of these cords are necessary to keep your devices powered and running, the disorganized chaos they add to your desk is not. Fortunately, you can control the chaos with an old shoebox, wrapping or construction paper, a little glue, a box cutter, scissors, and a power strip.
To start making your cord organizer, you'll want to lay out a large sheet of wrapping paper on a flat surface (pick a design that coordinates with your office space). Use the wrapping paper to cover all of the exterior surfaces of the box. To do this, you'll need to use the scissors to cut the paper so you can neatly fold it over each side of the base and the lid for a snug and tight finish. Once cut, glue the paper down.
Trace and carefully cut out four small circles along the front of the box. These will be to run the ends of the cords that connect to your devices. Next, cut a larger circle out from one of the ends. Make this hole large enough for the plug of your power strip to pass through. Then, place the power strip inside the box, plug in each cable, and run the connector end through the little holes you cut in the front. If desired, you can also decorate the cord organizer with some ribbon, markers, or other embellishments.
Organize ribbons for crafting
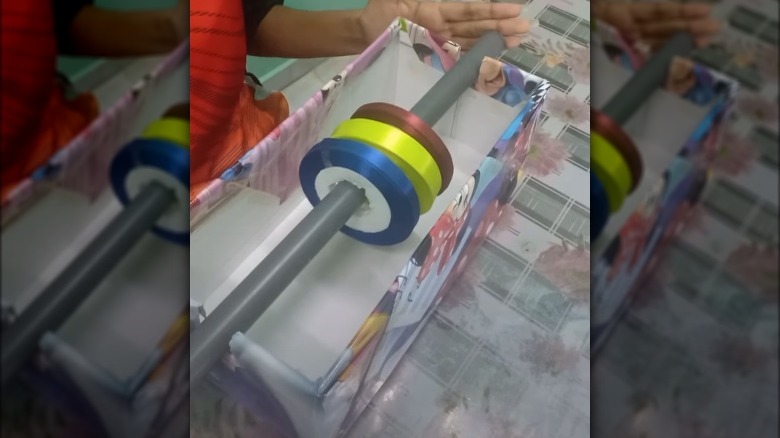
That shoebox you were thinking about throwing away could also be used to help keep your ribbons organized. That's right, with a few simple modifications, you can convert the box to act as a spool for several rolls of ribbon, making them easier to dispense and keeping them from getting all mixed up and messy. With just a few modifications, you can run a PVC pipe between the two short sides of the box. The PVC pipe will serve as a dowel to hold several rolls of ribbon.
Once you have the pipe and ribbons in place, you can pull the ends of each ribbon through the edge of the box lid. This will allow you to easily see the different options you have available. Then, when you need ribbon for a crafting project, simply pull the one you want, and it will unwind from its spool. It's that easy. You can keep this project as basic as you'd like and leave the shoebox undecorated. Or, if you'd prefer, wrap it with paper that coordinates with your crafting space.
Store your jewelry
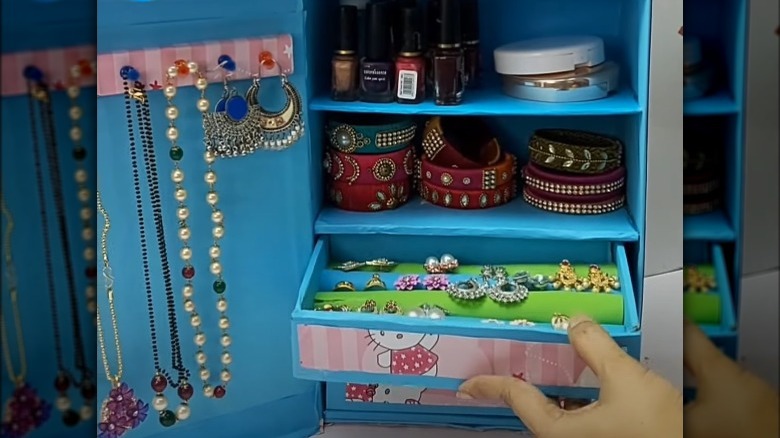
With a few extra supplies, you can also turn a shoebox into a jewelry box to keep your favorite items clean and safe. For this project, you'll need to use a box with an attached lid. Turn it so that it is standing on one of the smaller ends. You should get a good idea of how the jewelry box will work. Rather than opening up, as it does for the shoes, the lid will open to the side, like a door. Start by reinforcing the box's edges and trimming the lid's sides so that it opens and closes smoothly. Next, you'll want to choose a decorative wrapping paper that you like and use it to cover the outside of the box and lid. Add solid color paper to the inside of the box to give it a more streamlined and neat look.
Once you've completed these steps, the shell for your new jewelry box is complete. All that's left to do is add some drawers, shelves, and hooks for hanging necklaces. For all of these components, you can use cardboard covered with the same paper you used to line the inside. Connecting five measured cardboard rectangles with hot glue will allow you to make drawers for your jewelry box. Just measure the cardboard pieces to match the shoebox's dimensions to ensure they slide in and out smoothly. To hang necklaces, attach some push pins to a piece of cardboard inside the "door." Then, you'll be ready to fill up the new jewelry box and start putting it to good use.
Turn multiple lids into a work of art
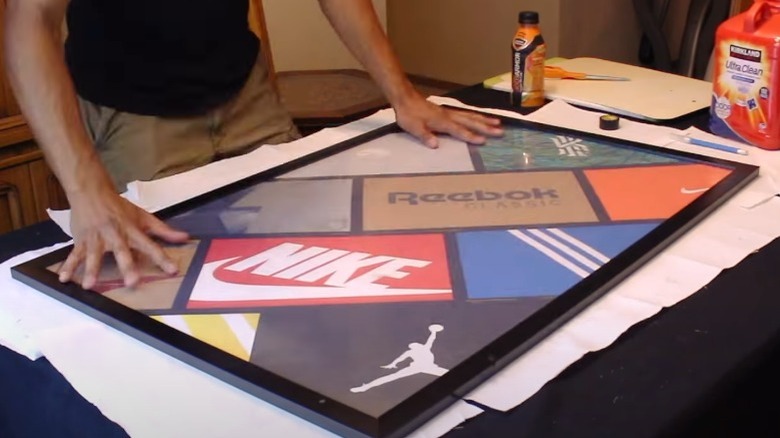
For some, shoes are simply a necessity, and they don't care too much about what is on their feet. For others, each pair of shoes is special and tells a story. If you agree with the latter statement and have been holding off on getting rid of old shoeboxes because of how much you love each brand and the memories accompanying the shoes, there is a better way to show your love. Instead of letting all the boxes take up space in your closets and collect dust, turn the lids into a unique piece of artwork for your walls.
Start by cutting the sides off each lid so you are left with a flat piece of cardboard with the brand name or logo of each pair of sneakers. Get a large frame (the size will depend on how many box lids you have and how big you want your artwork to be.) Cut a large piece of cardboard to match the dimension of the frame, and lay out the lids over it in a design/order you like. It's OK if some of the lids hang over the edges of the cardboard; after you have everything laid out, you'll trim off the excess. Once the design is laid out, glue the lids in place and use a box cutter to trim off the overhang. To clean up the uneven cuts between the lids and add a border, run thin, black electrical tape over all the seams before framing your new artwork and hanging it on your wall.
Turn it into a decorative storage box
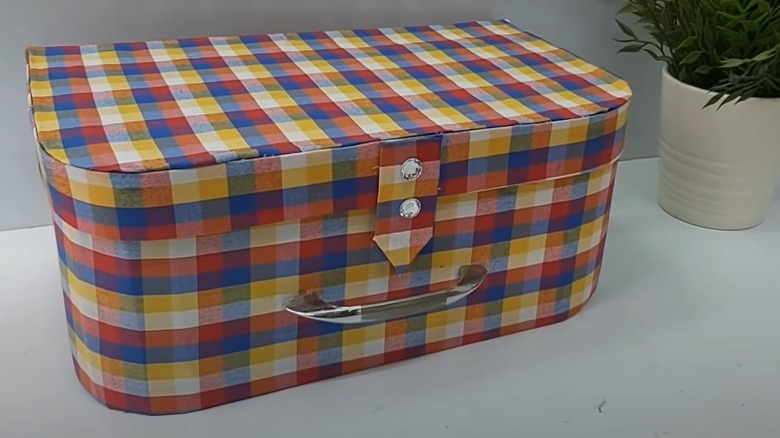
Many people store photos and other knick-knacks in shoeboxes. There's no problem with this, except for the fact that you'll probably want to keep it hidden away in your closet to avoid making your home look cluttered and messy. If you're looking for something more attractive for storing items in your living space, such as on a bookshelf in your living room, you don't have to spend money to buy a decorative storage box. You can simply make a shoebox more aesthetically pleasing.
There are different options when it comes to turning a shoebox into a decorative storage box. You'll want to think about your overall design goals to decide whether to cover it with decorative wrapping paper, rope, or another material that will look the best in your space. Whether the lid is attached will also impact how you design your decorative storage box. Either way, the finished product will be something you're ready to proudly display on your shelves for visitors to see when in your home.
Wrap presents
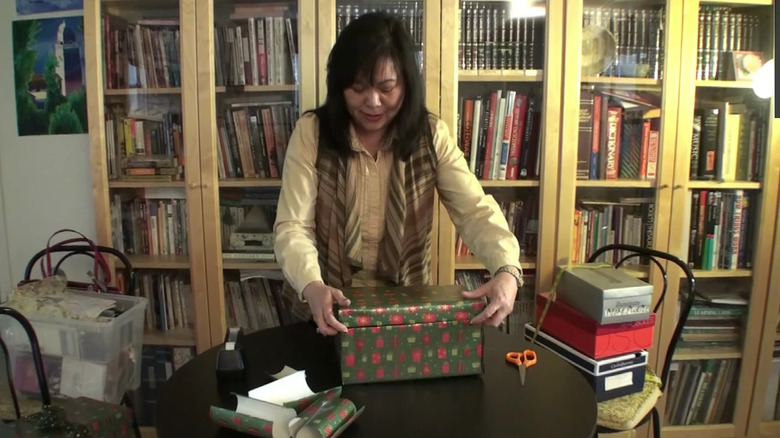
Many items you purchase as gifts are not easy to wrap with wrapping paper. Whether they're breakable, round, or oddly shaped, getting wrapping paper to lay nicely on them without making them look sloppy is sometimes impossible. For items such as these, placing them in a gift box is often the best option. However, gift boxes can be expensive. Plus, you may not have time to run to the store before getting your gift ready. Fortunately, you can transform a shoebox into a beautiful gift box with wrapping paper, scissors, and tape.
Start by unrolling the wrapping paper on a large table, and use it to cover the box. Glue the paper on it, covering the outside. Next, do the same thing to the lid. You'll want to cut the paper neatly at the corners of the lid and base for a cleaner look. Once the entire outside of the box is covered, you won't be able to see any logos or band names, and the recipient will never even guess that you used an old shoebox. You can add some ribbon or other embellishments to make the finished product as special as the person you're gifting it to.
Make a smartphone projector
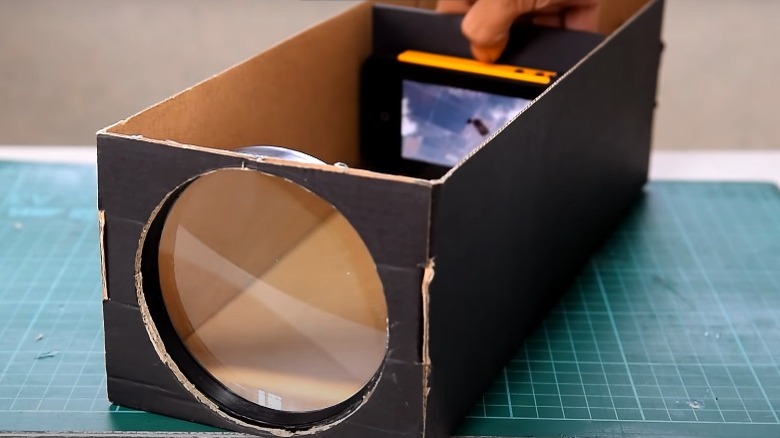
We use our smartphones for everything from answering emails for work to unwinding and watching a movie or favorite TV show. However, sometimes you want to share what you're watching with someone else, which doesn't work out so well, given the smaller screen size. Did you know that you can turn a shoebox into a projector for your smartphone, allowing you to display the video on a wall?
Using a magnifying glass as a lens on one of the small sides of the box will allow you to do just that. All you'll need to do is cut a round hole on the side to hold the lens. Then, make a holder for your phone using cardboard to make a stand that will slide back and forth along the box. Moving your phone towards or away from the lens will allow you to bring the video into focus. Just remember, because of how the magnifying glass will project the image, you'll want to lock your phone's screen so that the image stays upside down. Don't worry; it will be projected right side up on the wall.
Turn it into a planter
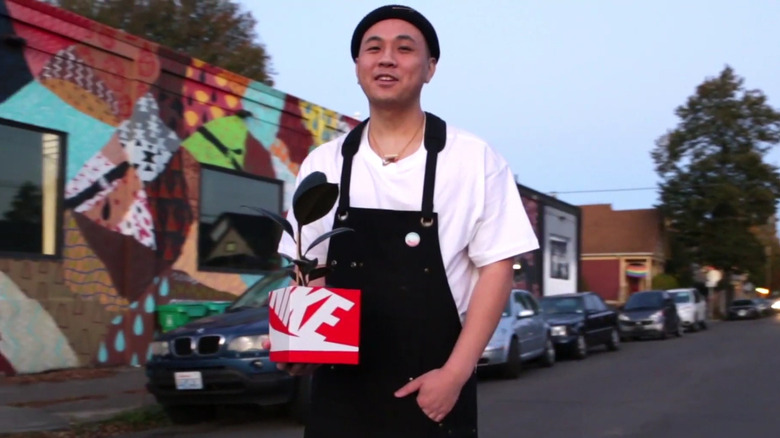
If you have some favorite shoe brands, you can work your love of them into your home's decor. Your Nike, Puma, Gucci, Louis Vuitton, and other favorite shoeboxes can be turned into a decorative planter cover to add a unique touch to your home's aesthetic. For this project, you'll need a potted plant in a cube-shaped planter.
Start by measuring the dimension of the planter to create a pattern for the cover you'll be cutting out of the shoebox. You will want to cut two copies of the same pattern, each from the lid, base, or any large and flat section of the box. Once these two pieces are cut out, you should have enough to make four sides of a cube, along with a top with an opening for your plant. Use a hot glue gun to connect the pieces and form the cube-shaped cover to slide over the planter, and you'll be ready to display your new creation.
Make a memory box
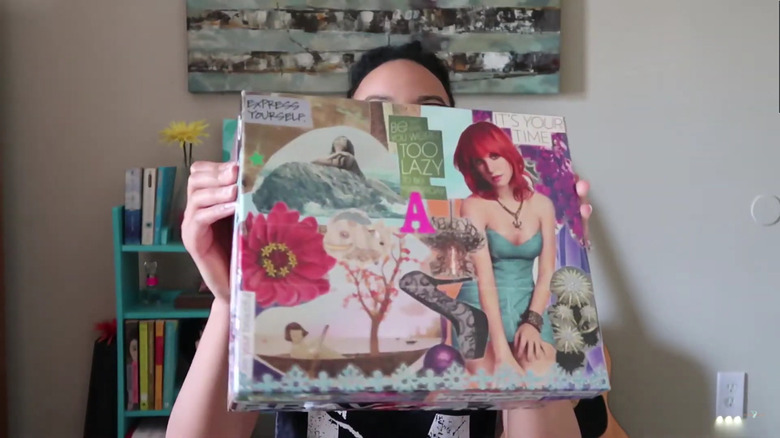
A shoebox can also make a wonderful memory box to hold postcards, letters, mementos from your travels, ribbons from childhood competitions, and more. One of the best things about making your own memory box instead of buying one is that you get to personalize its design, making it all the more meaningful. To do this, you'll want to decorate the outside of the box using your own photographs, pictures and words from magazines, or even your own drawings.
Pick out several images and sayings that you want to use to cover the shoebox and lay them out over the sides and lid. Your goal is to make more of a collage, so don't worry if images are touching or overlapping — that's precisely what you want. Once you've decided on the ideal layout, use some decoupage glue to put everything in place. To preserve the finish, add a coat of sealant over the top, bottom, and sides of the box. You could even add a few more pictures or images to the inside to make it even more personalized and attractive.