Don't Pass Up Thrift Store Drawers, Transform Them Into A Garden Planter Instead
We may receive a commission on purchases made from links.
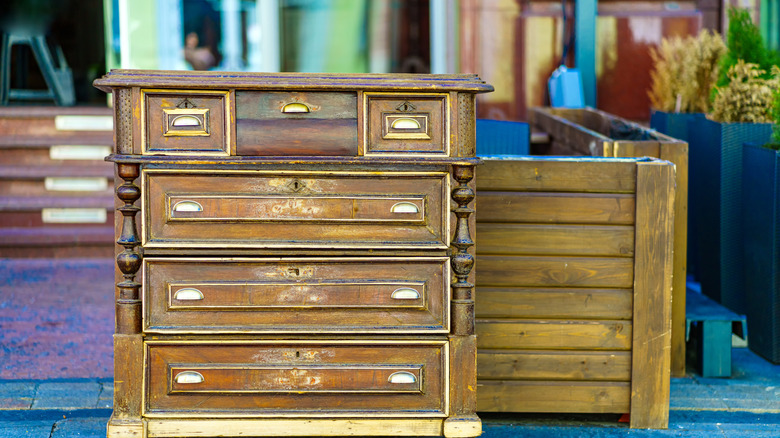
You've walked by those old dressers a million times at your favorite thrift store, but you're not looking for furniture. You're a gardener, scouring for goods you can repurpose for use with plants and flowers. If that's you, it might be worth circling back to the used drawers. As it turns out, they can be upcycled into adorable planters that make unique garden features.
Whether you already have a lush garden and are looking to add a fun accent or you want to enjoy beautiful blooms even in the city with a patio garden, this DIY can be customized to your gardening needs. You can make a single garden planter with one drawer or use multiple drawers arranged in different ways for a bigger display. This budget-friendly DIY will have your gardening neighbors peering at your property with envy.
To upcycle old drawers into something beautiful for your garden, you'll need a dresser drawer (or more, depending on how many you want to make), outdoor wood stain or paint, a paintbrush, and a drill. Optional supplies include scrap wood, screws, and a saw. Once your planter is complete, you'll need potting soil and your favorite plants or flowers to put inside.
How to make garden planter out of an old dresser drawer
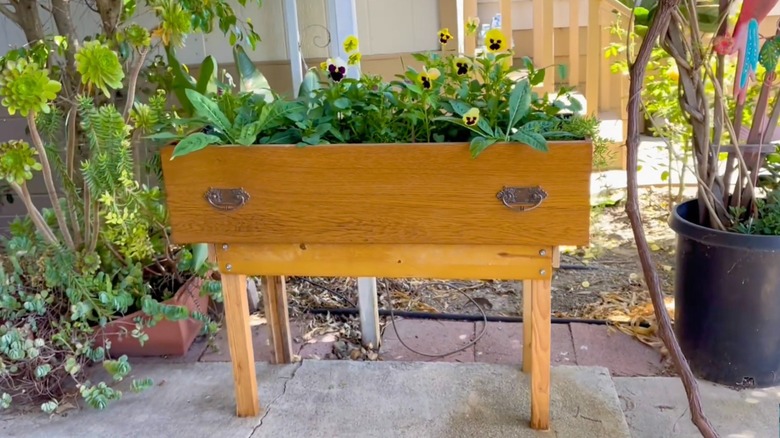
This clever way to repurpose old dresser drawers comes together fairly easily. Begin by removing any extra hardware that might be on the drawer, like metal slides or rails that are sometimes affixed to the bottom. Use sandpaper to lightly smooth the wood surface of the drawer, then apply a layer of outdoor wood stain or paint. This will help protect the drawer from the outdoor elements. Use a drill to create about 10 drainage holes across the bottom of the drawer. At this point, you can fill the drawer with potting soil and plants or flowers and place it in the garden or yard. For an extra vintage look, set it on an old chair, small table, or workbench.
Optionally, you can mount the planter onto a raised stand. This is especially helpful if you will be using the planter on a patio. If you choose this route, wait to fill the planter until you've mounted it onto the stand. Use the measurements of the bottom of the drawer to cut four pieces of scrap wood and screw them together. This is the base of the stand. Cut four more pieces of scrap wood to equal lengths for the legs. The height of the legs is up to you. Screw each leg into the four corners of the base. You can sand and paint the stand to match the planter, if you'd like. Then set the drawer on top of the base and screw it in at all four corners. You can also add a few brackets connecting the frame and planter for extra stability. Finally, fill your new planter and place it outside.