Use Concrete To DIY The Cutest Ladybug Decor For Your Yard
There's something uniquely charming about adding whimsical touches to your yard. While garden centers are packed with cute options, making your own DIY garden ornaments is always going to be more special. If you're looking for a fun and beginner-friendly weekend craft, use a little concrete to DIY some cute ladybug decorations for your yard. Unlike lightweight plastic ornaments, this solid concrete creation provides an adorable and fun focal point that's guaranteed to stay put, even during a heavy spring storm.
To get started on creating your ladybug, you'll need to grab some supplies. Get a small bag of quick-setting concrete, a smooth plastic bowl to serve as your ladybug mold, heavy-duty craft wire or bendable metal rods for the legs, and some plain old cooking spray. First, give the inside of your bowl a light, even coat of the cooking oil spray so your concrete ladybug body will pop out smoothly. Next, mix your concrete in a separate bucket; follow the manufacturer's instructions until it reaches a thick but workable consistency.
From there, carefully pour the wet concrete into your bowl; after pouring, tap the sides firmly a few times to knock out any trapped air bubbles. That helps you get a smooth outer shell. Now comes the important part: setting up those metal legs. While the concrete is still wet, but thick enough to hold items in place, cut six equal-length pieces of your metal wire. Partially insert three ends on each side, evenly spaced; keep them even in length (and add another two up front if you want antennas).
Bringing your ladybug to life with paint and weatherproofing
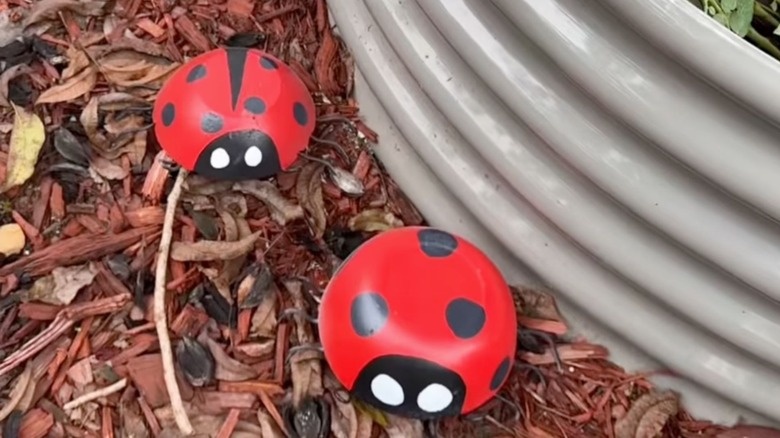
Once your concrete dome has fully cured (this usually takes anywhere from 20 to 40 minutes) and is resting adorably on its new metal legs, it's time for the fun part. Grab some outdoor-safe acrylic paint; ladybugs only need red and black, but feel free to add other colorful touches or even swap in brighter colors, like pink and blue, for a quirky twist. If you're keeping things traditional, though, apply an even base coat of classic bright red.
Once that base coat dries, use your black paint to create the head, the dots, and the line separating the wings that goes down the middle and parts towards the back. After the black paint dries, create the face by adding two white dots for the eyes, and make some black pupil dots in the middle of each once the white paint isn't wet either. Give the metal legs a quick coat of black to match. Who knows — maybe it could turn out to be another DIY that helps encourage beneficial ladybugs to visit your garden.
To keep your cute project looking great through all the seasons, consider adding a glossy protective finish to help seal things in. Your best bet is using a UV-resistant waterproofing sealer spray, like Rust-Oleum, for a glossy topcoat. Once that's all dry, your ladybug is ready to nestle in among your favorite flower bed or rest playfully on a sunny porch step. And now you're free to focus on other DIY concrete garden projects, like creating a concrete planter with coastal-chic vibes.