How To Make A Handmade Hanging Planter From Scrap Wood
We may receive a commission on purchases made from links.
Finishing up your woodworking project and sweeping away the debris, you notice some sizable scraps with potential. Don't toss your scrap wood! Instead, a collection of five pieces can easily join forces to become a hanging planter. Some inch-thick scraps between 4 and 16 inches in length are best for this project, and their other dimensions shouldn't be any smaller than 4 inches. With simple joins of glue and nails and just a few holes for hanging, this project doesn't require much in the way of tools, or even skills, for that matter. The planter can accommodate a potted plant for indoor use, or, with a few drainage holes drilled in the bottom, it can hang outdoors, filled with just soil and plants.
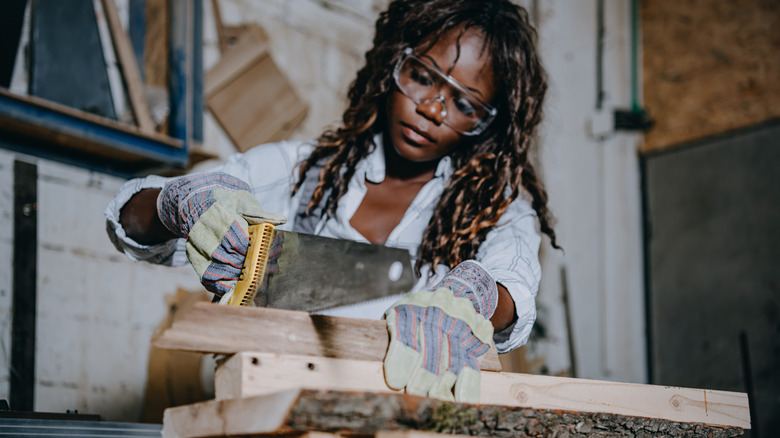
Gather up your wood pieces, a measuring tape, a saw (hand or power), two bar clamps, wood glue, finish nails, a hammer (or nail gun), a drill, sandpaper, a paintbrush, waterproof wood stain, and two 5-foot lengths of thin yet durable rope. Sisal, cotton, or jute look clean and classic, but colorful braided nylon or polypropylene rope would give the final product an offbeat, fun look and may hold up better for outdoor use. Although it's not a must, one or two L brackets per corner along with two per sides along the base will make the planter box more durable in the long run. You can opt for purely functional, plain metal brackets to attach to the interior of the box and/or add a bit of form along with function with styled brackets like these Geesatis Decorative Corner Protector Brackets.
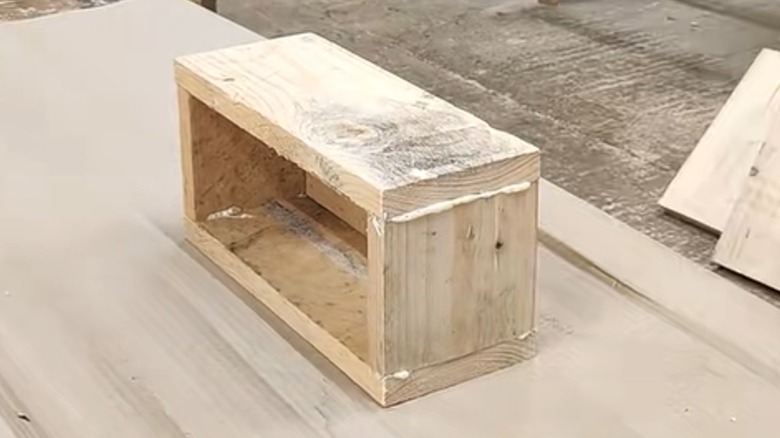
Piecing together a wood hanging planter box
The lovely thing about this project is that you can tweak it to make it work for the wood scraps you have. If none of the pieces are large enough to become part of a long, rectangular box, a perfect square planter is just as useful. No matter the size of the wood pieces, two end pieces need to be the same length, and the same goes for the two side pieces. The base will look best if it matches the inner dimensions of the four sides of the box, keeping it hidden tucked between the box's walls.
Measure and cut the matching end and side pieces along with the base. If you don't have a designated wood working space, you can use the bar clamps to hold the wood while sawing. Edge the ends and one side of the base piece with glue along with one edge of both end pieces. Along the glued edges of the base, fit an end piece against the base's side and against the inner 1-inch of one side piece. Work your way around the box, gluing the last and and side cuts in place. Clamp the box at two points — length- and width-wise — near the base. If you have a nail gun, secure the ends and sides to each other and to the base with nails. If not, let the glue dry for 24 hours before hand-hammering the nails. This extra security will allow you to remove the clamps and turn the box on its sides for easier hammering.
Putting finishing touches on the planter box
Once the box's sides and base are secured with both glue and nails, measure and mark holes for the hanging rope. Mark two of them about 2 inches in from the corners on both end pieces and 1 inch down from the top edge. If your creation will live outside, drill several drainage holes through the base as well. At this point, you can also attach any supportive brackets.
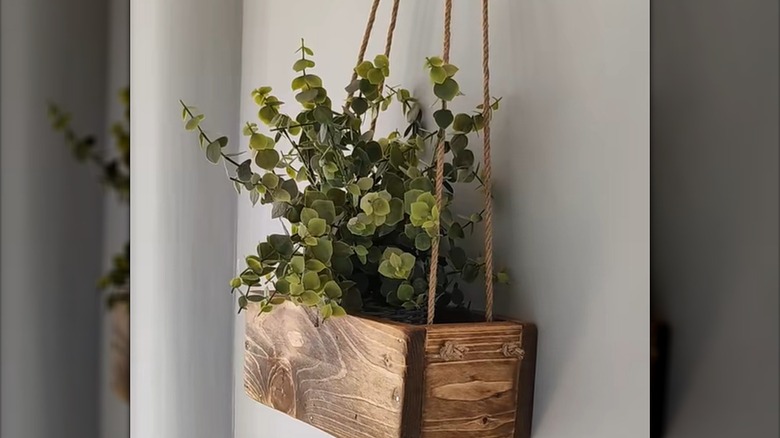
Give the wood a good sanding and wipe-down to get rid of the dust before staining it. A conventional stain is a reliable choice, but you can keep with the theme of reuse by painting on a few layers of brewed coffee, an ingredient that will naturally stain wood. For an outdoor planter, make sure the stain also waterproofs the wood. Alternatively, you can keep with the eco-friendly theme by waterproofing the wood with a coating of beeswax. You can choose to stain both the interior and exterior of the box, but if you're going to fill the box directly with soil, leave the interior bare.
Send the ends of the two cuts of rope through the holes at each end from outside-in, and either firmly knot each end or tie the two ends together. You can also string the rope from the inside of the box out so that the knots will be visible. Nest a few plastic planters (ceramic or terracotta pots may be too heavy) into the box, or scoop soil and tuck plants directly into the box for outdoor dwelling plant hangers.