Take Clay From Basic To Beautiful With A Jewelry Tray Anyone Can DIY

If you invest a lot in your jewelry, it deserves better than to be strewn across your vanity or nightstand. Having a proper home for it not only keeps it clean and safe but can also act as pretty, functional decor. It's the perfect way to declutter and organize jewelry to free up useful space. Case in point: a cheerful clay jewelry tray.
Made with air-dry clay, this organically shaped tray is a slightly rustic and colorful take on storing your jewelry. Since it's a free-form design and simple supply list, even a beginning crafter can find success with this project. To complete it, you'll need air-dry clay, a rolling pin, and small smooth stones, which are available at craft stores. Or, you can go for a walk and source your own from nature! You'll also need white gesso, Mod Podge, acrylic paint, and optionally, stick-on cork.
The best part of this DIY tray is how many ways there are to customize it, starting with the clay itself. Try air-dry clay that already comes in a vibrant color, or use a sandy clay color and neutral paints for a more natural look. Or, try an inlay technique and leave a few shells, seeds, marbles, or tiny stones pressed right-side-up permanently into the clay.
Making your tray
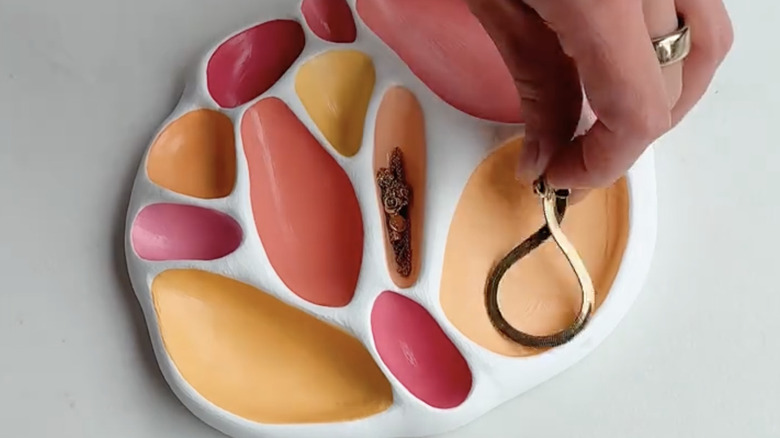
Start by shaping the clay into a rough oblong shape with your hands and gently level the surface with a rolling pin. Then, further smooth the surface, blending and sealing any small cracks or imperfections. Next, press your stones into the dough. Keep in mind that the stones are creating the impressions that will hold your jewelry, so you may want to use different sizes to fit earrings or bracelets. Press stones in flat side down or standing on their edges to create the different shapes. If you want something different, you can make impressions in the clay with small seashells, spoons, bottlecaps, or even just your hands.
When the clay dries, paint it with white gesso to prime the clay for color. Then, mix acrylic paints in tones you love and paint each well a different, vibrant color. Once dry, it's ready for a coat of Mod Podge to help seal and protect it from dust and spills. Finally, add some optional cork feet, and it's ready to grace the top of your dresser and keep all of your favorite jewelry contained and beautifully displayed.
This simple tray technique can translate to other areas of your home, too. Sculpt a larger tray and paint it in colors that complement your dining room. Then, use tea light holders to create wells and make it into a candle tray centerpiece for your table. Just be sure to place candles in heat-safe holders — never directly in the clay! These cute DIY clay leaf dishes would be the perfect complement, or create a tray with rectangular indentations to hold mail in your entryway. If you have clay leftover, decorate your walls with a sweet and unique DIY you can use for storing notes.