The Stunning Shoe Rack Beginner Woodworkers Can Try
We may receive a commission on purchases made from links.
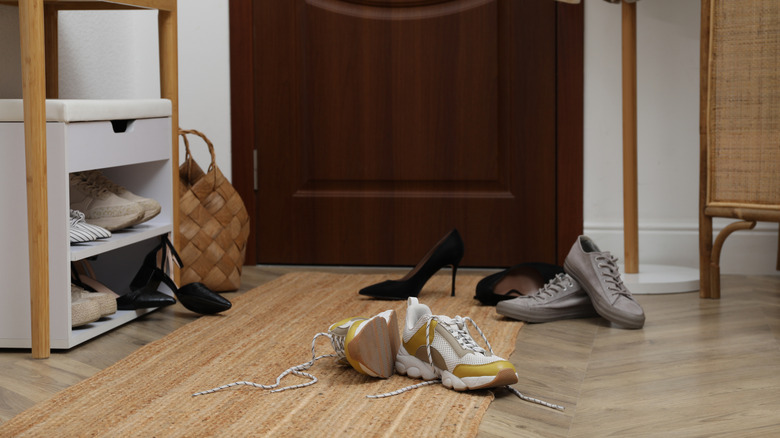
If you're always tripping over discarded shoes or trying to find new places to tidy them away, there are genius shoe storage ideas for small closets that will help solve the problem. However, there are always favorite pairs that you and the family want to keep handy, so why not create a stunning open shoe rack that anyone can make? I have over 20 years of experience as a professional carpenter, but this is one of those simple woodworking projects even beginners can do.
The rack is made with cheap, store-bought lumber. You'll need 2-by-2 boards for the ends and a 1-by-12 board for a top to give you somewhere to sit. You'll also want several lengths of ¾-inch or 1-inch poplar dowel. As for tools, you'll need a saw (I would recommend a miter saw for ease and accuracy), a cordless drill, and a spade bit that matches the diameter of your dowel.
You'll also need a pocket hole jig to put the ends together. If you haven't come across this technique before, there's an excellent explanation on the Kreg website. In my opinion, Kreg makes the best jigs, but they do come with a premium price tag. You can pick up a similar pocket hole jig system at Amazon for around half the price. Pocket hole joinery can be used for all kinds of furniture and cabinets, so I'd say it's well worth the small investment.
Build the end frames for the DIY shoe rack
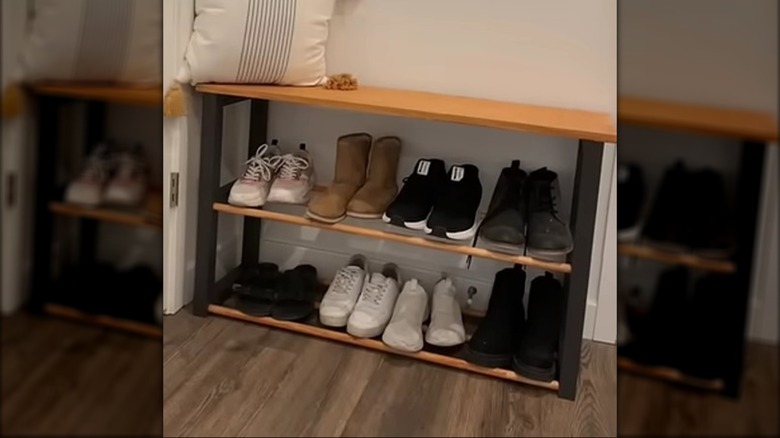
You can make the shoe rack any size you like, but 19 or 20 inches tall is normal chair seat height and will give space for shoes and things like ankle boots. A foot deep is about right. As for width, the dowels will support a fair amount of weight but will start to bow eventually if the rack is too long. I would keep it to 3 feet or under.
The ends consist of two rectangular frames with a bar across the middle that adds strength and supports the center rails. Using a miter saw to cut the pieces ensures the ends are square and everything goes together neatly without gaps. Give all the edges a quick once-over with 120-grit sandpaper to remove any splinters. You don't need a sander — it might remove more wood than you intend. Just wrap the sandpaper around a 2-by-2 offcut, and give each edge a quick rub.
The pocket hole jig is used to drill the short cross members, which are then screwed to the uprights. If you keep the screw holes facing downward (toward the floor) as you assemble the ends, nobody will know the holes are there, so you don't have to worry about filling and sanding them.
Put the shoe rack together, and add a finish

Drill recesses for the dowel rails with the spade bit. Use a pencil and ruler to measure and mark the positions. Wrap painter's tape around the bit about an inch from the end to provide a depth guide so you don't drill through. Clamp each end to a bench so it can't move.
If you want the ends a different color from the rails and seat, paint them now. Cut the dowels to length and glue everything together. I use Titebond III for my woodworking, but any high-quality wood glue is fine. Ideally, you would clamp it all up, but most beginners won't have clamps of that size, so make sure it's all level and square, and leave it to dry. Cut the seat to size, allowing a small overlap at the front and ends. The video shows it being nailed on. Make sure the nails go below the surface so you can use a dab of wood filler to hide them. I would use small screws, which are stronger. Drill pilot holes and countersink them so you can hide the heads with filler. Finish with your choice of paint color or water-based polyurethane varnish.
Once you've built this shoe rack and have some confidence, you could test your woodworking skills with a hidden shoe storage DIY that can fit in an entryway or be a standalone. With a little ingenuity, the same idea could also be used to make a low hall cupboard.