The Simple Garden Edge DIY That Illuminates Your Outdoor Space At Night
We may receive a commission on purchases made from links.
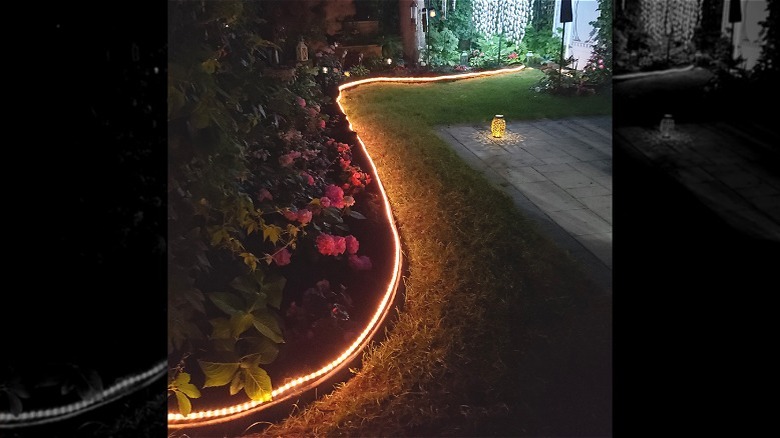
After the sun sets, your outdoor space doesn't have to disappear into darkness. With proper lighting, your garden, walkways, and landscaping features can take on a whole new look. If you're looking for an easy way to add function and ambiance outside, a rope light garden edge is a clever DIY solution. It's easy to install, requires minimal tools, and leaves a pretty, glowing border to help define your space and improve visibility. Rope lights are fairly low-maintenance as long as install them properly. They'll highlight your yard's layout so you can navigate your outdoor areas more safely in the dark, and maximizing your outdoor lighting can also improve your home's security.
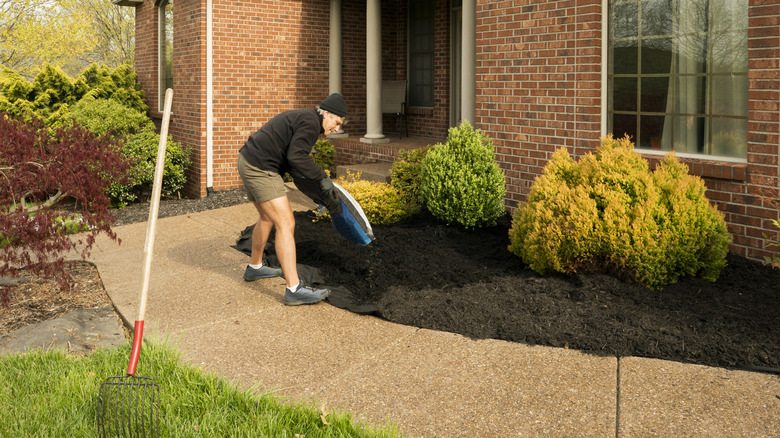
One of the biggest advantages of this DIY is its versatility. You can easily outline a curved flower bed, accent a winding walkway, or provide lighting along your patio garden beds. Rope lights bend and adjust to fit the shape of your garden edge, and many brands can even be cut to fit the length you need. The result is a subtle but clean-looking and effective lighting solution. For this DIY, you'll need garden stakes or landscaping staples, a rubber mallet, and your rope lights. Outdoor rope lights are available in various tones and colors, like these warm white SURNIE LED Outdoor Waterproof Lights. You can also go for a modern cool white, soft pink, or electric blue to create a unique look that matches your garden's overall aesthetic.
Steps to take when installing garden rope lighting
First, consider the layout you want to achieve. Make sure you have enough rope lights, and plan where you'll connect the strands to a power source. If you have a large garden or limited outlets, you might want to get solar-powered rope lights, like these Brightown Solar Rope Lights. Test your lights before getting started so you can feel confident that they will work.
Next, carefully place your rope lighting along the edge of your garden bed. Place U-shaped landscaping staples over the rope lights as you go along, gently tapping them into the soil about every 12 to 18 inches. Keep the rope straight, but leave some slack so you don't stretch it too tight and put stress on the wiring. Carefully guide the lights around corners and add in some extra landscaping pins to keep their shape. Wrap any plugs or cut ends with waterproof covers or sealing tape if needed. Most outdoor rope lights are designed to withstand the elements. However, you should still check for loose sections or damage occasionally. Be careful when using a lawnmower or weed eater near the lights to avoid accidentally nicking them. During more extreme weather conditions, homeowners can remove or disconnect the lighting to extend its lifespan.
This rope light garden edge DIY can be easily customized, moved, or expanded upon over time, illuminating and enhancing your garden's nighttime visual appeal with minimal effort. You can also adjust the layout if you change up your planting beds, using it to border between different species or plant groups. After seeing just how quick they are to install, you may want to find other clever ways to elevate your outdoor lighting with rope lights, such as lining your driveway or wrapping a tree.