Not Baskets, Not Shelves: The Antique Cabinet That's Great For Kitchen Storage
The difference between a novice and an expert thrift flipper is a discerning eye. In order to pull off the best upgrades, you have to look beyond an item's original purpose. While you can always spruce up a piece like a sturdy wood table or dresser as-is, other vintage items you can find at the thrift store might not be as useful in our modern world. Case in point: if you find an old ice box, you likely don't truly need it for its intended purpose when we have technologically advanced, modern refrigerators. But instead of throwing it way back to store food in your antique ice box, consider turning it into a stylish cabinet that's perfect for adding more storage to your kitchen.
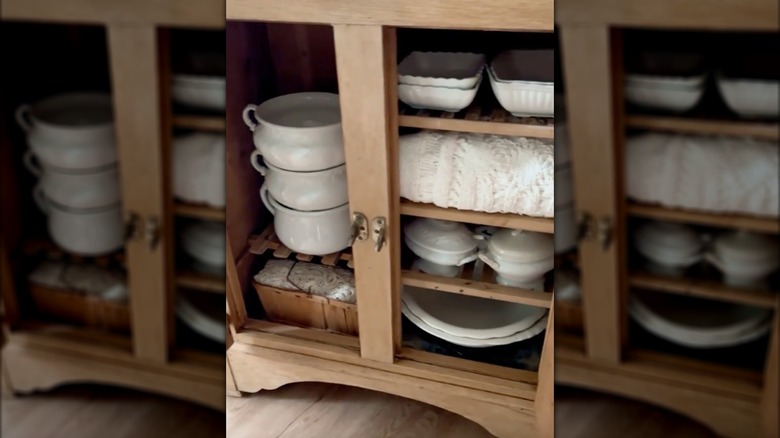
TikTok user @deerrunvintage shared a beautiful thrift flip that displays an ice box's versatility perfectly. Basically, you'll be gutting the inside of the piece and creating a space for extra storage. For this project, you'll need a thrifted ice box, a crow bar, varnish stripper, and a wood stain or paint of your choice. Each ice box will be a bit unique, with a variety of different compartments or shelving. As such, you may or may not need to buy or construct custom shelving for this project. If that's the case, you'll also need scrap wood, wood glue, nails, shelf supports, and/or pre-fabricated shelves. Once you have your materials together, this can go alongside other old-time kitchen storage solutions as stylistic pieces that are completely unique to your home.
How to transform an antique ice box into a cabinet
Start your search at a local thrift store, antique store, or estate sale. Search online sources like Facebook Marketplace or 1stDibs too. Once you bring your ice box home, begin the DIY by completely gutting it. This process will vary based on how your ice box is put together, but you're essentially aiming to remove the insulation and the bulk of what is holding that insulation in place. Use a crow bar or a smoothing tool to work away at the wood holding the insulation in place. You can do this from the inside or the outside of the ice box. If you're removing outer wood, just be sure to save any nails and gently remove the pieces so you can reinstall them once you're done taking out insulation. Also make sure to save any wood pieces that might be useful for creating shelving.
Once you have the insulation removed and the structural wood back in place, it's time to remove the old varnish. Brush on a generous layer of varnish thinner and use a stiff bristle brush to scrub it off. Once that's done, you can leave the wood as-is or give it a new stain or paint job. Take this time to install shelving, if necessary. Thrift small wicker baskets to make this space even better for decluttering your kitchen. Style the top with a runner or a decorative tray. If your ice box features compartments on top, you can use them as miniature laundry baskets for used rags. You could also put a bucket filled with ice in the compartment to store champagne or other beverages when you entertain.