Turn A Scrap Wood Lid Into A Useful Storage Tray For Better Organization
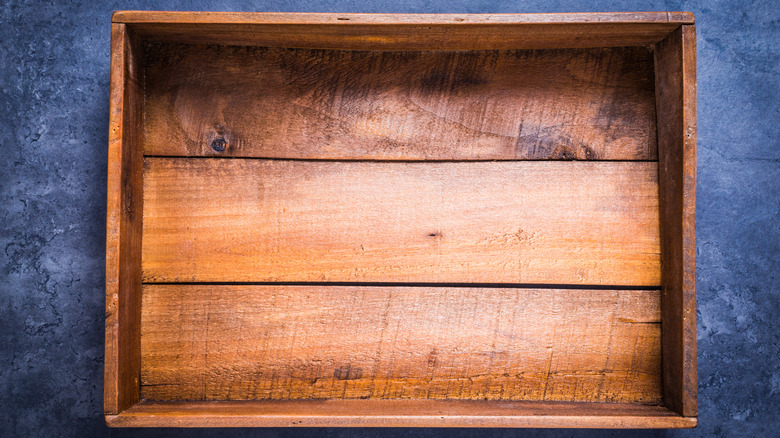
If you have an old wooden box — possibly a wine case or a disused jewelry box — you can repurpose it to make your own desk organizer. This scrap wood DIY tray will give you a place to keep art supplies, pencils, paper clips, and even pills. Hopefully, as a result, you will feel more relaxed when you sit down at your desk to work or find it easier to locate what you need in that once-cluttered utility drawer. This project will also allow you to upcycle some of the scrap wood that may be lying around your garage. Before you get started, it's important to have a mental image of the final product. Your lid will be inverted to serve as a tray with adjustable wooden dividers to separate it into compartments.
Next, you will have to gather your materials. You may need to use a screwdriver to remove a trunk or box lid from its hinges. Then, for your dividers, you should select pieces of wood that aren't very thick, because you don't want them to take up too much space that could otherwise be used for storage. Thin plywood does the job perfectly. You will also need a measuring tape, a straight edge, a pencil, and a saw — whether it's a table saw, a circular saw, or even a hand saw. This project is one of many ways to DIY a functional storage tray.
How to build a storage tray using scrap wood
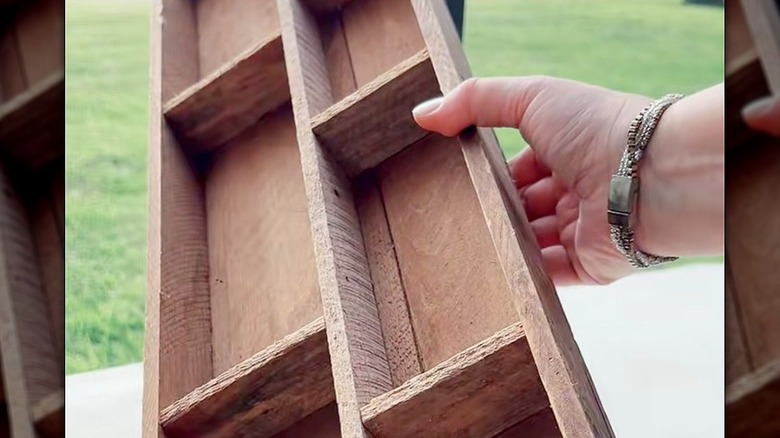
The first step is to design the tray's layout. For instance, one compartment may hold paintbrushes, which means it will need to be long and narrow. Or maybe you'll use your lid as a pill organizer, so it will need to be broken up into seven sections of equal sizes. Then you can use a straight edge, like a ruler, to draw lines where the dividers need to be placed. Next, you need to measure those lines and cut your scrap wood pieces to the same length.
Keep in mind that your dividers need to be even with the sides of your tray. So, measure the depth of your tray, and cut your dividers to the same height. You may have to use a fine-grit sandpaper, like 180 grain, to smooth any splinters from around the edges of your freshly cut dividers.
@whimsybarn Do you have a vintage box lid just waiting for a second life? I turned this long wooden lid into a divided tray to store some of my favorite little treasures—picture clothespins, bingo cards, game pieces, and more. It's such a simple project that almost anyone can do... and it adds just the right touch of character to your storage. What would you keep in yours? Around here, we do mostly vintage. 2025 is our year to vintage treasure hunt, stash & style our spaces and add "freedom" to our lives in so many ways! We specialize in vintage mystery boxes and helping people shop by decor style! Check out our online shop or jump on our email list (for family & friends insider info and specials). We can't wait to serve you! #VintageBoxLidDIY #DividedTrayProject #WhimsyBarnStyle #StyledWithVintage #RepurposedWithJoy #FromJunkToJoy #ChippyAndCharming #VintageInRealLife #RusticStorageIdeas #DIYWithPurpose #TimewornTreasure #CreativeReels #FacebookReels #SimpleVintageStyle #RepurposedStorage #SlowCreativeLiving #mysteryboxshop #whimsybarn
If you're interested in carpentry, there's a slightly more complex version of this project that involves using a jigsaw and clamps. For the purposes of this example, you will learn how to divide the box into six square sections using three pieces of ¼ inch plywood, but you can make as many sections as you want with any thickness of wood. Cut two pieces of wood to divide the box and one to run perpendicular to them. Also, cut them to the depth of the box. These dividers will cross over each other by sliding in place using notches. Clamp the lengthwise piece to the edge of the table and cut two evenly spaced notches. Then cut a notch in the center of each widthwise piece. Then slide the three pieces together and place the divider in the tray.
How to add style to your tray with craft materials

There are plenty of affordable ways to decorate your tray. For instance, you can use acrylic paints to give each section its own color. You can also sand the entire tray and apply a couple of coats of stain to give it a bit of shine. If you enjoy crafts, tape stencils onto the sides of the lid, or even the dividers themselves, and paint ornate designs over them.
But, perhaps one of the classiest ways to decorate the bottom of a tray organizer is to line it with velvet. For this addition, you'll need to acquire some supplies from your local crafts store. Get a thin piece of cardboard, a hot glue gun, and a swatch of velvet that's a little bit larger than the tray's surface area.
First, measure the dimensions of the bottom of the tray, then mark and cut your piece of cardboard to those dimensions. Then lay your cardboard square on top of that swatch. This cardboard square will give the velvet swatch structure. To tightly fold the fabric over the square, you'll need to cut off the corners, giving the fabric a hexagonal shape. If you try to fold a square swatch of fabric over a square piece of cardboard, the fabric will bunch up at the corners. Then apply hot glue to the cardboard square and fold the velvet over it. Once the glue dries, you'll be able to slide the velvet square into the tray. If you're still low on storage space, you can also turn an old chocolate box into a chic DIY storage solution.