Keep Kitchen Countertops Organized With An Antique Storage Rack Upcycle
We may receive a commission on purchases made from links.
For those who suffer from too-much-stuff syndrome, kitchen countertops seem to shrink as new items find their way into the home. Even for those who aren't troubled by such a challenge, lack of counter space can still be an issue — cramped apartments can certainly present their fair share of challenges. Fortunately, TikToker @lexiyoakum took the issue to heart. She turned a pair of unlikely items, the upcycled legs from vintage bed frames and a few drawer pull knobs, into a storage rack for the kitchen. Her DIY not only keeps the countertops organized but creates a uniquely stylish addition to the room.
Antique bed legs vary in length; depending on how much storage space you need on your wall, you may have to buy a couple pieces. You could fuse them together, end-to-end, using brackets. Or if you have a lot of space to cover, consider buying several bed frame legs and hanging them up separately. In interior design, groups of three related items are common because they capture the eye and make a display more striking, making this DIY a great way to upcycle a frame with one leg that's beyond repair.
You'll then add items to them, like vintage drawer pulls, interesting hooks, or lengths of rope to turn the posts into a shelf. To make a truly stand-out piece, look for knobs and hooks that are every bit as interesting as the bed legs are. You'll also need something for mounting, like these GUSSKER D-Ring Picture Hangers, and a screwdriver or drill.
Prepping the bed frame legs
If you'd like, this storage idea could potentially align your kitchen with some popular decorating styles, such as farmhouse or industrial decor. For the most rustic, interesting final product, look for bed frames that boast legs with features like intricate spindled carvings, bold knobs at the top of the posts, and built-in slots where the frame's metal hardware once attached.
@lexiyoakum My dad says he's a hoarder but the good kind, I AGREE 😍 I have a haul coming next of all kinds of other things I found in my parents storage ranging from 25-100 years old and it's GOOD!! #momsoftiktok #antique #thrift #thrifted #antiques
After you've settled on the design, it's time to work with the repurposed pieces. Your goals and your kitchen's design style determine how you treat them. A rustic decor style may not require you to sand them, as leaving everything pretty much as-is, warts and all, is acceptable. On the other hand, if you've got a room filled with shabby chic decor, you may need to distress your furniture items before you put them on the wall.
This stage of the build is also the time to accentuate certain features or add embellishments. For example, if there are carvings in the legs, fill in the recessed areas with dark stain or paint. This technique makes the raised portions of the design stand out even more. You could also stencil words like "Welcome to the kitchen" or "Dinner's ready!" across the front of the posts to create feelings of whimsy or welcome. Finally, add the D-ring picture hangers to the back of the piece before moving on.
Ways to level up this antique storage rack even further
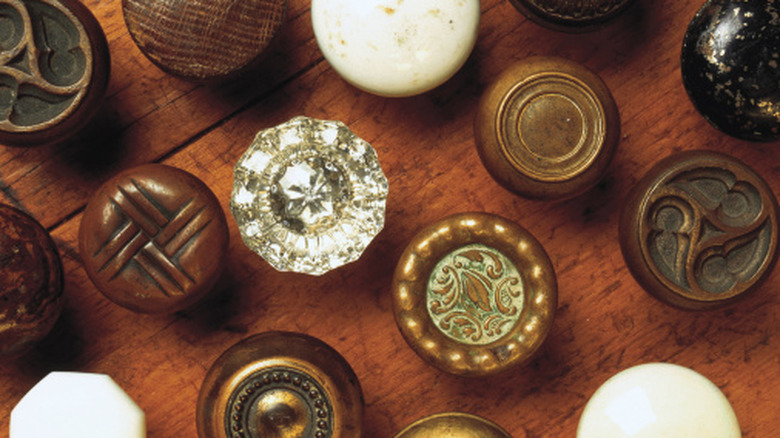
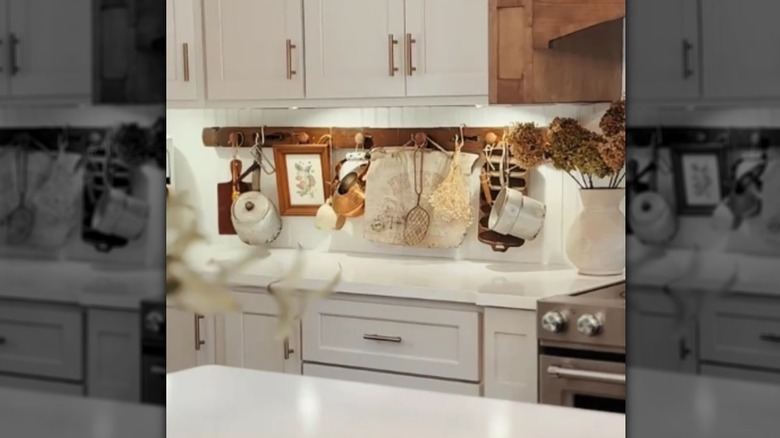
The bed frame legs only become a rack after you outfit them with pieces like drawer pull knobs or coat hooks. If you'd like to repurpose some old cabinet knobs, this is the perfect spot to use them. Or maybe you want to invite some texture into the decorative mix by attaching something like Wannianmu Retro Ceramic Knobs to your display. The juxtaposition between those disparate textural elements keeps the finished piece from looking bland. In all cases, these additions are where you'll store your kitchen items, so choose knobs or hooks that'll hold the weight of what you want to stash on them. Baskets or vintage buckets with long handles become repositories for items like utensil sets; you'll hang these containers on the knobs or hooks.
Finally, keep in mind that you don't have to hang every item that you want to display on this shelf. If the legs have some girth to them, stand flat pieces, like pictures, on top of the shelf instead of hanging them up. You'll save the knobs and hooks for things that can't stand upright on their own, like cooking forks and pancake spatulas. Just make sure that the front edge of the rack sits far enough away from the wall to accommodate your photos or kitchen art without them being in danger of sliding off.