Turn An Old Button-Down Shirt Into A Unique Hanging Planter For Your Garden

When it comes to up-cycling basic home items into new gardening supplies, social media has an endless supply of creative ideas. We've seen users turn old coffee makers into hummingbird feeders, old wooden pallets into gorgeous herb gardens, and muffin tins into garden seedling trays. In short, the options are endless. We never would have thought of using an old button-down shirt as a makeshift hanging planter, but thanks to social media, now we can't wait to make our own. Hanging planters are excellent for anyone struggling with a small garden as they allow you to use up valuable vertical space. This DIY planter can be hung on a fence, wall, or even on the side of your home. It can even hold multiple plants at once depending on the specifics of the design you choose.
Youtube channel Green Plants has a plethora of gardening content, from growing tricks to garden decor. This DIY in particular is a perfect mix of both. You may have seen hacks online that use old strips of T-shirt fabric as string for hanging planters, but this hack instead transforms the actual pockets and sleeves of an old button-down shirt into mini plant holders. You only need a few basic supplies to get started, most of which you may already have at home or in your garage. The most important ingredient is the binding material cement, which you want to make sure you don't accidentally confuse with concrete. While this DIY may take a little longer to complete thanks to the time cement needs to dry, it is definitely worth the wait.
How to transform a button-down shirt into a planter
For your supply list, you will need the following: a button-down shirt, extra fabric to make pockets, a needle and thread or a sewing machine, cement, water, a large bucket, a paintbrush, four to six small balloons, a pair of gloves, and paint, if desired. You will also need a prepared space to hang the shirt to let it fully dry outside.
In this DIY, you are utilizing the back of the shirt as the front, so you can add a few more pockets (plant holders) to the front using your sewing tools and extra fabric. Cut pocket squares out of your fabric and stitch them to the back of the shirt. (Remember to include both sleeves in your count of total plant holders.)
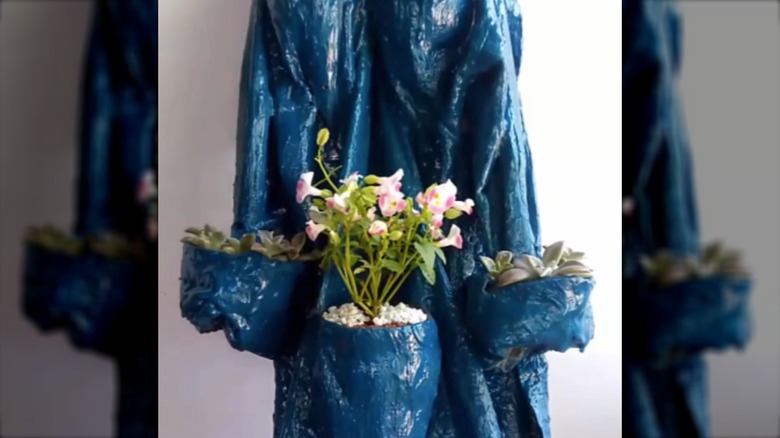
Next, using your gloves, mix your cement and water in a large bucket. Place your shirt into the bucket and cover it thoroughly with the cement mixture. Remove the shirt and hang it on your fence or wall. This is where you can adjust the shirt into the shape you desire. To make planters of the sleeves, fold them upwards to create small containers. To ensure the pockets dry with ample room for your plants, blow up your balloons until they are about the size of your hand and insert them into the pockets.
Now it's time to let the shirt dry. Once the first coat has hardened, apply a second coat of cement using a paintbrush. Once the second coat has dried, you can apply a coat of paint to the shirt if you so desire. Finally, you can add in your soil and your plants. Make sure to cut small holes into each pocket or sleeve planter to ensure your plants can drain properly.