Turn Dollar Tree Baskets And Plungers Into A Clever Blanket Storage Solution
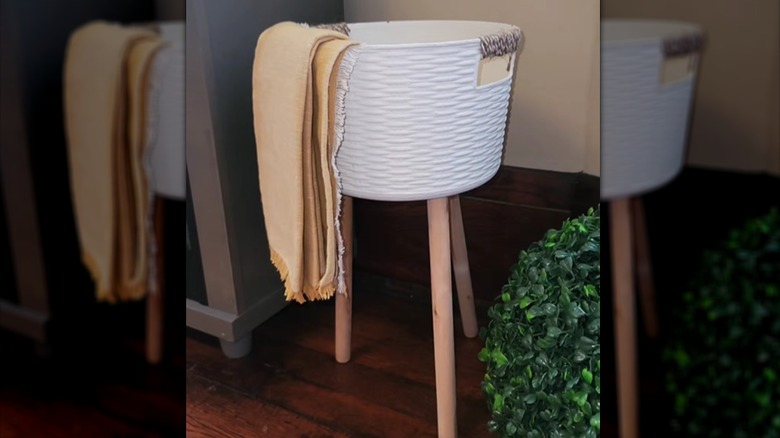
There's a lot to be said for a blanket slung over a couch's back: with no effort at all, you can grab it, cuddle up, and get on with relaxing. Sometimes, though, blankets draped across furniture can start to look cluttered. Plus, it may be worse if your pets imbue the blanket fibers with their fur. It's getting more common to see oversized baskets used to corral blankets. However, lots of these beautiful ways to keep blankets organized will set you back a pretty penny. Alternatively, making a raised blanket basket for around $5 can sound pretty appealing to budget-conscious DIYers. TikToker and Dollar Tree visionary @gleespen_designs did just that with a plastic bin and three toilet plunger handles. The bin's textured faux-woven sides, finished with a coat of white paint, give the basket a polished look, while the wooden plunger handles double as angled legs. With a few tweaks that don't increase the project's price tag too much, we can make the unit sturdier and more fit for the long haul.
The textured plastic bin that @gleespen_designs used is no longer sold at Dollar Tree. If you don't mind going without the basket texture, pick up one of these white Flexible Plastic Storage Tubs. If plastic underwhelms you, go one better by upgrading to this Cotton Woven Rope Basket in gray or white. Throw three toilet plungers into your basket along with a round Crafters Square DIY Hanging Plywood Decor piece. You'll also need a saw, E6000 glue, a drill with a screwdriver bit, an angle finder, a measuring tape, a marker, and 1½-inch wood screws.
How to create a sturdier standing basket
Our inspirational TikToker attached three legs to their basket with just two steps: cutting holes in the basket's base and gluing the legs through the holes at an angle. While the method is quick and visually appealing, it may not hold up well long-term. Instead, we'll attach the legs to the basket with the help of a reinforced wooden base. Unscrew the wood handles from the rubber plungers — set them aside for one of these creative DIYs that rely on just the rubber portion. Cut the threaded ends of the handles at a 30-degree angle to create a flat surface for attaching the legs. Use the angle finder to mark 30-degree cuts on the threaded ends of the handles, then saw along the lines.
Cut the hanging string off the plywood circle. Measure and mark evenly spaced attachment points for the legs on the circle. Drill through the base into each leg, and secure each one to the circle with a wood screw so that they angle away from the center of the circle evenly. With the base standing upright, apply a generous amount of E6000 to the top of the wood circle, and set the basket or bin on top. Place something weighty, such as a water jug, inside the basket to make a firm bond as the glue dries. One of the reasons why you should keep E6000 in your home is its ability to hold together two different materials. Let the glue cure for 24 to 72 hours before moving or using the basket for the best possible hold.