A Pool Noodle Becomes A Chic Decor Piece With A Creative DIY
Pool noodles are the DIY gift that keeps on giving. Creative projects show up across social media and often transform these innocent pool floaties into amazing pieces that people would actually want to have in their home. There are so many creative projects that can be done with these bendable Polyethylene foam tubes, including creating a work of art noodle vase that uses eight of the tubes for the finished product or DIYing a stunning fabric wreath that's festive for the holidays. If you've ever wanted to try your hand at crafting with a pool noodle, there's a chic vase designed by my_home_by_kendra_nicole that offers an elegant twist on this classic DIY experience.
While the project itself looks high-end, it doesn't require a lot of materials to pull together. To start, you will need a pool noodle, and since this project is painted, if you can grab a white noodle, that would likely work best. The other materials you'll need are a knife, a flexible chopping mat like this one from Dollar Tree, acrylic paint (the original project uses rose gold), a paint brush, clear acrylic gems, and glue. Hot glue will allow you to keep working on the project as things are setting since the glue will harden quickly. While the project itself seems relatively straightforward, it will require a bit of time to put everything together.
Here's how to put together your own chic pool noodle vase
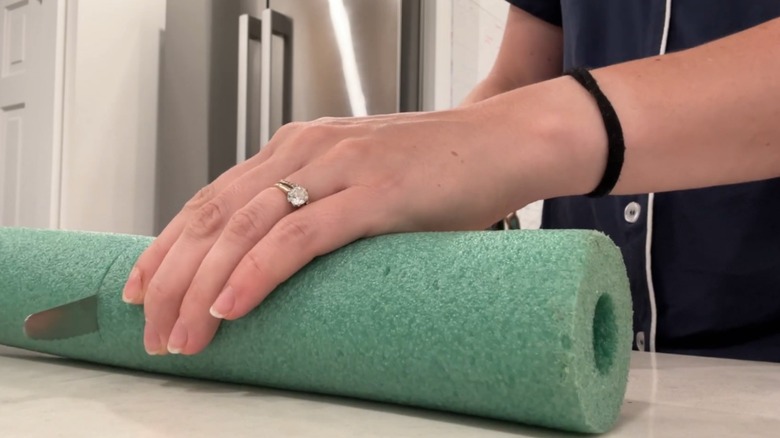
In order to create a chic flower vase with your pool noodle, you'll want to start by cutting the noodle into equal-sized pieces approximately an inch to 2 inches wide. Make sure that you have clean lines when cutting your pool noodles. Use either a utility knife or one with a serrated edge. Once the noodle has been cut down, you'll then want to cut those pieces in half; this will leave you one rounded side and one flat side. Take the cutting mat and fold it into a tube shape. You will want to make sure that the mat is secured in the shape of your vase before moving on to the next step.
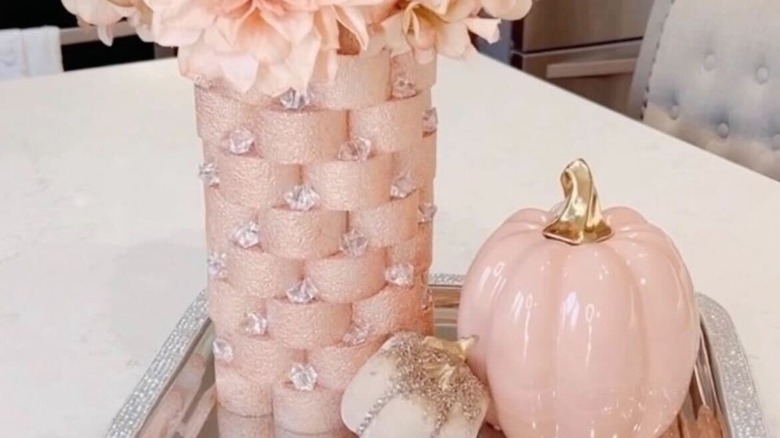
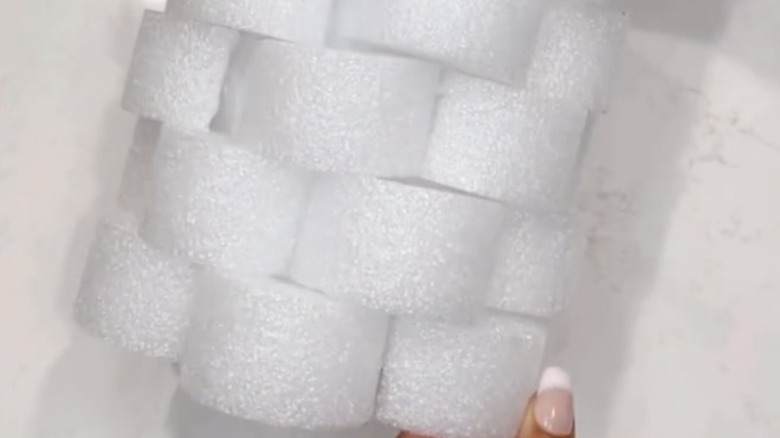
Once you have your basic shape, the original DIYer took the pool noodle pieces and glued them in rows onto the mat. After the first row, stagger the half rounds directly over the original noodle pieces. Continue this process all the way to the end of the mat, covering the entire tube with your pool noodle pieces. After everything is glued on, paint the entire piece with your choice of paint. When the paint is dry, the final step for putting this vase together is adding the acrylic gems, which are placed onto the little ledges that were created by staggering the noodles.
While there is no base to this vase, having a tray to put it on, like the original video, and using a foam block to stick your stems into will let you use it for your florals. Once everything is set up, add in your faux flowers, and you can add decorative touches to the rest of the tray.
Tips for how to build and customize this pool noodle vase to make it work for you
If you're thinking of creating this pool noodle vase for yourself, there are different ways that you can customize it to work for you. One suggestion is to change the paint color you use. While the original creator chose a rose gold paint, you can pick any color that will work within your own design aesthetic. If you're looking to match a seasonal theme, like fall, paint the pool noodle pieces in shades of orange or brown. Lean into a seasonal approach to the design, going with colors that make sense for a specific holiday, such as Halloween with black or Christmas with greens and reds.
An additional way to customize this vase is with the acrylic gems. While the original design used clear gems, you can find a wide range of colors for sale on Amazon, such as this YATOJUZI 165pcs Multicolor Vase Filler, which gives you a lot of variety for under $10.
To make the overall look more seamless without missing any spots, try painting the pieces before attaching anything to the mat. If you want the paint to stay and everything to look finished, it's recommended that you start with a primer that's safe on the foam before using your acrylic paint.