Reuse An Old Pot Lid To Create A Budget-Friendly Solution For More Organized Counters
We may receive a commission on purchases made from links.
Like the mateless socks piled on the dryer, sometimes you end up with a lid without a matching pot. If you can put the pot's mystery disappearance aside, don't throw out an old pot or pan lid when it can join forces with other repurposables. Instead of sending it to the landfill, combine the lid with a glass bottle, some paint, and a few other decorative elements to create stylish countertop storage that can easily play different roles around the house. YouTuber @HandmadewithEsin created a copy-worthy stand with decoupaged details that's suitable for the kitchen, dining table, bathroom, or patio table for outdoor entertaining. This DIYer decoupaged a roughly 12-inch glass pot lid with a cheery lemon-patterned napkin and sandwiched it between a small glass bottle and a beaded handle. With a bit of paint and some jute twine trim, this pretty upcycle is nothing resembling a kitchen castoff.
Make your own with a glass lid and drink bottle, four or five 1-inch wood beads, a roll of jute twine, a patterned napkin, an emery board, and a pack of bamboo skewers. Copy the design inspiration with these Peony Man Lemon Paper Napkins or find a look that appeals to you more. You'll also need acrylic paint, a brush, Mod Podge, scissors, and a reliable crafting adhesive like Gorilla Hot Glue.
A glass lid is best for this project, since decoupaging what's normally its top will give the upturned tray portion of the stand a glossy, finished look. A glass bottle with a base that's wider than its upper body is ideal, like Orangina or Clearly Canadian bottles.
Decoupage and decorate the pot lid
Unscrew and remove the lid's handle, and give the surfaces of both a good clean. Separate the patterned layer of the napkin away from the other ply, paint a layer of Mod Podge over what's usually the top of the lid, making sure to cover the lip of the lid, too. If you do other repurposed paper napkin decoupage projects, you may want to swap the Mod Podge out for a product like Viva Decor Decoupage Glue that's designed for working with napkins.
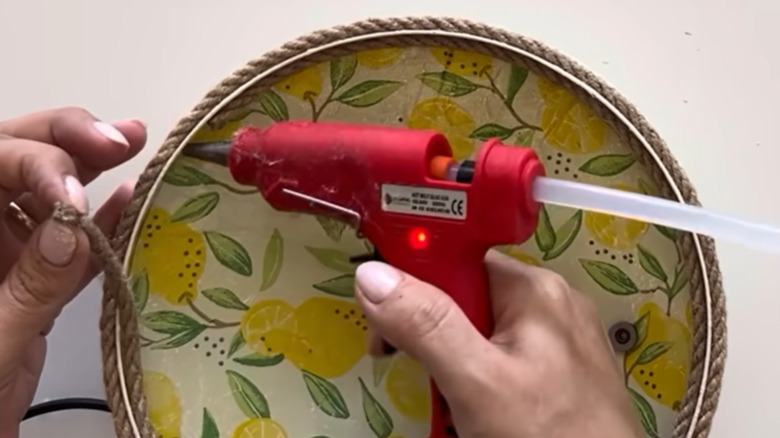
Smooth the napkin patterned side-down over the glued surface, taking extra care to press the material along the edges of the lid. Grab the emery board, and lightly rub it in downward motions over the lip of the lid to remove the excess napkin. Set aside any large scraps to use later. Let the glue dry fully before painting a couple of coats over the napkin; this will seal the material and give it a finished look. While you've got the paint out, give the bottle and the lid's handle a couple of coats, as well. Once the paint is fully dry on the lid, glue an edging of jute twine around the lid, covering any raw edges of the napkin. If you want, you can also rim the inner edge of the lip with twine.
To tie the bottle into the lid's pattern, cut out several patterns from either another napkin or scraps left over from covering the lid. Affix the patterned layer of napkin to the sides of the bottle, and paint over them with decoupage glue.
Create the handle and assemble the stand
The assembly steps for this project are hot glue-heavy, and you can avoid the stringy mess it makes with this handy way to use Vaseline. Simply apply a bit to the tip of the glue gun, and you'll have a much neater experience. Grab your wooden beads and bamboo skewers, bundle together enough skewers to fit snugly inside the beads, and slide four or five beads over them. Slide the beads to the end of the skewer bundle. Glue the lid handle over the end bead, making sure to apply plenty of glue to the skewers running through its center.
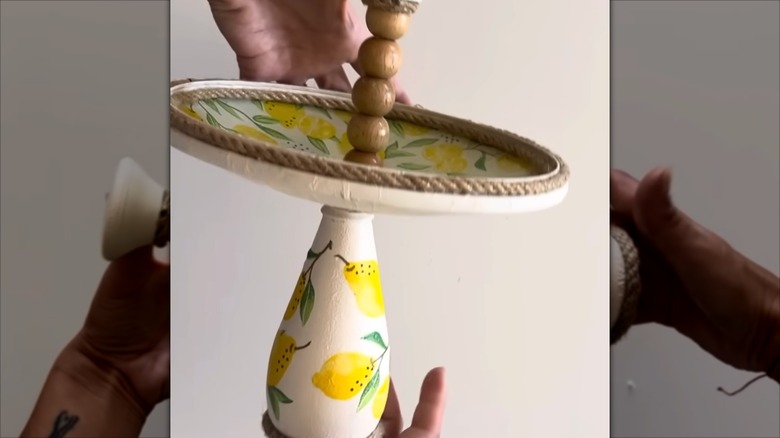
Cut off any excess of the skewers that extend past the beads; you may have to mark the skewers and remove them from the beads to cut them one at a time. Apply glue at the cut ends of the skewers to hold the beads in place. Test how many skewers will fit through the lid's screw hole, and cut off all but that amount from the bundle of skewers coming through the beads. Flip the lid pattern side-up, slip those remaining skewer ends through the lid's hole, and secure it with glue. Place the lid unit atop the bottle so that the skewers sit inside the bottle's neck, and glue where the lid meets the mouth of the bottle. If you like the way it looks as-is, consider your project complete. However, if glue is visible at the joins, you can encircle those areas with jute twine, as well. Jute trim around the base of the bottle can unify the look.