

11 Tomato Growing Tips Every Beginner Needs For A Successful First Harvest
We may receive a commission on purchases made from links.
Beginners tend to think growing tomatoes is either the easiest thing ever or that it's dauntingly difficult, and underestimate their abilities. The truth lies somewhere in between. Tomatoes aren't particularly difficult to grow, but it is easy for them to go wrong. As a master gardener of over 20 years, I've been growing tomatoes for literally decades, and I've had some fabulous years and some less great ones. And having things go badly during your first year or two of planting tomatoes can put one off growing them permanently! However, it's more than possible to get a good crop, no matter your experience level, and via natural methods. Besides being a master gardener, I'm also a permaculture specialist, so I grow my tomatoes simply and organically and still generally manage to get fantastic harvests.
With a few simple (and sometimes weird) tricks, even a gardening novice can enjoy a bumper crop. The key is getting the foundation right. If you make sure there's an ample supply of calcium (I'll share my top tip for this below), good airflow, that the soil is beautifully rich, and you have an easy, consistent, low-maintenance watering system — you shouldn't have too many troubles with growing tomatoes.
Choose a sturdy transplant, not the biggest one

Lots of people prefer to buy starts rather than growing their own tomatoes from seed. Generally speaking, I grow mine from seed, but if you prefer plugs or transplants, make sure you know what you're looking for. Don't just go for the tallest or biggest tomato plant you can find. Bigger doesn't always mean better. Often, if there are a few that are way bigger than the rest, they'll be taller but have thinner, weaker stems. It can imply that they've been in the pot too long, they're root-bound or stressed, or that they've been getting too much light and haven't been adequately hardened off. These plants will almost certainly end up with transplant shock.
Instead, look for a short, stocky plant with a nice thick stem. The leaves should be fairly closely spaced, and the plant should be deep green all over. Avoid anything that's leggy, pale, yellowing, or that has spots or shows signs of wilt or leaf curl. I'd also strongly recommend skipping anything that already has flowers or fruit forming, as this indicates a plant that's pushing energy into fruit production before it's developed a solid root system, usually as a stress response, which doesn't bode well for supporting a full crop throughout the season. A plant with no flowers but a healthy stem will quickly overtake a stressed flowering one within a few weeks of being in the ground, and will perform better across the whole season.
Harden off plants before they go in the ground
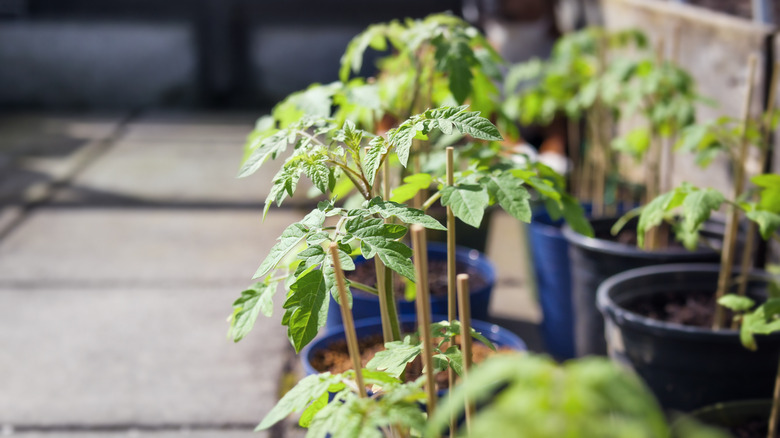
Hardening off plants is one of the things that many newbies unknowingly skip. They tend to think it's pointless and that the plants will just cope. But you have to remember that if you've grown from seed, or even if you buy transplants from the store, those seedlings have spent their whole lives under shelter. They've had plenty of heat and gentle light, but they haven't been exposed to wind, significant temperature variations, or the rigors of everyday life. If you go straight from the greenhouse to planting directly outside, it shocks the plant. Foregoing hardening off is one of the biggest tomato transplanting mistakes you can make. Transplant shock slows growth significantly and it delays root production and fruiting. In extreme cases, it can kill seedlings outright.
Hardening off is the process of gradually getting plants used to being outdoors over a couple of weeks. Around the last predicted frost date for your area, you need to start popping your plants outside in a sheltered, partially shaded spot for an hour or two a day then, bring them back indoors. Gradually increase the exposure a few hours each day until they can cope with full days outside. After the first four days, you can move the plants to a slightly less sheltered position so that they get exposed to more wind and sun. To help the process go faster, you can start making your plants a little sturdier as soon as the seedlings are up and have their first two pairs of true leaves. All you do is very gently run your hands through the tops of the seedlings every day. You can also blow across them or even set a small fan on a low speed to blow directly at the seedlings. This kind of stimulation mimics external conditions, and it triggers the plant to grow thicker, more robust stems. It also encourages them to put more energy into root production. When you're getting ready to plant them out, your transplants already have a head start.
Adding a source of a calcium
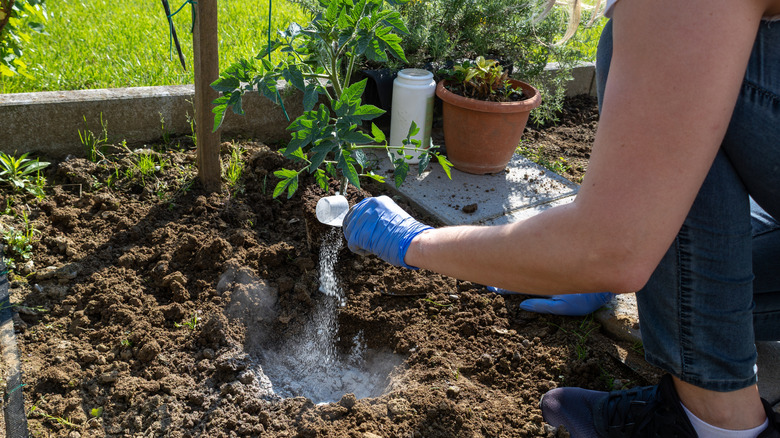
Calcium deficiency or poor calcium uptake is one of the most common tomato-growing problems. Without sufficient calcium, tomatoes end up with blossom end rot. The tomatoes look healthy enough until they actually fruit, and then as they swell and ripen, you'll find the bottom of each tomato, where the flower was attached, turns dark brown, sinks a bit, and gets weird and leathery. This is a direct result of calcium deficiency and can be caused by inconsistent watering or a lack of calcium in the soil, or some combination of both. It's very common, but also preventable.
Lots of vegetable fertilizers contain some amount of calcium, such as Jobe's Organics Granular Garden Fertilizer. Bonemeal can also be a good source of calcium, but it can take a few months to break down, so you will need to add it to the soil or compost heap ahead of time. While ensuring that there is plenty of calcium available, keep in mind that consistent watering (which we will talk about more below) is the only way to ensure that your tomatoes can adequately take up that calcium and move it from the roots into the stems, leaves, and fruit.
Enrich the planting area with compost before transplanting
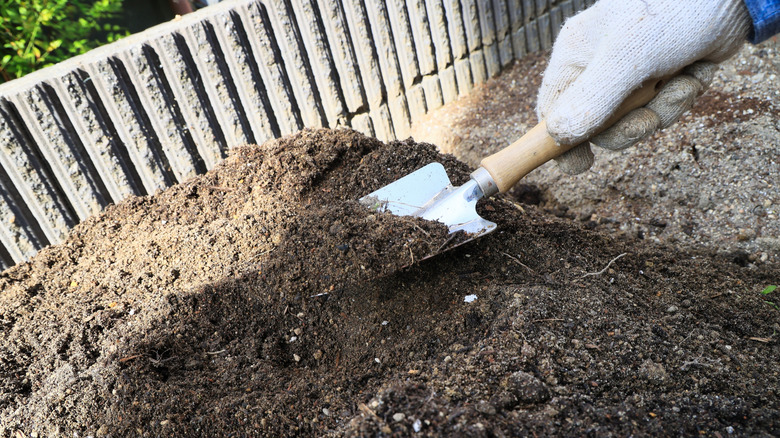
Tomatoes are both hungry and thirsty. They like steady moisture, but they also like lots and lots of nutrients. I get my tomatoes off to a good start by adding well-rotted manure or beautifully rich, finished compost into the planting area along with my powdered milk. I am generous with the amount of compost I use because it adds nutrients, helps to improve drainage and open up compacted soil, and this, in turn, increases air flow and root penetration.
Place the compost or rotted manure into the bottom of the trench, then add your powdered milk and mix in a tiny bit more compost, and plant your tomato directly on the top. If you're starting with poor or depleted soil, this is a particularly important step for successful tomato plants. Just make sure you never use fresh or partially composted manure as it can be too strong for your plants and can burn the roots. Plus, you may introduce pathogens. It's also important if using manure that you know where it came from, as some manures can still carry persistent herbicides that will very quickly kill your tomato plants.
Plant tomatoes deeply, or even better, sideways
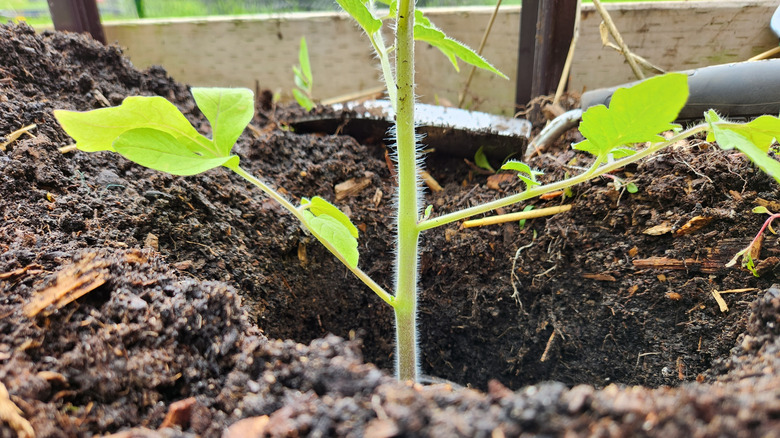
People always give me weird looks when I tell them to transplant tomatoes on their sides. But this is a proven tomato-growing technique. Tomatoes can form roots anywhere along their stem, particularly if that stem is buried or touching the soil. Therefore, planting tomatoes sideways in a trench rather than a hole can trigger a much bigger root system so they're able to take up nutrients from a wider space.
Strip the lowest leaves and bury the plant up to the first set of remaining leaves. That buried section will develop a substantial secondary root system, which better anchors the plant, making it sturdier and less prone to toppling, and gives it access to more water and nutrients. You can get the same effect by digging a deep hole and planting the transplant vertically, but I prefer the trench method as I find the horizontal roots provide better anchoring and stability than a single vertical column.
Prevent damping off before it takes hold
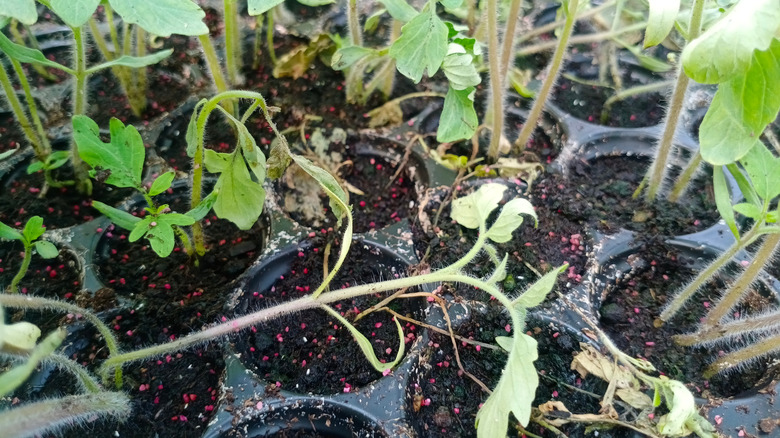
Damping off is the reason many people choose to buy transplants rather than growing their tomatoes from seed. It's caused by a number of soil-borne fungal pathogens that rot stems at soil level and kill the seedlings outright. They usually just collapse overnight, and you walk into the greenhouse to a scene of utter devastation. Once you've got damping off fungus, there's no cure, so you need to prevent it from taking hold in the first place.
Firstly, get in the habit of good greenhouse hygiene. Make sure you use fresh sterile seed starting mix rather than using old compost. I also strongly recommend thoroughly cleaning all tools, pots, and seed starting trays and letting them dry. If you use a propagator, remember to clean the lid too. It's also a good idea to give your greenhouse a thorough clean at the end of every season, including any greenhouse staging.
To further combat damping off, water seedlings from below by using shallow water baths or wicks and capillary matting. I add cold chamomile tea to my water at each watering, then I sprinkle a very light dusting of cinnamon powder over the surface of the soil. Both chamomile and cinnamon have anti-fungal properties, and many organic growers have found that these two methods in particular are very good for combating damping off fungus. Make sure your greenhouse has good airflow, too, and that seedlings aren't overcrowded. Aim to keep the surface of the soil dryish, not desiccated, but not so moist that it encourages fungal growth.
Pinch off the first flower cluster on newly transplanted seedlings
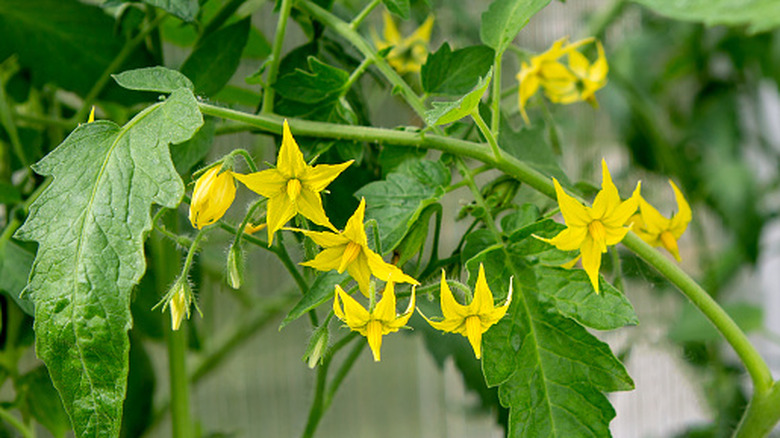
Yes, I know that pinching off the first flower clusters seems counterintuitive. You probably assume that every flower is valuable, and that every bloom you cut off is one less tomato you get. However, in reality, pinching off those first flowers is beneficial long-term. With a young or newly transplanted tomato plant, you don't want it to push resources into flowering and fruiting before it has developed a sufficient root system. Letting the plant rush to fruit while it still has an immature base gives you smaller yields overall and makes the plant more vulnerable to stress and ill health later in the season.
By removing the first flower cluster, you tell the plant to redirect its energy into root development for another couple of weeks. This gives your tomato plant a better chance of establishing a large, robust root system, helping to bring food and water into the leaves and tissues. After transplants are sufficiently established in their final location, you can then leave the next set of flowers that appear.
Space plants for airflow, not maximum number of bushes
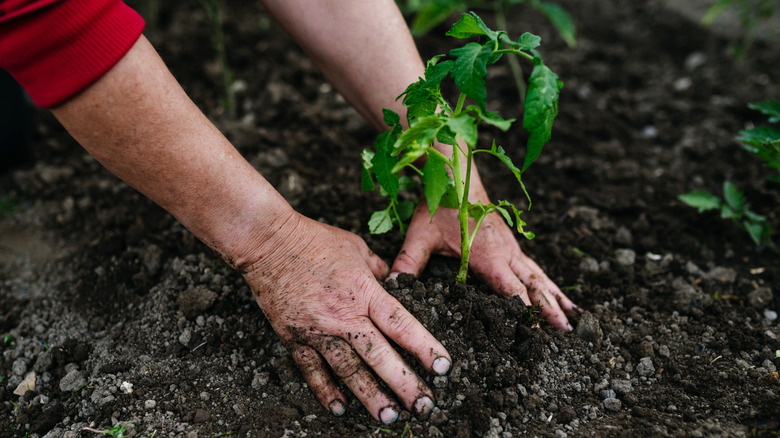
I understand the urge to cram as many plants into the bed as possible, but it rarely works and is particularly harmful to tomatoes, as you'll ultimately limit air flow. Tomato plants need space. Although they are small when you transplant them, even compact bush varieties need several feet to mature into. If you crowd the plants, you trap moisture between them and raise the humidity, which makes tomatoes much more likely to be hit with blight, or leaf spot, or some other fungal disease that thrives in warm, damp spaces.
Leave 2-3 feet between indeterminate varieties, and extra if you are growing them in larger cages and planning to not prune heavily. Determinate bush types need a little less room, but at least 2 feet between plants is still a good planting plan. You are better off growing two well-spaced tomato plants and maintaining them carefully, rather than three or four crowded ones, as you will get a larger, healthier crop.
Set up ollas at planting time
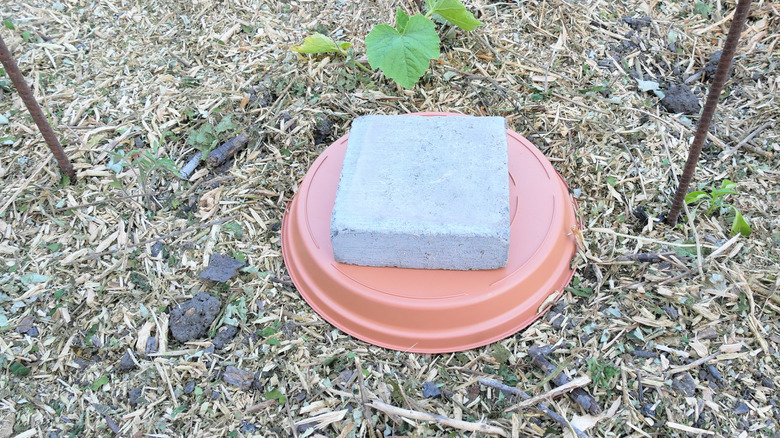
An olla is basically an unglazed terracotta container with a lid. You bury it in the ground between your plants, fill it with water, and pop the lid on. As the soil around it dries out, the porous clay walls of the olla allow water to slowly seep through to keep the soil moist but not sodden. I'm a little obsessed with ollas, and I use them all over my vegetable beds. It's such a simple and elegant option for creating a low-maintenance tomato garden. I don't need to worry about drip lines or where I'm digging for fear of hitting a buried soaker hose — or how to make sure that my plants get ample water when it's dry but not too much water when conditions are already wet. This is particularly important for tomatoes because they don't like having constantly soaking roots, but they struggle with dry conditions too. Additionally, tomato plants really don't like getting bone-dry, followed by receiving lots of water, and being left to fully dry out again, before receiving another huge water dump. To avoid blossom end rot, they need consistency, and ollas are my favorite solution to this problem.
You want to bury the olla at the same time as you transplant the young tomatoes. That way, you're not destroying the root zones of established plants. The neck needs to sit at or just above the soil surface so it's easy to refill, and don't forget to replace the lid so no small animals actually accidentally fall in and drown. Ollas are quite widely available these days — you can even pick up options on Amazon, such as these Srapwati 30-ounce ollas. You can also make a DIY olla with an unglazed terracotta pot and a reasonably heavy lid. If the pot has a drainage hole, just cover it with a ceramic tile or a large pebble or rock to stop the water from running straight out of the bottom. This functions in exactly the same way as a specifically purchased olla. It just may not look quite as sleek and neat.
Strip the lower third of foliage throughout the season
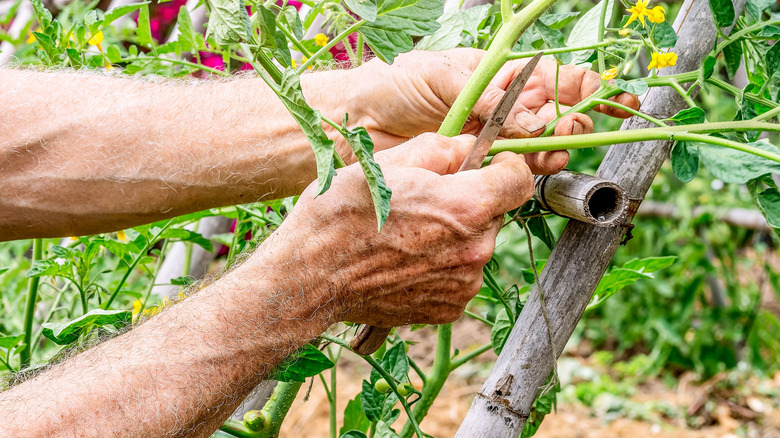
Many common plant diseases you don't want infecting your tomato plants are carried in the soil. Some blights and wilts live in the soil, and when water hits the ground, infected soil particles splash up onto the lower leaves of tomato plants. They then infect those leaves and travel upwards through the rest of the plant.
Wherever possible, I always recommend starting with cultural control in the form of prevention. In the case of soil-borne pathogens, the easiest method is stripping the lower leaves from the bottom third of tomato plants as they grow. Try and keep the lowest foliage around a foot off the ground. Just be sure to cleanly snip the leaves off rather than tearing them and damaging the stem. Stripping these lower leaves reduces the chance of soil contact with the foliage, limiting the risk of infection. This habit, combined with mulching around the base to further reduce splashing, is your best defense against soil-borne plant pathogens.
Check the undersides of leaves twice a week
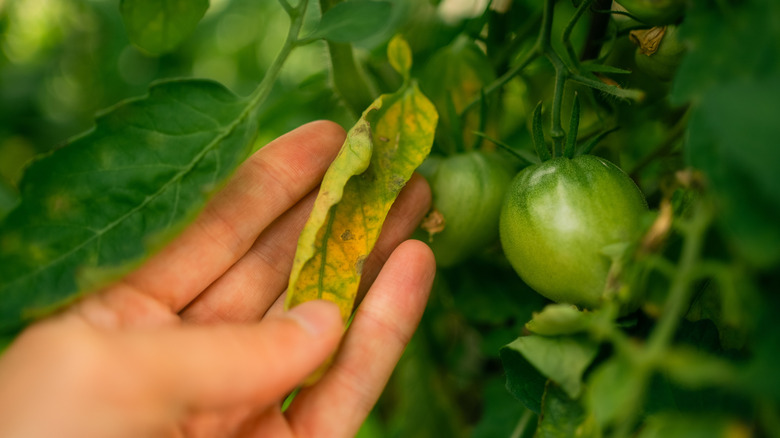
There are an awful lot of pests that really like tomatoes. And there are a lot of diseases that can take hold quickly. Even if you do everything right, you can't always prevent an infection or an infestation, but you can limit the damage by catching it early. Get into the habit of checking your plants every time you go outside to water them. There are plenty of ways to get rid of tomato hornworms and other pests, but you can't take action if you don't know you have a problem. Even if you're using ollas, you'll need to top them up a couple of times a week. When you do so, check your plants over for signs of problems. Things like aphids, spider mites, and tomato hornworm eggs, as well as whitefly colonies, usually take up residence on the underside of leaves, in the joints between stems and branches, and on new tender growth.
You will need to gently, physically turn the leaves over and look closely at stem junctions for clusters of tiny eggs, juvenile or adult insects, or droppings. These tender and delicate places are also where you're likely to spot signs of disease. If you do spot a problem early, this gives you the best chance to identify and rectify it before the pest or disease spreads and causes significant damage. If you're worried your plants have already contracted an issue, here's a guide on 10 common garden tomato diseases and problems, and tips for prevention. If you're looking for a natural pesticide option, here's why neem oil is a simple and affordable solution that can safeguard tomato plants from pests. You can also try insecticidal soap, or even dislodge pests like aphids with a blast of water from the hose.