Woman Uses Simple Paint To DIY Faux Wallpaper That Looks Beautiful On A Budget
Are you in the mood to revamp areas in your home that feel dull or lackluster? If so, you may find yourself scouring the internet for DIY projects that can give your space new life. Popular options include adding trim or paneling, changing out hardware, or even refinishing the floor. However, there is another clever, budget-friendly interior decorating hack to revamp your space and give it a fresh new feel.
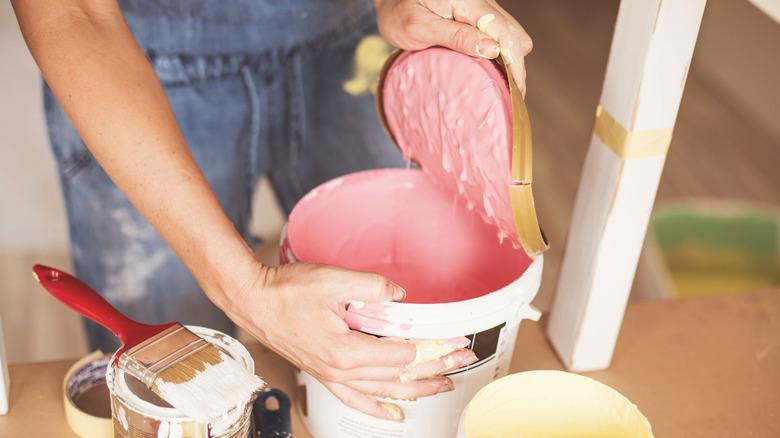
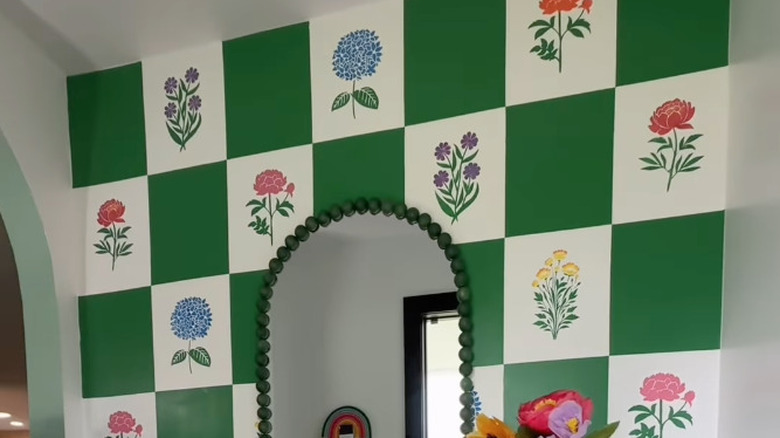
Rather than purchasing brand new, costly rolls of wallpaper to beautify her walls, content creator @luciamallea instead employs simple painter's tape, paint, and stencils to craft her own bespoke faux wallpaper. By sectioning out a grid on the wall using the tape, she first paints alternating squares to create a checkerboard pattern. Then, she uses stencils to fill the non-painted squares with floral designs. And voila! She has a showstopping wall that likely cost much less than many wallpaper installation options.
One key benefit of this fun project is that it is entirely customizable. While the creator uses green paint and a mixture of pinks, blues, and yellows for the flowers, you can easily change out these colors for ones that are better suited to your own personal design tastes. For example, if your home is decorated in an English cottage design, you could opt for muted neutrals and softer pastels which bring the charm of a cottage garden inside. Alternatively, a midcentury home might benefit from this design done in deep, rich jewel tones. Whatever your style, let's explore how you can do this clever DIY faux wallpaper project in your own home.
Creating your own faux painted wallpaper
Before you begin taping and painting the walls in your home, it is important to first think carefully about how the tape should be arranged. If you simply tape vertical lines and cross them with horizontal ones, you will end up with painted squares that are not connected at the corners. If you don't mind this and would prefer to have a bit less of a checkerboard look, then you can go ahead and stick with that method. However, if you want the painted squares to be touching on each corner, you need to move the tape outward on every other box to get rid of the gaps in between.
Once you have your checkerboard design taped and painted, you can then begin with your stencils. These can be found at affordable prices from discount retail stores or online. Keep in mind that you are not restricted to only using floral stencils, though those are some of the most common designs. You could instead opt for a geometric, celestial, or abstract design, depending on the themes which are already present in your existing decor.
When the paint has dried and the stencils and tape have been removed, you can then think about how to style your furniture and decor around your new eye-catching faux wallpaper. Because this is a relatively full, busy design, you may want to keep clutter to a minimum in order to avoid overwhelming the space. However, if you are a fan of a maximalist decor style, you could opt to emphasize the stencils and checkerboard patterns with plenty of matching pieces to create a frenzy of visual interest.