Turn An Old Kitchen Cabinet Into Clever Hidden Bathroom Storage
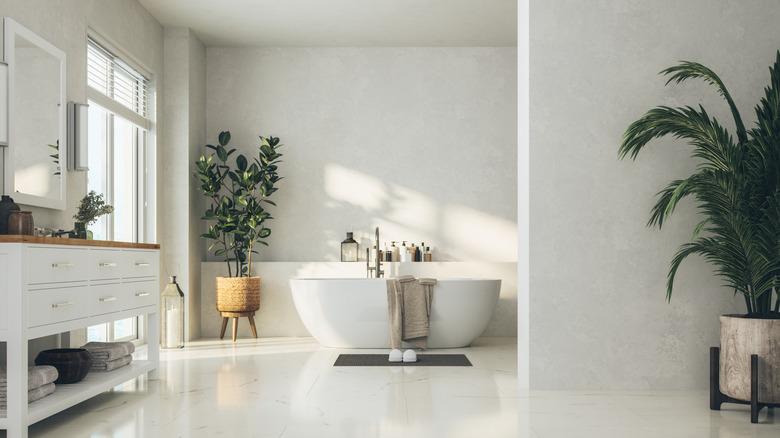
Dead space inside a home is nothing more than wasted potential, especially in a small or high-functioning bathroom. If your bathroom includes a washer and dryer alongside standard fixtures, every square inch matters. Instead of letting an empty wall cavity behind a shower or next to a sink go unused, you can use that space to install an old kitchen cabinet. This can become your budget-friendly piece of furniture that saves you storage space. Additionally, hiding it with wallpaper and other accessories creates a completely hidden storage unit. You can then use this unit to store bulky items like large detergent jugs, extra towels, and cleaning supplies.
The main piece you need for this DIY project is a kitchen base cabinet. The cabinet can have one or multiple drawers, which you can customize later. What matters most is picking a unit that fits inside your unused space. Measure the length, width, and depth of the cavity, and find a cabinet that fits those dimensions. To minimize the cost of buying a new cabinet, check local thrift store options or online marketplaces.
Aside from the cabinet, grab a sheet of quality plywood to build out the wall around the storage unit and its door. Moreover, to ensure everything sits level, keep some standard framing lumber and wood shims on hand. You will also need a handsaw, wood screws, sandpaper, wood filler, and primer for assembly and finishing. When selecting a door handle, you can choose a towel bar instead to double as a towel rack.
How to create hidden storage for your bathroom using a kitchen cabinet
How you build this project depends entirely on the type of cabinet you find. If you manage to source a single-drawer pull-out cabinet that fits your wall space, your modification work will be minimal. This is because you won't need to remove the slides or the dividers to create a single drawer.
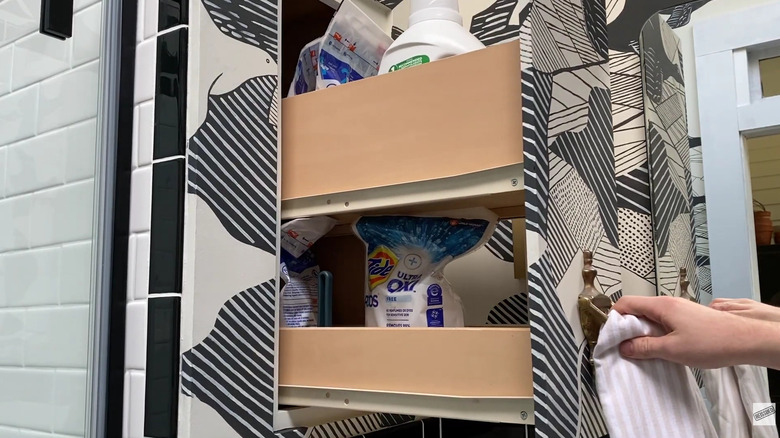
If you have a multipledrawer cabinet, start by removing the drawers. Use an oscillating multi-tool or a handsaw to cut out the horizontal wooden divider bars inside the cabinet frame. Removing these bars opens up the entire inside of the cabinet, creating a tall, continuous sliding shelf that can easily hold large bottles. Once the inside is cleared out, you should unscrew the upper drawer slides to create a large open drawer. You can do this for the lower slide as well if you want one continuous drawer without shelves. Keep the middle slides, as those will be reattached to the door. After sanding and applying wood filler to repair cracks, you should also seal and waterproof the exposed solid wood with an oil-based polyurethane sealer. Oil-based sealers are highly moisture-resistant to help increase the durability of your hidden cabinet.
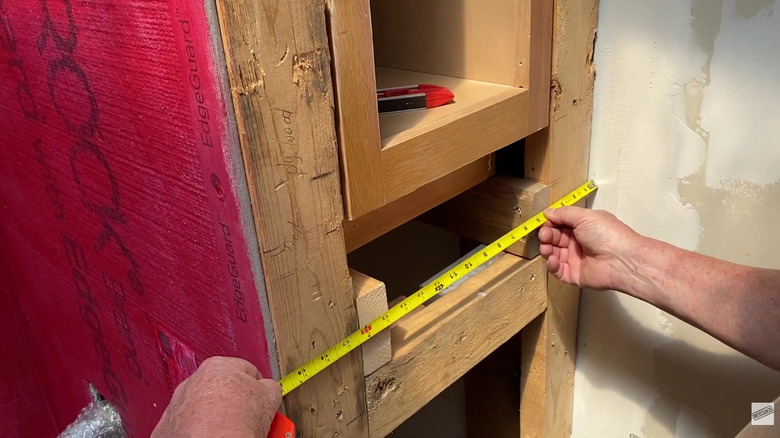
Once you're done, use framing lumber to build a sturdy support platform for the cabinet to rest on. Measure and cut your plywood sheet to fit the entire wall opening. Using a pencil, measure a rectangular shape in the center of the plywood sheet. This will become the cabinet door. Carefully cut it using a saw. Finally, attach the door back to the drawer with screws and install the door handle.
How to navigate mistakes and achieve a beautiful finish
Getting a perfectly hidden look requires avoiding a few common DIY mistakes that can easily ruin your hard work. One of the biggest mistakes everyone makes when painting is skipping priming and sanding. This leaves with an uneven surface and a chipped cabinet. The second mistake that happens during painting is the temptation to take the plywood door to prime and paint it separately. However, this is a mistake; without being attached to a flat surface, moisture from the wet paint can cause the wood to warp, meaning the door will no longer fit into the wall opening. To prevent this, leave the door panel screwed in place on the cabinet tracks while you prime and paint it. If you're worried about not getting optimal results, repatch the doors and hardware separated after the first layer dries completely.
You also shouldn't paint your cabinet in a humid bathroom or a dusty place to avoid a streaky finish. Additionally, use wood filler to hide the screw heads and smooth out any rough edges. For the best camouflage, cover the entire wall and the hidden door with a busy wallpaper pattern. The detailed design will completely hide the tiny seam around the door, keeping your new storage space hidden. After applying the wallpaper and letting it dry, you can use a paper cutter and trace along the pattern on the edges to hide the seams. This is a clever hack to create a hidden space that blends seamlessly with the rest of the wall.