How To Easily Upcycle Plastic Lids Into A Functional Storage Shelf
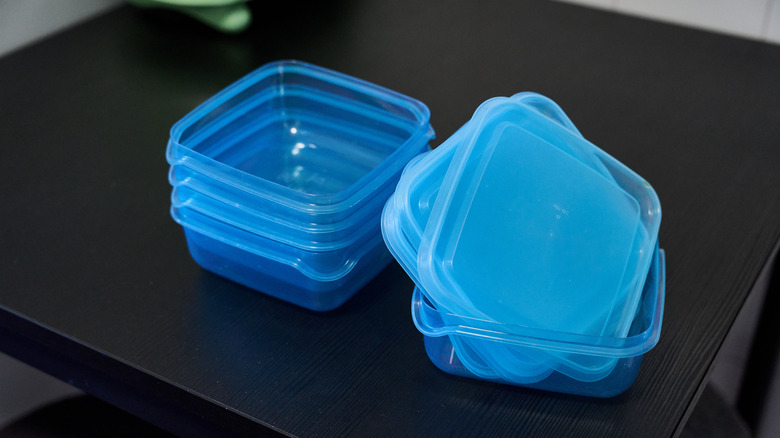
Do you often find that you have way more lids than the plastic containers that are supposed to accompany them? Good, don't throw them out. There are many genius ways to repurpose plastic container lids around your home. For example, you can get inspiration from Merry Craft on YouTube and turn those mystery lids into a functional two-tier storage shelf. This can easily become one of your favorite storage ideas for keeping small items organized without hogging space. And it's pretty straightforward to make — no complex skill needed, no power tools required. As a bonus, repurposing plastic that may otherwise end up in a landfill somewhere is a plus for the environment.
You can make multiples of these functional storage shelves and use them to organize the items that collect on your nightstand or bedroom dresser for a clutter-free living space. To make one of these, you'll need two round plastic food container lids of the same size. Then, find some cardboard, fabric, jute rope, and a rectangular table placemat that's firm but flexible (like the plastic woven kind). Tools-wise, get a pair of scissors and a hot glue gun with glue sticks. With that, you're all set to make the shelves and attach the side panels.
Turning plastic lids into a two-tier storage shelf: making the shelf panels
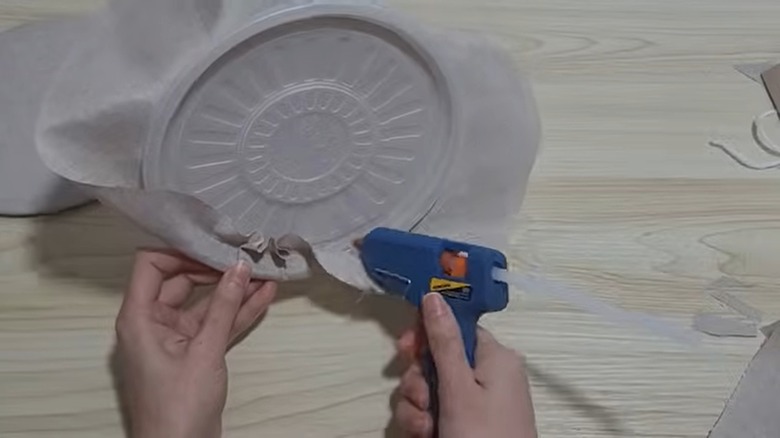
This is where the plastic lids in particular come in. To make them sturdier and add a bit of cushion, each lid will be reinforced with a piece of cardboard. First, snip off the lid's lip. Then, cut a cardboard circle that fits flush on the lid's inner circle (the space between the lid's outer grooves). Now, to wrap the cardboard with fabric, apply hot glue on one side and stick it on the fabric. Trim the fabric to form a circle, leaving about a 1-inch overhang all around. After that, make fringe snips on the overhanging fabric about an inch apart, and hot glue each strip to the back of the cardboard circle. Repeat the same process to wrap the plastic lids with fabric.
Wind up this step by bonding one fabric-wrapped lid to one fabric-wrapped piece of cardboard to form a sturdy circular shelf panel. Ensure the smooth sides are facing out to form the visible surfaces of the shelf. You can either use the same color of fabric for both the cardboard and the lids (as the creator did), or make it more interesting by using different colors so the bottoms of the shelves look different from the top sides.
Finally, for the finishing touches, glue one line of jute rope along the seam where the cardboard and lid meet. It will hide that joint and give the shelves a premium look. Again, you can use jute rope of a color that matches the fabric or one that beautifully contrasts with it.
Building the shelf's side panel and a few customization ideas
The next step is attaching a placemat around the shelves to form the side panel. Place the mat on a flat surface. Apply hot glue in a line along the length of the mat a few inches from the edge. Keep in mind that wherever you place your line of glue is where the shelf will sit. Next, curve the mat around one shelf panel so that it sticks to the line of glue. It should now look like a cylinder with one side open for accessing the shelf.
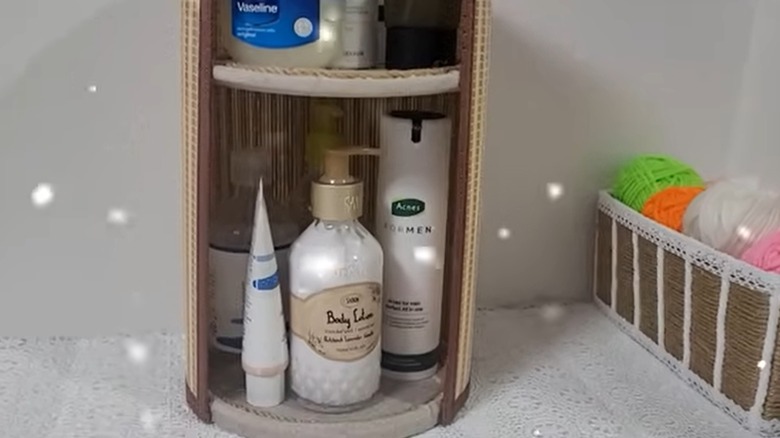
Now, stand the cylinder upright to attach the other shelf at the bottom. To do that, apply hot glue along the inside bottom edge of the curved wall. Then, press the second disc into the glue line until it's solid. Once the glue dries, you have your finished DIY storage shelf. It's portable, so you can place it wherever you need more storage in your home. On your dresser, you can use it to corral your creams, lotions, and other beauty products. Or, perhaps it can serve as one of those creative storage ideas for a clutter-free entryway by living on top of your console table. Keep in mind, however, that this may not be as sturdy as a wooden shelf, so avoid placing very heavy items on the upper portion.
To customize it, you can paint the placemat before gluing it to the shelf panels. You can also give this DIY shelf a rustic look by gluing jute twine all around the outer surface of the curved panel. And, to give it more utility, add small hooks on the mat's sides to hang your hair ties. keys, or brushes.