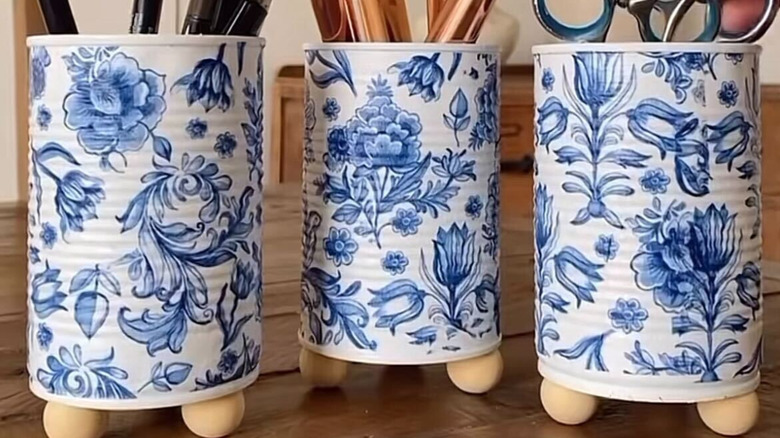
Turn Empty Soup Cans Into Floral Countertop Storage
Being able to reuse and repurpose everyday items that might otherwise end up in the trash feels like an accomplishment. Whether you are upcycling an old Altoids tin into a kitchen storage solution or transforming a soup can into something new, there are some interesting DIYs that will let you reduce how much you are throwing out without it feeling like you're just adding more clutter into the mix. If you like the idea of a DIY that takes an empty tin and turns it into a storage solution for any room in your home, then you might like an easy project from makinghomematter on TikTok. In this DIY, you're transforming empty soup cans and turning them into decorative containers that can be used to store everything from makeup brushes to pens and pencils.
While the original creator did a set of three soup can containers, you can do as many or as few as you want. In order to get started, you'll want cans that have had the labels removed and have been fully cleaned inside and out. You'll also need white paint, a decoupage medium (in the video, she used Matte Mod Podge), floral napkins of your choice, paint brushes, large wooden beads, and hot glue. For the paint, you'll want to use either a chalk paint or an acrylic paint, as these will work best on the surface of the tin can.
How to turn your empty soup cans into decorative storage containers
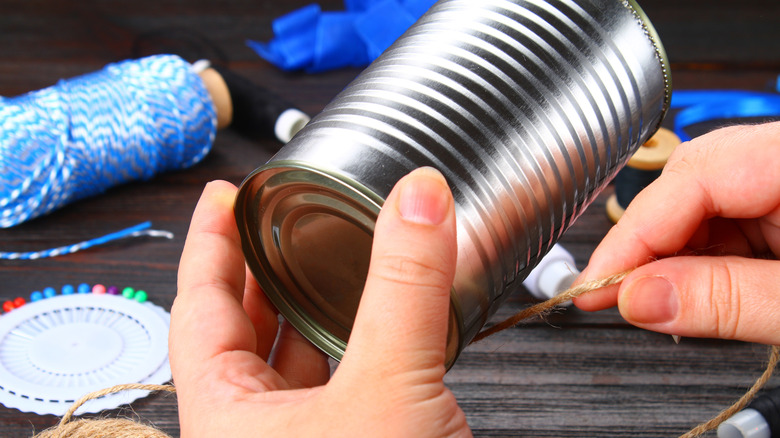
To start this project, make sure that the can surface is clean and devoid of any sticker residue left over from the label. Then you'll want to paint the exterior of your can with a coat of the white paint. Once the paint has dried, set the can aside and unfold the napkin you plan to decoupage onto the can, measure the napkin against the surface area and cut it down so that you can wrap it around the body of the can without it going over the edges. Next, you need to make sure that you remove the backing layers of the napkin, leaving behind just the layer with the design printed on it.
Once your napkin is prepped, paint a coating of decoupage medium over the surface of the painted can. You'll then carefully lay the napkin design side up on the can while the decoupage medium is still wet. The original creator took the time to press the napkin into the ridges of the can, which might be something you want to do for a clean, finished look. Allow the project to dry so that the napkin doesn't rip or bubble, and then go back over the napkin with another layer of the decoupage medium.
@makinghomematter ✨DIY Friday✨ After a few weeks of feeling unmotivated & struggling with creativity, i'm so happy to finally share a simple, affordable DIY project that anyone can try. Ever wonder what to do with used tin cans? Instead of tossing them out, why not turn them into something both beautiful & functional? This upcycling idea is the perfect solution for adding a touch of spring to your home while also creating stylish storage for all your little knick-knacks! All you need are some tin cans, Mod Podge, decorative napkins & wooden beads...super easy, budget-friendly & a great way to give everyday household items a new life! I absolutely love repurposing things that would otherwise be thrown away & transforming them into something unique. Let me know if you give this DIY a try & tag me in your creations! Happy crafting! ✂️✨ . . . . #creativereuse #creativeprojects #homediy #diyhomedecorating #découpage #decoupagenapkins #napkin #reuserecycle #trashtotreasure #makesomething #craftingideas #upcyclethathome #storagesolution #springhome #springhomedecor #springideas #springdecorating #countryhomestyle #countryhomedecor #herbgarden #diyidea #homereels #craftreels #diyreels #countryhomes #seasonaldecorating #myseasonalhome #diyhomedecorating #craftingtime #craftingfun
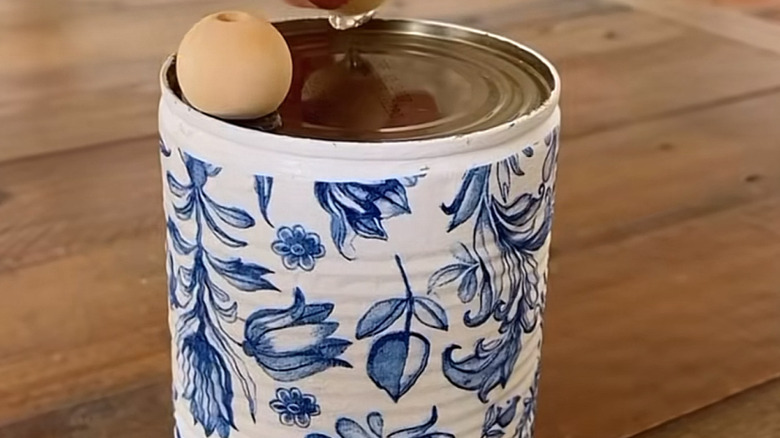
The final step of this project is to glue on the feet. For her cans, @makinghomematter glued three beads around the edge of the can to give it stability and a bit more height. Once everything is dry, it's time to put these cans to use.
Things to consider when making soup can storage containers
With DIY projects like this, you can easily upcycle a tin can into a stylish storage solution that can work for a number of things. However, there are a few things to consider when making these decorative storage cans. Be careful of sharp edges. If you're using a standard can opener, you may want to sand away any sharpness on the interior or exterior of the can with a fine grit sandpaper before you start this DIY project. A smooth-edge can opener can be a great tool to have on hand if you plan to upcycle tin cans. If you want a decorative tin that will look good for a long time, you'll also want to make sure that you properly prep the can if you're using acrylic paint. Use fine grit sand paper on the exterior of the can to lightly rough up the surface and then clean away any dust and debris left behind. This will give you a better surface to hold the paint.
When it comes to creative ways to use decoupage in your home, being able to reuse what would otherwise be thrown in the trash definitely makes the list. This project gives you a decorative container that can be used in multiple ways. The decorated tin can be used as a small planter as long as you seal the exterior with a waterproof sealer, such as Polyvine Heavy Duty Varnish. Plus, this tin can be used for faux flower arrangements or as storage for smaller items in a bathroom, the kitchen, or an office.