Don't Throw Away That Detergent Container: Use It For A Cute DIY Planter

We may receive a commission on purchases made from links.
Whether you're new to caring for plants or a connoisseur of lush greenery, at some point, you will appreciate the convenience of having extra planter pots stored away somewhere when you need them ... and in various sizes. Fortunately, if you're in a pinch and need a planter ASAP, you might not have to head to the store. That's because your next plant pot could already be somewhere in your home, as there are many common household items you can turn into beautiful planters. Thanks to YouTuber No1 Garden, this includes laundry detergent containers.
While an empty detergent bottle may not seem like a starting point for stylish plant décor, this DIY shows how easy it can be to turn one into a fun, quirky homemade planter. The project doesn't need a large budget or long list of supplies. All you need to make it happen is your detergent container(s), some acrylic paint, a brush, spray paint, scissors, an X-ACTO knife, a Sharpie, a bottle cap, and an adhesive, such as Y'allCanDiy plastic glue or a hot glue gun.
Prepping and cutting the detergent planter
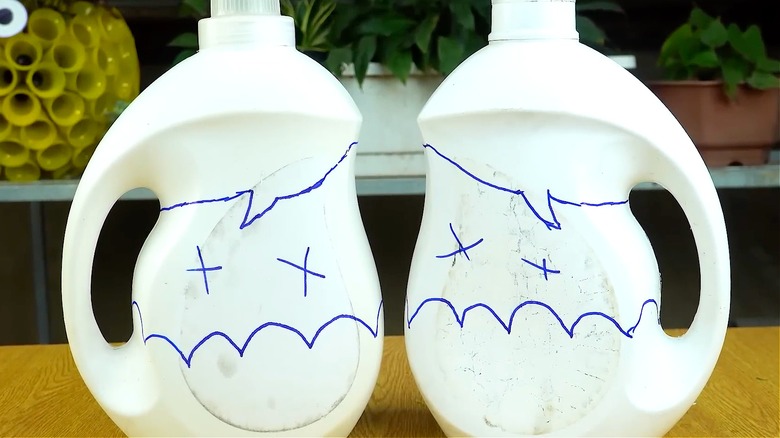
Your first step is to clean out your detergent container thoroughly, as it'll soon house some plants. After this, the next step is to create a guide for your cut lines. In No1 Garden's design, note that the cut line dips down in a slant across the upper section of the container, creating a wave shape on the front. The lower section of the container, meanwhile, has a scalloped, wave-like pattern across it. Essentially, you're going to cut out the bottle's entire middle, leaving only the handle intact. If you have trouble sketching the wave pattern, consider using a stencil.
After creating your guide lines, use an X-ACTO knife to start the guide line cut, then alternate with your scissors to cut away the rest of the container. Once you're finished, remove the marker lines with a soapy cloth or a little rubbing alcohol. Now it's time to create a few drainage holes. You can use a soldering pen for this step if you have one. If not, a sharp object such as the X-ACTO knife, scissors, or a paring knife will work as well. (Learn a simple hack for choosing a good plant pot.)
Customizing your detergent bottle planter
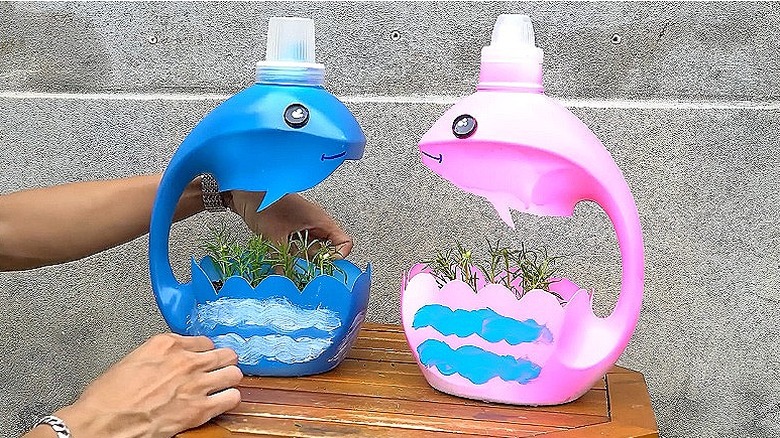
After you've made three drainage holes or so, start to make the planter(s) your own. You could use No1 Garden's idea and give the planter a coat of spray paint, paint on some ocean ripples, and create a cute, smiling dolphin face with a shining eye made from a black bottle cap. Alternatively, you could simply decorate the containers with glued-on embellishments like flowers, beads, or felt cutouts.
Or, depending on the shape of your detergent container, you could go another way, like turning the bottle into a hanging planter, either strung up or mounted to a wall, fence, or other vertical surface. To do so, start back at Step 2, but flip the container upside down, and cut off the entire bottom to create a pot. Then, paint a face on the side of the bottle, with the handle being the nose. Thread some twine through the top sides of the new planter to hang it up, or mount it through the back. (Don't forget to make some drainage holes on the bottom, too.)
However you decide to cut and design your laundry detergent bottle, the takeaway is that this DIY offers an easy way to decorate your home with plants in pots you make on your own. And don't forget that if used indoors, the flowers and plants can be artificial, as well. Just "plant" them right in the soil for a natural look. (Check out these unique ways to decorate your home with plants.)