

Turn An Old Surfboard Into A Stylish Coffee Table With A Clever DIY
We may receive a commission on purchases made from links.
It seems that anything, from old doors and suitcases to wine crates or stacks of books, can be used to make creative tables for a living room. Even a surfboard! Para surfer Parker Olenick shared on Instagram his cool DIY for a unique coffee table statement piece – featuring one of his first custom surfboards as a table topper. And it's amazing.
To tackle this cool project, you'll just need some pre-cut lumber and a few other supplies, along with your used surfboard, to easily turn your living room into a beachy escape. You can keep lumber costs down by using pine boards for your base. The number of pieces needed will depend on your board's size and your personal style.
The build has three basic components: a top frame made from 1-by-4-inch wood pieces, four table legs cut from 2-by-2-inch posts, and a box stretcher base built with 1-by-2-inch thick strips (example size estimates). In his supplies list, Olenick listed a 10-foot plank measuring 1 inch by 3 inches. Again, it will depend on what your board is like, and how you want your table to look.
Other items needed include sandpaper, a saw, a box of 3-inch wood screws, a tube of clear silicone, epoxy adhesive, some wood stain, and an electric drill, like the FADAKWALT Cordless Drill (available on Amazon for $22).
Building a surfboard coffee table
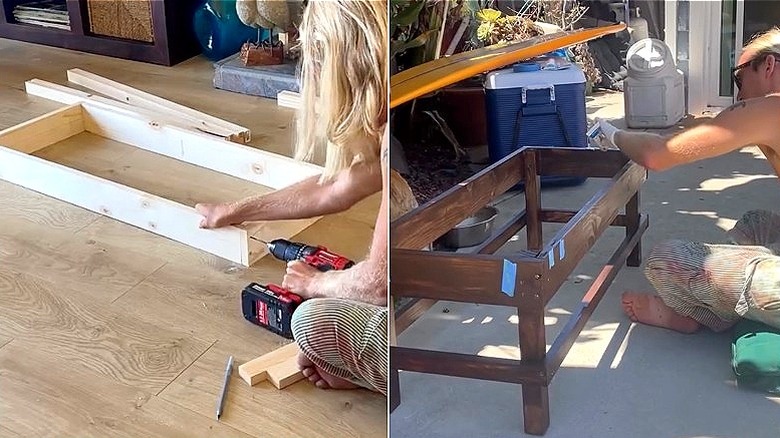
The first step is building the top of the table's base. To do this, saw your wider wood pieces (e.g., 1 inch by 4 inches) to form a rectangle. Then, sit these pieces on their edges and screw them together at the corners to form a rectangular border. This is the surface where the surfboard will rest. Once that's done, saw the 2-by-2-inch wood posts to the size you want, and screw the four legs onto the base's inner corners.
Next, saw the box stretcher pieces to size, which will match the top base, and then screw those around the outer perimeter of the lower legs to tie everything together. And just like that, your base is complete. The next step is prepping and staining it. A worn, weathered or vintage stain may pair well with the surfboard — or you can go bold and choose a dark stain. Make sure your surfboard is clean, free of fins, and lightly sanded on the areas where it'll make contact with the table base.
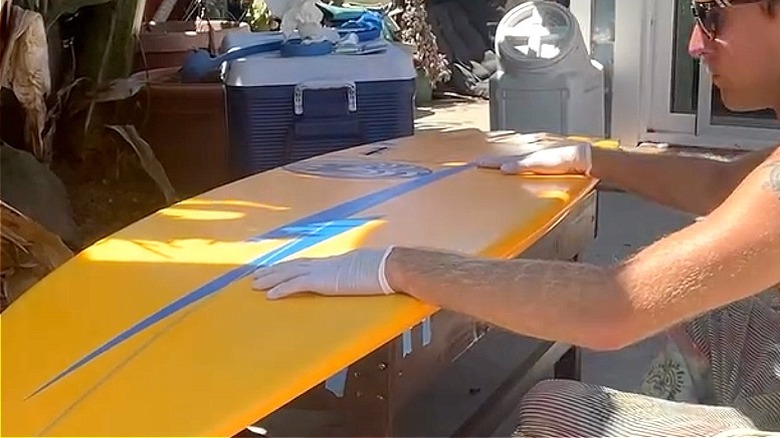
After doing a test fit, add a bead of adhesive along the top of the base, then place your surfboard face down on the base. For a solid bond, place a heavy object like a filled cooler or stack of books on top while the adhesive cures. Wrap things up by filling the surfboard's fin boxes with sealant — this will prevent them from being riddled with dust and debris.
Ways to customize your surfboard coffee table
Before you sit back, beaming with pride at your new surfboard coffee table design, remember that there's plenty of room to make this project even more custom-cool. For example, if you wanted to beef up its functionality, consider adding a lower shelf to the design. You'd only need one additional piece of wood (like a ½-inch thick board), and it shouldn't take long to do — just be sure to get its measurements correct so that it fits snugly against the inner perimeter of the legs.
The shelf should be positioned right about where the box stretcher sits on the table legs. It can be used to lean more into the beach-style vibes by topping it with items like a rattan basket, small dried palm leaves, or perhaps even sand-filled glasses. Or, consider covering the surfboard and other areas on the table with coastal-themed stickers for a playful, lived-in feel.
Think tiki motifs, sea turtles, and those ever-popular retro sunset decals — in other words, the things that you may expect to see plastered on an actual surfboard when visiting the beach. It's these little decorative touches that can really make your coffee table quite the hit. (Here's another DIY coffee table that looks more unique than what you can get in stores.)