

Ditch The Floating Shelf: The Creative Way To Add Storage To The Bathroom
We may receive a commission on purchases made from links.
It seems like floating shelves get all the credit when it comes to cool storage solutions for small spaces like bathrooms. They do their job well, freeing up space without requiring you to knock down walls or spend hundreds or even thousands of dollars on renovations. However, if you're looking for a genius solution to add extra counter space to your bathroom, there's one DIY idea that's simple and affordable. YouTuber Jay Munee DIY has the tip you need to help keep your bathroom clutter-free: a chic, gold-hued cabinet made using mini plastic crates with picture frame doors. The space-saving cabinet can be used to house everything from cotton balls and makeup to shampoo and hair products.
To get started on this boutique-looking yet budget-friendly project, you'll need nine mini plastic crates, such as this 12-pack of Sterilite Mini Crate, Stackable Plastic Storage Bins for about $33 or this pair of Tobeso-Nuoze Small Pastel Plastic Storage Bins for around $13. Get nine picture frames that fit neatly within the dimensions (length and width) of the crates to serve as doors. Additional materials you'll need for the project include a plastic toilet paper holder, self-adhesive wall hooks, and gold thumbtacks. Other supplies include a bag of zip ties, 18 1-inch hinges, Towjug Self-Adhesive Magnetic Tape, and a can of waterproof metallic gold spray paint. This project also calls for a waterproof adhesive, such as E6000, along with a hot glue gun.
Building a bathroom cabinet with mini plastic crates
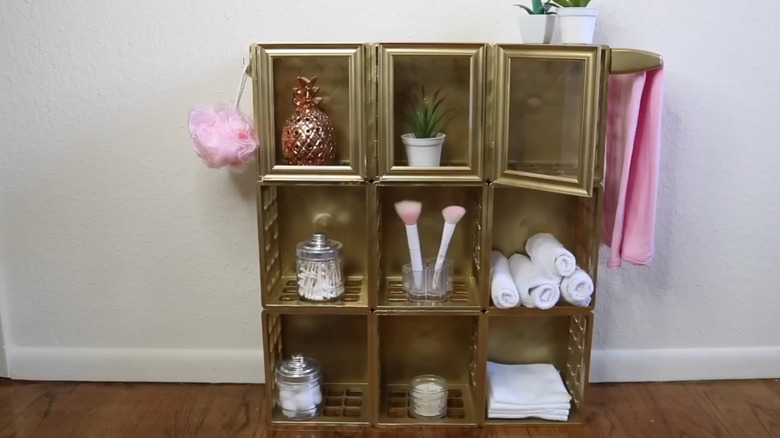
This DIY storage system is easy to build, but the project does have multiple steps. Start by gathering everything in one place so you don't have to stop halfway through the process to get more supplies. Next, disassemble the picture frames by removing the fasteners with pliers. You can discard the wood or cardboard backing, but set the transparent glass or plastic insert to one side. Add E6000 to two of the 18 hinges and mount them to the left rim of one crate. Add glue to the top of the hinges and attach the frame. You can use masking tape to hold the frame in place while the glue cures. Repeat the process for all the remaining crates and frames.
After adding the doors to the crates, line up three crates side by side. Apply adhesive to both sides of the middle crate — again, you can clamp them together using masking tape until the glue dries. Repeat this process until you've created a three-by-three crate cabinet. Add the adhesive wall hooks and toilet paper holder to the sides of your cabinet for more storage options.
Take the cabinet outside and apply at least two coats of gold spray paint. Once it dries to the touch, it's time to finish the doors. To ensure they'll stay shut when closed, add a small strip of magnetic tape to the lower inside corner of each picture frame, then press three metal thumbtacks into the opposing spot on the plastic crates. The magnetic tape will attach to the tacks, holding the door closed. Then stick the glass or plastic panes back onto the inside of the picture frames using hot glue.
Customize your new mini plastic crate cabinet to fit your bathroom design
If you've been hunting for items you can use to organize your bathroom that won't cost a fortune, mini plastic crates are about to become your new favorite thing — not least because they're so easily customizable. This crate cabinet is a solid starting point for bathroom storage, but there's plenty of room to play around with the aesthetics and functionality. If you need, for example, more lighting in a dimly lit bathroom, you can get some Ahuledlight LED Puck Lights — a three-pack costs about $10 — and mount them inside the top of each cubby. They even come with a remote so you can turn them on and off with ease. This can save you the expense of electrical rewiring for built-in bathroom lighting.
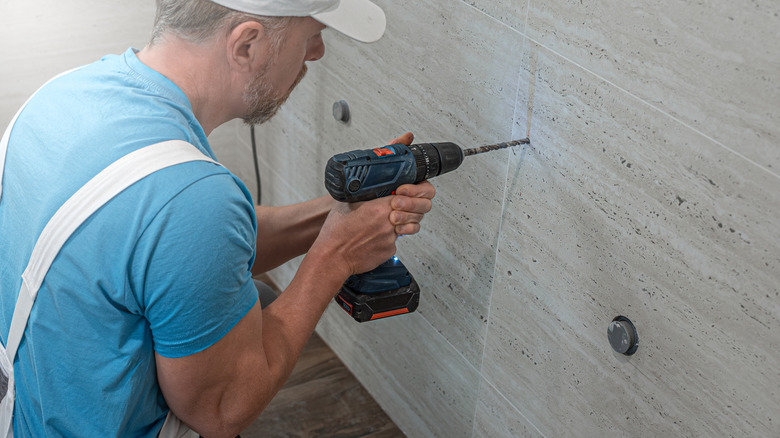
Don't want this cabinet taking up space on a small vanity countertop? Mount it to the wall by screwing it into a stud or using wall anchors. If you do decide to hang your creation on the wall, you're not limited to a rectangular or square shape — you can arrange the crates any way you wish, such as in a zigzag pattern. Replace the transparent glass in the picture frames with mirror glass for a window frame effect. You can also ditch the gold metallic spray paint and opt for Krylon General Purpose Stainless Steel Metallic Spray Paint instead. Pair this with a HighFree Black Steel Pipe Towel Ring and some Paoli Black Heavy-Duty Adhesive Wall Hooks for an industrial-loft aesthetic. Of course, you don't have to use metallic spray paint at all — choose any color that matches your existing interior palette.