

Upcycle An Empty Cookie Tin Into A Cheaper Bird Feeder That Keeps Seed Dry With A DIY
We may receive a commission on purchases made from links.
Attracting birds to your garden or yard can be done in a number of ways. You can welcome these backyard visitors by setting out a birdhouse for them to nest in, or offering them a cool drink with a water feature, like a bird bath. One of the best ways to almost guarantee that you'll see a few feathered friends in your yard is to add a bird feeder to the space. Sure, you can choose from several different types of bird feeders at your local pet store. If you're up for a fun DIY and looking to stretch your dollar a bit further, you can also make your own bird feeder with an unexpected item from your pantry: the cookie tin.
Yes, this beloved metal container for sweet treats can also double as a budget-friendly DIY feeder. The bottom of the tin works as the feeder tray, and the lid, which is attached by a metal spindle, works as a cover and baffle, keeping out rain and squirrels. This exposed-tray feeder style and its durable metal construction help it hold up well against outdoor elements. So, once you've polished off that last cookie, don't throw the container away.
To kick the project off, you'll need the following supplies: A metal cookie tin with a lid, a drill with ¼ and ⅛-inch bits, and a cupcake stand hardware kit. For this, something like the Happy Will Heavy Metal Cake Stand, which is available on Amazon for $8, will work well. Other items you'll need include a felt-tip marker, a couple of bottle corks or a thread spool (which is optional), a metal punch or a nail, a hammer, and a tape measure.
Steps to build your cookie-tin bird feeder
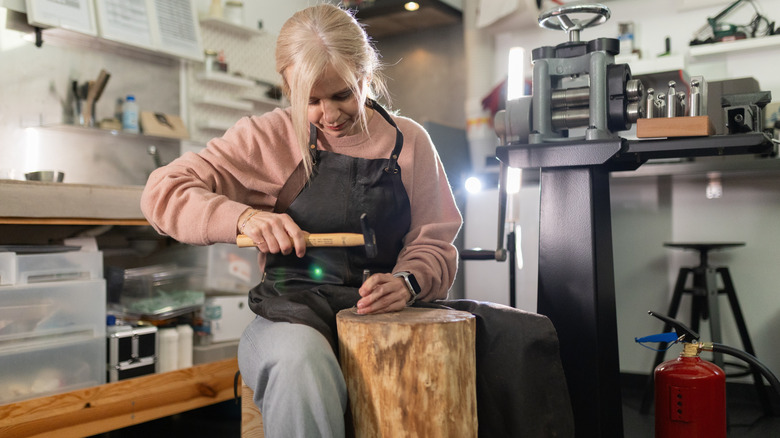
After gathering your supplies, make sure the tin container bottom and lid are clean and dry. Use your tape measure to locate the center point on both the inside of the lid and the tin. Use the marker to draw drill points on both pieces. Then, with the metal punch and hammer, make a small indentation at these points — this will prevent your drill from slipping when you create the pilot holes.
Next, use the ⅛-inch bit to create pilot holes at each spot, then follow this up with the ¼-inch bit to create a cleaner edge and widen the hole for the spindle. Your next step is drilling anywhere from 6 to 8 small ⅛-inch holes around the tin's bottom. These will serve as drainage holes, preventing mold from accumulating inside the feeder. The next few steps involve building and setting up the feeder's roof. Grab one of the screws and a plastic washer from the kit, and place them on the underside of the container, threading the screw up the center hole.
Screw a spindle onto that screw. Next, screw a second spindle on top of the first to give the roof enough height for birds to perch comfortably on the feeder. Add another washer on the second spindle, then place the lid on top. Place a plastic washer on top of the lid– after which, you can also optionally add the wooden spool. Screw on the handled spindle to complete the feeder, and then hang it up with your favorite birdseed mix.
Ways to create a custom look for the bird feeder
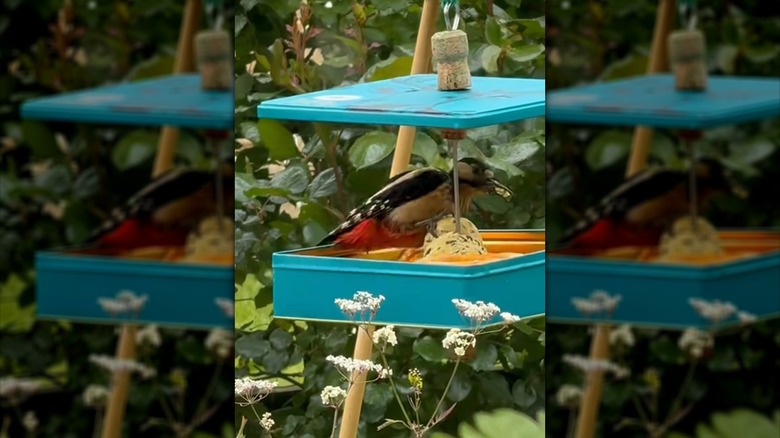
Mixing up the materials used for this feeder design can definitely give it a different vibe. For example, if you aren't able to purchase the cake stand spindles, you can use a couple of threaded eye bolts with nuts to thread through the tin container instead. Also, on the decor side, the corks or spools on the top and underside of the lid can be swapped out for threaded wooden or plastic beads if you want to give it a stylish touch.
Add a bit of style by placing strips of tape on the tin bottom and lid, then paint them with acrylic paint. You can also use chalk paint if you want to go for a rustic or farmhouse look. Of course, if you prefer, you can always paint the tin directly. If you go this route, prime it first or buy a paint/primer mix so that it doesn't peel or chip prematurely outdoors. For a more whimsical look, mount a plastic funnel on the tin lid, or consider a small terra cotta saucer or pot for a completely different look — just make sure that they have drainage holes.