

Not Onion Skins: The Berry You Can Use For A Bold Wood Stain

You probably own some wooden items whose natural appearance you wouldn't want to cover with synthetic stains or paints. Maybe it's your kids' toys or other baby items, or certain indoor furniture like your dining table. Well, if you want to preserve the wood's natural state but need to give it a facelift, go for blackberries. Youtuber Jeff of @TheRipeTomatoFarms for instance, stained his wooden raised garden beds with a beautiful blackberry stain that is so easy to make, you'll wish you had known this earlier. For this DIY wood stain idea, you only need a bowl of blackberries, concentrated vinegar, steel wool and just a little water. The process is fairly straightforward: boil, mash, mix, cool, let the mixture rest, and then apply the stain.
So, why are blackberries a great staining ingredient? Generally, dark berries (blackberries included) serve as kitchen staples you can turn into a natural wood stain because they contain something called anthocyanins. Anthocyanins are plant pigments found in dark berries, red onions, and many other fruits and vegetables. They're responsible for the vivid purple, blue, and red hues those plants display. And if you've gone blackberry picking or cooked with this fruit, you've probably had to deal with this pigment, in the form of stubborn stains on your clothing. When these pigments soak into porous materials like wood, they can leave behind a long-lasting natural stain. The blackberries produce a nice and soft purple-gray to bluish lavender stain that is an excellent alternative to synthetic wood stains.
How to turn blackberries into a beautiful organic wood stain
So how do you prepare your blackberry wood stain? First, harvest a bunch of blackberries and make use of those juicy and soft overripe ones first. If you do not have some nearby, you can buy fresh or frozen ones from the store. When it comes to the vinegar you'll use, keep in mind the acetic acid concentration difference between white vinegar and cleaning vinegar. You want concentrated 10% acetic acid vinegar for this DIY project, so go for cleaning vinegar or industrial vinegar. Then grab a piece of steel wool — you'll only need one pad for this project. Besides the supplies, you'll also need a nonreactive saucepan, a potato masher, a strainer, a large plastic container or jug, and a wooden spoon.
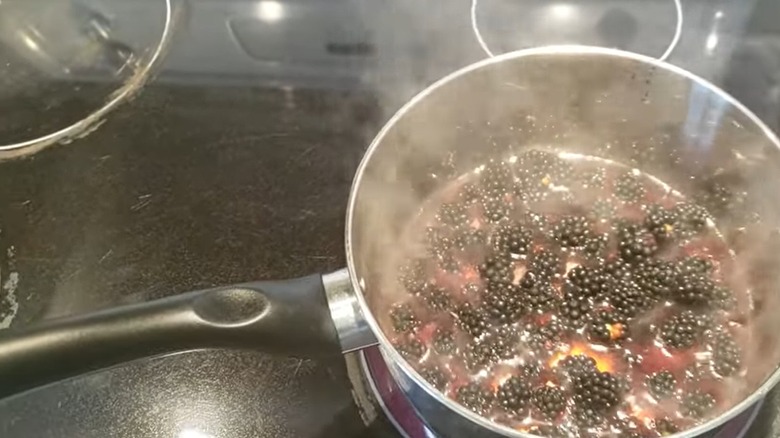
First, give your berries a quick rinse to remove dirt, leaves, or insects then add them to the saucepan. Pour in just about enough water to cover the berries. A ratio of one part berries to two parts water works great. Bring the mixture to a gentle boil, then reduce it to a simmer for about 30 minutes to extract the berry pigments. As they simmer, stay close to the pan as you may need to add a little bit more water if the berry jam begins to dry out. In the final 10 minutes take your potato masher and break up the berries to release more dye. When the time is up, take them off the fire and leave them to cool down. At this point, you can actually use the blackberry liquid as is to stain your wood. However, there's one last step that will make the stain more effective.
How to enhance the shade of your blackberry wood stain
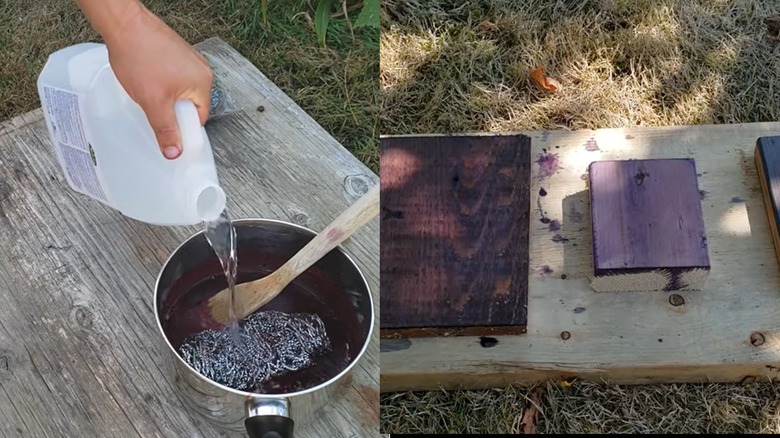
When the blackberry mixture is cool and safe to work with, make a simple iron mordant from steel wool and vinegar. A mordant helps modify the color and improve how well a natural stain bonds to the wood. Add the steel wool to the vinegar, then combine the iron solution with the blackberry mixture using roughly two parts vinegar to one part blackberry mixture into the pan. As the steel wool reacts with the vinegar, it forms an iron acetate solution that darkens and alters the blackberry pigment.
The iron mordant will deepen the berries' hues into a darker and richer shade while creating a deeper bond between the stain and the wood. And, just so you know, besides steel wool, you can also use iron filings or nails to achieve this same result. After that, leave the mixture to sit for 24 to 48 hours. Finally, give the mix a stir then pass it through a strainer to your jug to separate the pulp from the stain. That's it.
Now apply two or three coats of it on wood. One important tip to successfully use the wood stain is to prepare the wood by sanding it so the stain can set properly into the wood. Give each layer adequate time to dry before the next application. If the project will be exposed to the elements, apply a protective finish to help preserve both the wood and the stain. So, dab hemp oil on the wood for a natural matte finish or tung oil for a warm satin finish. For maximum durability, coat them with a nontoxic water-based polyurethane wood finish.