

DIY Acoustic Panel Artwork To Reduce Noise While Creating A Stylish Space

We may receive a commission on purchases made from links.
To make a living space look and feel good, you invest in the furniture, lighting, colors, and the trendiest home decor ideas. But one thing many people hardly think about is acoustics, yet it has a great impact on how you feel when you're in there. How sound bounces off the room walls, stops, or is absorbed into surfaces can either have a beautiful, calming feel or a noisy, stressful effect on the occupants. So in a bid to manage how sound moves in your space, what better way than to make your artwork double as acoustic paneling.
Acoustic panels are specialized boards that absorb sound in a space and help reduce the reverberation and echoes. But since your home isn't a studio, you don't want it to look like one by putting up the bare panels as-is, hence the DIY acoustic panel artwork. That means turning the panels into stylish works of art.
Basically, you add the foam panels to the back of a wall art you already have. The kind of art piece you use is critical. A painting on breathable canvas is the best option, not the framed kind that has glass at the front. And on the back, it should have the wooden stretcher frame that creates a depth (this is where the panels will sit). For the main part, try these Saiqiang Acoustic Foam Panels, which cost less than $15 on Amazon. You'll also need cardboard that's large enough to cover the entire back side of the art, a pair of scissors, tape, and heavy-duty adhesive.
How to turn a wall painting into stylish acoustic panels
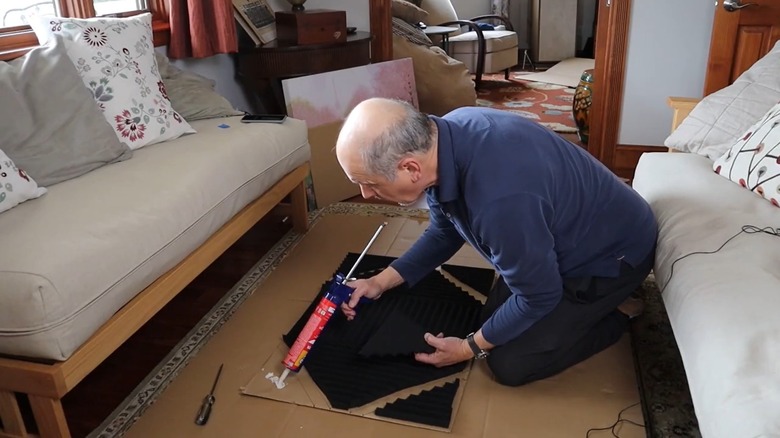
Begin by cutting the cardboard to fit snugly at the back of the painting's frame. Use a large, sharp scissors to make this process quick and easy. If there are any additional framing bars on the back of the painting, you'll need to mark them on the cardboard. This could be diagonal corner bars or a cross brace (horizontal and vertical bars that crisscross in the middle). These markings will help you know where to cut out the panels to make room for the framing.
With the cardboard ready, lay it on the floor or any flat surface and start arranging your acoustic foam panels on top. Remember to cut out the places where the wooden bars will pass. Once everything fits, one by one, glue the panels in place on the cardboard using construction adhesive like Liquid Nails.
Now place the cardboard at the back of the painting with the panels going between the canvas and the cardboard backing. Finally, secure it in place using tape along the edges. The DIY acoustic panel artwork is practically ready at this point and you can go ahead and hang it up. However, if you want this paneling to be more effective, add another layer of acoustic panels behind the painting to act as spacers. Simply glue in place a couple of foam panels to the back of the cardboard sheet. You can make several of these acoustic panel artworks and hang them all around the room and you'll notice sounds are calmer, just like in a studio.
Make this DIY acoustic panel artwork your own
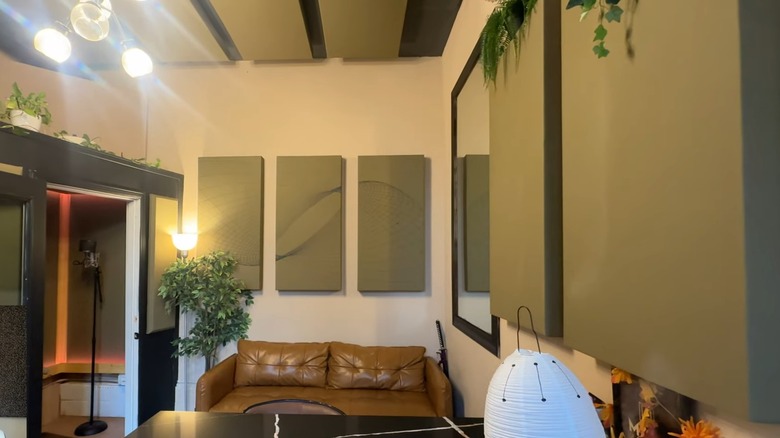
With DIY projects, there's always room for some customization, and this one is no different. For starters, instead of using artwork you really cherish or that's really expensive so you wouldn't want to spoil it in any way, why not use old pieces? Try some DIY wall art upcycles and use that as a front for the foam panels. Alternatively, make your own artwork from scratch by simply covering the panel using pretty breathable fabric and hang it up. That doesn't need any artsy skills apart from just wrapping and gluing things together. You can also use plain fabric and then make simple abstract artwork on it using paint.
So where exactly do you place your finished DIY acoustic panel artwork? The answer is anywhere you would usually hang up that painting. For example, these can be pieces of artwork that are perfect for your entryway while also removing any hallway echoes. You can also display several of them in your living room and basically any other room in your home. And on the idea of covering the panels with simple plain fabric, you could creatively position these on the ceiling to serve as acoustic ceiling tiles for your home without sacrificing style.