

Good-Bye Traditional Jack-O-Lanterns: DIY A Cute Alternative From This Surprising Ingredient

We may receive a commission on purchases made from links.
Legend has it that the original jack-o'-lanterns of the 19th and early 20th centuries weren't made from pumpkins at all: They were created by carving into turnips and other root vegetables. (Gotta keep those restless spirits at bay.) In the years since then, these throwbacks from Samhain's past have been made out of round orange squash, plastic, wood, and now, papercrete, a lightweight concrete that's common in the DIY world. Invented in 1928, papercrete is user-friendly, cheap to make, and as its name suggests, made from the most unlikely material possible: paper.
This DIY pumpkin from Char's Nest on YouTube gives you an opportunity to transform scrap paper, like the newspapers, printer paper, and magazines in your recycling bin, into something useful. Although you'll also use Portland cement and perlite (a volcanic stone), paper is papercrete's most abundant ingredient in the form of paper pulp. It's a 3:2:1 ratio of paper pulp, Portland cement, and perlite. You'll round out the DIY pumpkin supply list with an interesting-looking short stick from your yard.
You'll additionally need two large plastic buckets, a drill with a paint mixer attachment, and a fat, round bowl. If the buckets are leftover laundry or cat litter buckets, that's ideal, because you'll alter one of them. Lastly, add an old pair of pantyhose, twine, scissors, a couple of plastic bags, rubber gloves, and some E6000 Plus Multi-Purpose Clear Glue to your list of supplies as well. To ensure that the papercrete pumpkin is finished by the time you're ready to put out your Halloween decor, give yourself about a week and a half to finish the paper pulp and allow the papercrete to dry.
How to make the papercrete pumpkin
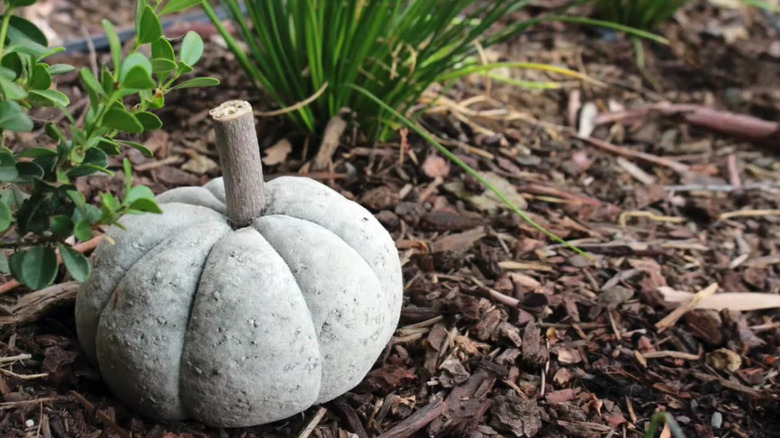
To make the papercrete, mix your paper pulp, concrete, and perlite mixture in a 3:2:1 ratio. It's easiest if you mix it in a big bucket with gloved hands. While you're in this stage, decide if you'd like a plain gray pumpkin, or if you'd like it to be a more traditional orange color. If you'd like the latter, you can either paint it once it dries, or you can add a concrete stain like GOODTAKE Concrete Pigment to the papercrete mix while it's still wet. The mixture is ready when it forms into a ball without falling apart.
Pour the papercrete mixture into the pantyhose, make a knot in the top of the pantyhose, and cut off the excess at the top. You don't want too much looseness near the knot because the pantyhose helps to create the papercrete jack-o'-lantern's structure. Next, tie six or eight strings of twine around the ball of wet papercrete. Cinch the strings up tight so that they make indentations in the sides of the ball. These will become the lines down the sides of the jack-o'-lantern once the papercrete dries. Finally, cover the round bowl with a plastic bag and place the jack-o'-lantern inside to dry. At minimum, it'll need to be in there for two days. A week is better.
After it dries, take the papercrete pumpkin out of the pantyhose and glue the stem into place with the E6000 adhesive. Or, to experiment a bit with this piece's rustic decor overtones, you could use a thick piece of rope to make the pumpkin stem instead of the stick.
Tips for making paper pulp
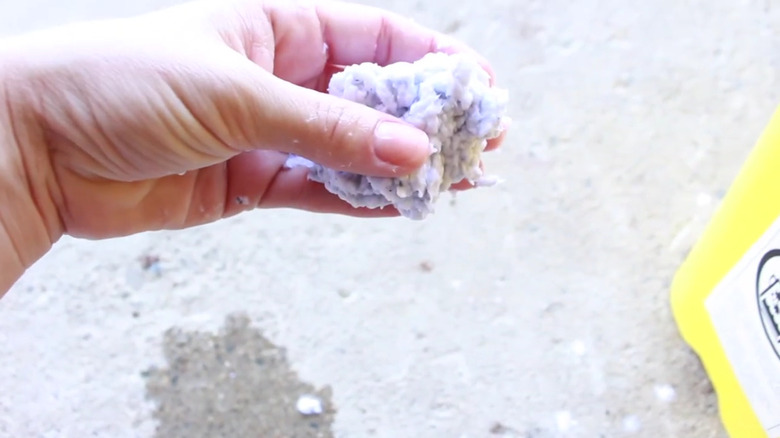
Making paper pulp isn't difficult, though it requires a bit of waiting time. To make it, get out the two buckets. Drill about six holes in the bottom of one of them. In the other one, put in a large amount of paper. It's easier to start with shredded paper for this, but you can use the paper in its original form if you don't have a paper shredder, or you don't feel up to tearing it apart by hand.
Fill the bucket of paper with water. If it's shredded already, the paper will soak all the way through in a couple of hours. If it's not shredded, leave it soaking for a couple of days or so before moving on to the next phase. Once it's saturated, put the paint mixer attachment on the drill and mix the paper and water together. You'll know it's the right consistency when it feels a bit like "oatmeal," per Char's Nest.
Next, pour the watery pulp into the bucket with the holes in the bottom. Make sure it's outside or in a tub, since the water will drain out of the holes. Let it sit overnight until the pulp becomes one large mountain of damp paper. If you take a clump of it, you should be able to squeeze a bit of water out of it, but the mound as a whole shouldn't be saturated. Now, it's ready to go into the papercrete mixture.