

Retire Your Old Welcome Sign: Build A Wooden Planter That Also Lights Up Your Porch

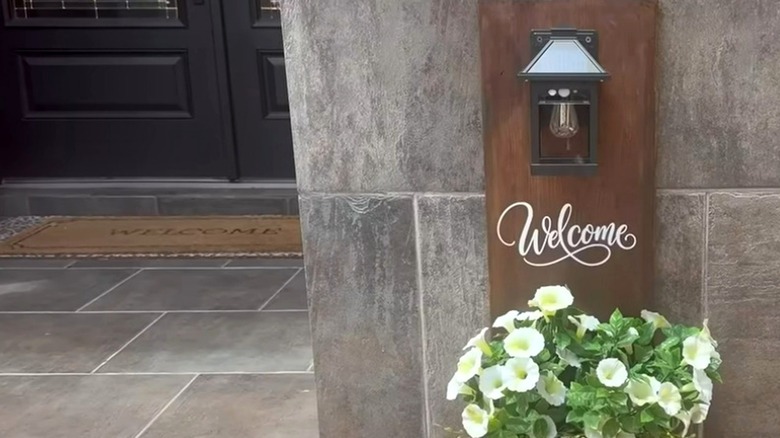
Your front porch delivers one of the first impressions visitors get of your home, but outside of holidays, that space can wind up looking a little underwhelming. If it's currently decorated with a faded "Welcome" sign and some empty planter boxes, maybe it's time to update your front porch with an easy, multitasking DIY. In this video, YouTuber Designed to the Nines whipped up a compact planter box with a built-in porch light and added a vinyl "Welcome" sticker for a finishing touch.
The project starts around the video's 9:30-minute mark. She uses leftover scrap wood that was already stained from a prior project, but unless you're planning to cut up some furniture, you'll most likely need to stain your planter box after it's built. Since she didn't need to stain the whole piece, this project only took her about half an hour. It's a very beginner-friendly build, although depending on your DIY supplies, you may need to borrow some more specialized tools, like a pocket hole jig. This planter box is also easy to customize to match your outdoor decor.
To get started, she cuts three sides and a base for the planter. One long plank serves as the back, where a solar-powered outdoor lamp is mounted. She drills pocket holes for invisible screws and clean-looking sides. If you don't own a pocket hole jig and don't want the screws to show, you can cover them with a strip of trim or store-bought wood buttons.
Tips for building your own light-up planter box
As you're attaching the base, remember to drive in the screws on opposite sides to keep the boards square. She attaches the base to the front of the planter first, then drives in the furthest screw on one side, followed by the middle screw on the third side. If you're not using pre-stained wood, you'll want to stain your build when you've finished assembly.
Next, she installs the light. Since it's solar-powered and doesn't require wiring, this step is as simple as drilling a couple of holes. For a finishing touch, she uses her Cricut to cut out a "Welcome" sign. This is an optional step and a great opportunity to customize your sign with words, stencils, a hand-painted design, or nothing at all.
If you want to use your own scrap wood for this project, don't get hung up on replicating her box's dimensions. If all you have are narrow pieces of scrap wood or old wood pallets, those can be glued or joined together for a more rustic planter box. You may also opt to extend your planter's longevity and improve your plant's health by adding a plastic planter box liner, or hiding your least favorite plant pot inside. Just remember one planter box step you don't want to forget and drill a few drainage holes. Installing feet so your planter box is elevated can also help protect your plant from root rot.