

Skip Store-Bought Frames: Use A Common Household Waste Item To Upgrade Your Walls

We may receive a commission on purchases made from links.
Do you have a box of printed photos that you'd love to display on your wall? Or perhaps you've always wanted to create the perfect gallery wall using snaps from your favorite vacation. But what's the best way to get them up on the wall without spending a fortune on store-bought frames? There's an easy answer: the next time you receive a gift that's been wrapped in the prettiest paper, don't toss the wrapping into your recycling bin. Instead, put it aside for a craft project that's as easy as can be and will allow you to create the cutest photo frames by using nothing but the paper and some cardboard.
For this art project, you'll want to gather a range of different wrapping papers (depending on how many frames you want to make). If you don't have much saved up, you could always head to Dollar Tree and grab a few rolls of Plusmark Assorted All-Occasion Wrapping Paper Rolls for just $1.25 per roll. In a pinch, you could even use pieces of leftover wallpaper if you happen to have any. You'll also need some cardboard, which you could easily score from the boxes your online orders arrived in. You'll want two pieces of cardboard for each frame. As standard photos measure 4 inches by 6 inches, each piece of cardboard needs to be at least 8 inches by 10 inches to give you a 2-inch frame around it. However, you can create these frames any size you want. Don't forget to grab a few tools, like a ruler, pencil, utility knife, and hot glue gun. Alternatively, you could use some ALECPEA PVA Glue, or even some Mod Podge for the gluing.
How to make your frame
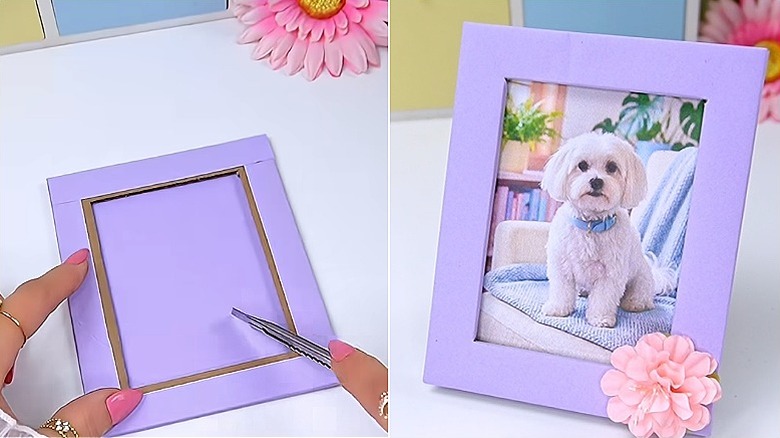
Take your ruler and pencil to outline your cardboard pieces so that each one measures 8 by 10 inches. Cut out a pair of these for each frame using the utility knife. Now take one piece of each pair, mark out a 4-by-6-inch rectangle in the center, and cut this out. Cut a piece of wrapping paper so that it's at least 2 inches larger in each dimension than your cardboard pieces. Lay the cardboard with the cutout onto the back of this piece of wrapping paper, and use your pencil to mark another rectangle in the middle that's around 3 inches by 5 inches. Cut this out, and then make diagonal cuts from the inside corners of the paper to the inside corners of the frame. You also want to cut out small squares on the outer corners of the paper, so that you can fold all the edges over neatly and glue them in place.
You can now wrap the other cardboard piece with wrapping paper to finish the back. Glue the two pieces together to make your completed frame. Then, just glue the photo inside the frame. If you want the photo removable, you could glue some strips of cardboard onto the back of the cutout piece along the bottom and two sides, and then glue the back onto these, leaving the top open to slide the photo in. Finally, use some 3M Double Sided Tape to hang your new photo frame on the wall. You could even glue some ribbon or beading around the edge of the frame for a little extra embellishment. Once you're familiar with the process, you could even use this method to wrap every ugly picture frame you might have been tempted to throw out.