

Give Your Plants Some TLC With A Grow Light Made From Terracotta Pots

We may receive a commission on purchases made from links.
Growing plants indoors is immensely rewarding and offers a range of benefits, including adding a touch of greenery to your interior decor, improving air quality, and promoting a general sense of well-being. However, even plants that hail from deep within tropical rainforests need some light to thrive, and this might not always be possible to provide naturally indoors. The easiest way to give your plants some TLC is with a grow light.
Commercial grow lights can be quite expensive and aren't always pretty. While you could turn a thrifted lamp into a perfect grow light for your indoor plants or fit the right type of bulb into a pendant light, even these options can be a bit too pricey. If you're on a budget but still want to provide your plants with the best care possible, why not follow YouTuber Brooke Darwin's example? She made a gorgeous pendant-style grow light from a terracotta pot, a hanging light fixture, and an LED grow light bulb.
For this surprisingly easy project, you'll need a terracotta pot, which you can buy new from any homewares store. Look for one with an aesthetically pleasing shape. For example, you can find this almost 6-inch Allen + Roth Round Clay Planter at Lowe's for about $8. You also need a pendant light cord, like this 15-foot-long Lightingsky Hanging Light Bulb Socket, and a grow light bulb. This four-pack of Mfxmf Full-Spectrum LED Grow Light Bulbs costs around $13. For tools, get a drill with a diamond hole saw bit. Finally, grab some paint in your favorite color. If you already have the hole saw bit and some leftover paint, each bespoke grow light you make should cost less than $20 total.
Preparing to turn a terracotta pot into a grow light

The first step in this DIY project is to make a hole in the base of the pot for the cord to fit through. Make sure the hole is large enough for the socket — around 1 inch — to fit through but smaller than the socket cap, which is usually a bit bigger than 2 inches. Place your pot upside down on a soft towel and use a drill fitted with a suitably sized diamond hole saw bit to create the hole. You might even find that you simply have to enlarge the pot's existing drainage hole. Spritz the area with water as you drill to prevent overheating and cracking. Remember to start gently at an angle and then straighten up as the drill bit starts to bite into the terracotta.
Once you've created the hole and confirmed that the hanging cord is going to fit nicely, it's time to paint your pot. How you do this is entirely up to you. You could use a can of chalk spray paint in your color of choice or use a brush or roller to apply whatever paint you already have on hand to the pot. Bear in mind that terracotta is porous, so it will absorb some of the paint, causing it to dry quite quickly. For this reason, it's a good idea to apply paint primer first, followed by at least two coats of paint to get adequate coverage. Make sure you paint both the outside and inside of the pot, as both sides will be visible when you hang the grow light above your houseplant. Alternatively, if raw terracotta fits with your existing interior decor, you can skip this step.
Assembling your inexpensive but stylish terracotta grow light
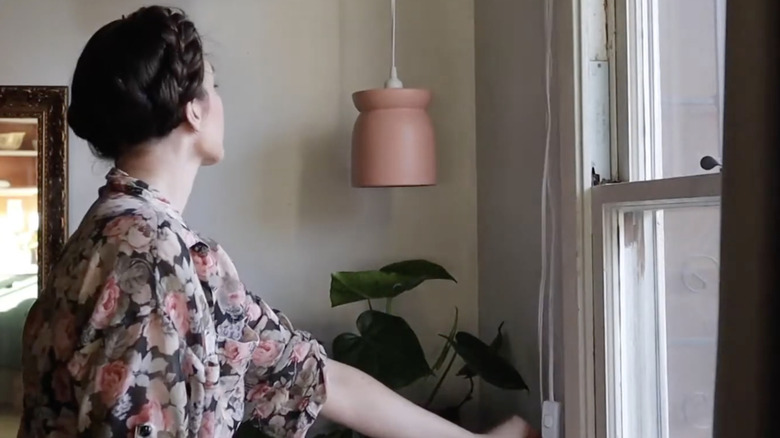
After the paint has dried completely, take your light cord and unscrew the cap from the socket. Thread the socket through the hole in your pot and screw the cap back on from the inside. Now take an LED grow light bulb and screw it into the socket. Finally, all that's left to do is to hang your new grow light from a ceiling hook positioned directly above your houseplant. Run the cord along the ceiling and down to the nearest outlet, affixing it in place with Command Mini Light Clips or similar cord organizers as needed. As an alternative, you could swap the hook for a clothes rod for a more chic look — just make sure you screw the rod into a stud in the wall.
If you're a renter and you can't screw a hook into the ceiling, you could always get some type of floor stand, like this 77-inch-tall LamYHeng Floor Stand Light Hook, to hang your pendant-style grow light from. Or you could repurpose the stand from any old floor lamp you can find at your local thrift stores. Paint or otherwise modify it to match the aesthetic of your fancy new grow light. Once you've installed your grow light in your home, you'll be happy knowing that you can now help your houseplants thrive all winter with this simple lighting setup. You'll be able to provide them with the exact amount of light they need to stay happy, even when it's dull outdoors.