Tulips: Everything You Need To Know Before Planting
We may receive a commission on purchases made from links.
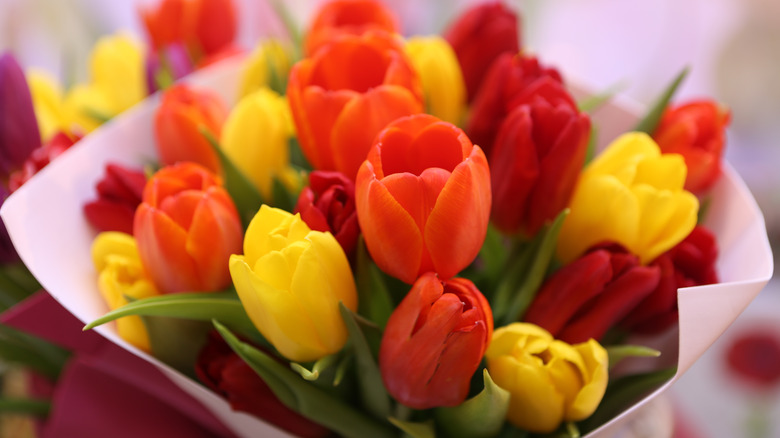
Tulips (scientific name: Tulipa) are sun-loving flowers that are easy to grow in the garden in both beds and containers. They thrive in climates that include cold winters and hot summers and bloom perennially in the spring, as per American Meadows. Tulips come in a wide variety of colors, including yellow, orange, pink, and purple. Each color has a unique meaning, according to FTD by Design. If you'd like to symbolize happiness, you can grow a pink variety, while yellow blooms are typically associated with uplifting thoughts.
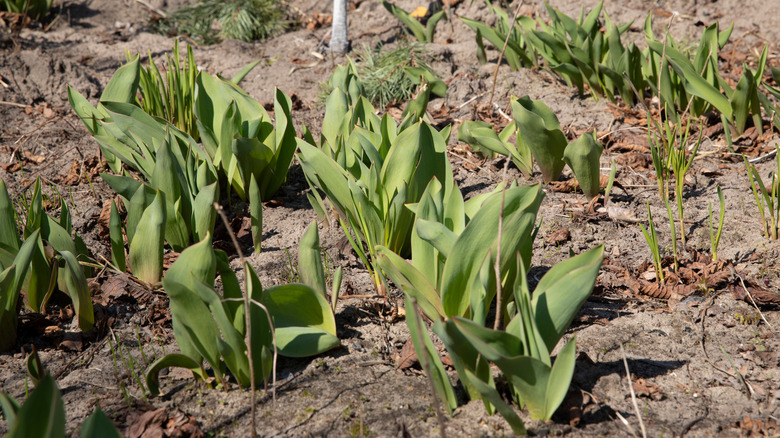
Most blooms are characterized by an elongated cup shape with petals growing upwards and enclosing around the middle. Due to the many tulip types, you'll find that their size differs depending on the type you plant. However, the majority range between 10 and 18 inches, according to Gardenia. This plant is also marked by bright-green foliage that both precedes the emergence of the flower and continues after the last bloom has died off.
Many people hold the misconception that tulips come from Holland, the country known around the world for producing enormous fields of colorful blooms. However, they are native to Central Asia in the region around the Tien Shan mountains, as per Dutch Review. It wasn't until sometime in the 16th century that tulips made their way into the outdoor tapestry of western countries, starting in Holland.
Ready to add tulips to your property? Keep reading for everything you need to know about growing and caring for tulips in your garden.
How to use tulips in the garden
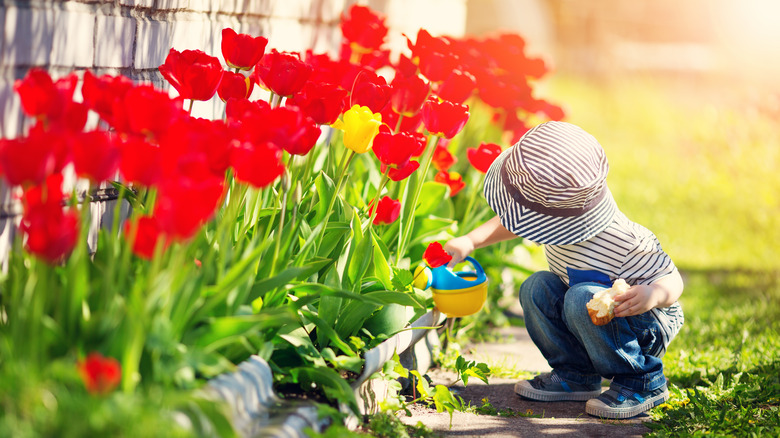
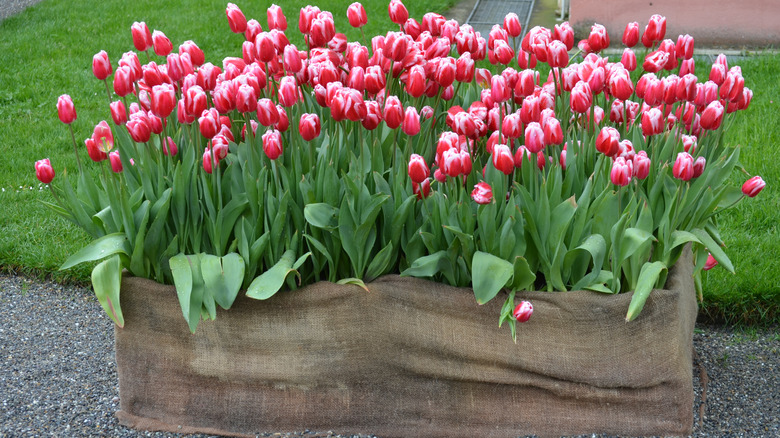
There are endless options for planting tulips in your garden to take advantage of their wide range of colors, heights, and bloom appearance. Many people choose to plant tulips by the hundreds as each bulb typically produces just one bloom. When it comes to deciding how you want to design your garden with the addition of tulips, you must first think about whether you want to plant your tulips in beds or in containers. The advantage of planting in containers is that you can place your tulips in locations that aren't conducive to planting in the ground, such as on patios, decks, and balconies.
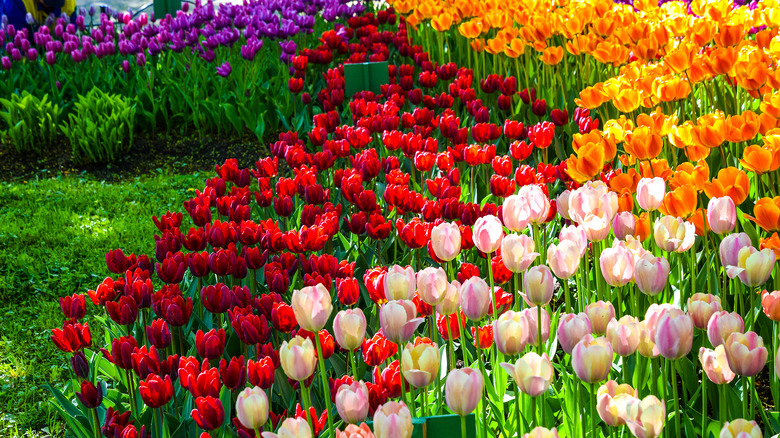
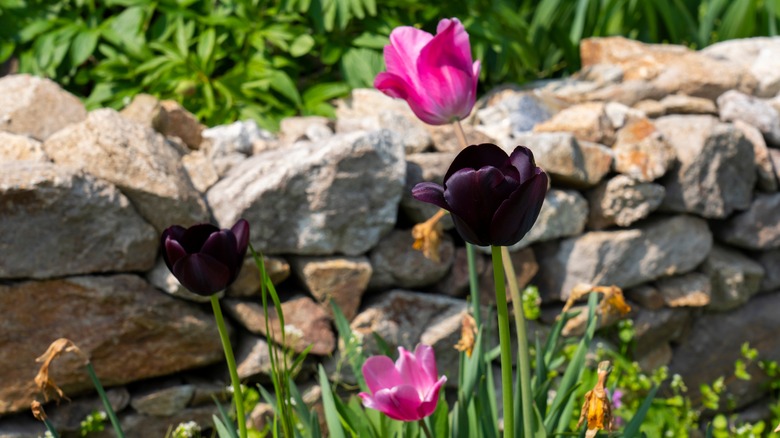
When you plant tulips directly in the soil of your garden, you can create elaborate tapestries of color that will brighten your outdoor space. Better Home & Gardens recommends planting tulips along fences or rock walls in your garden to create colorful boundaries. You can also get creative by mixing different colors in the same bed or general space. Another popular idea is to plant tulips with other perennial flowers for a variety of texture in the same space. You'll also want to pay attention to the size of the plant once it blooms. Taller varieties should be placed in the back of the bed so as not to obstruct the other varieties or flowers in that area. If you have a stone pathway through your garden, try planting tulips in a row along the edge of the path.
How to grow tulips
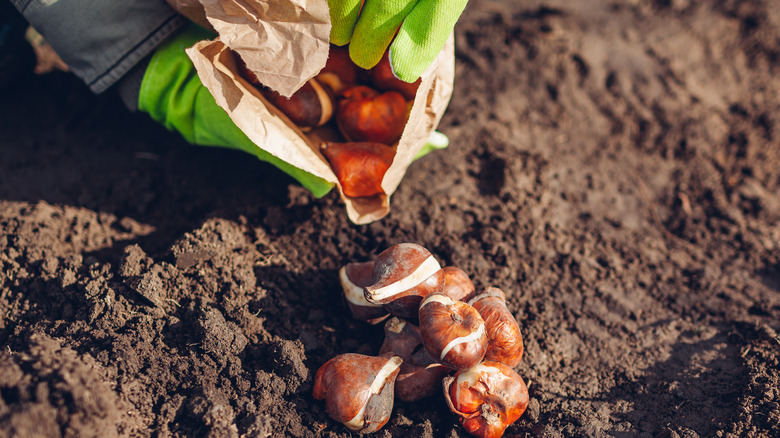
Tulips grow from bulbs that are planted in the ground in the fall before the first frost hardens the soil. This plant must pass through winters with soil temperatures below 55 degrees Fahrenheit in order to create the optimal conditions for survival once the blooming period arrives in the spring, as per the Amsterdam Tulip Museum. If your climate doesn't experience cold enough winters, you can also refrigerate the bulbs for two and a half months before planting them in the ground in the early spring, according to American Meadows.
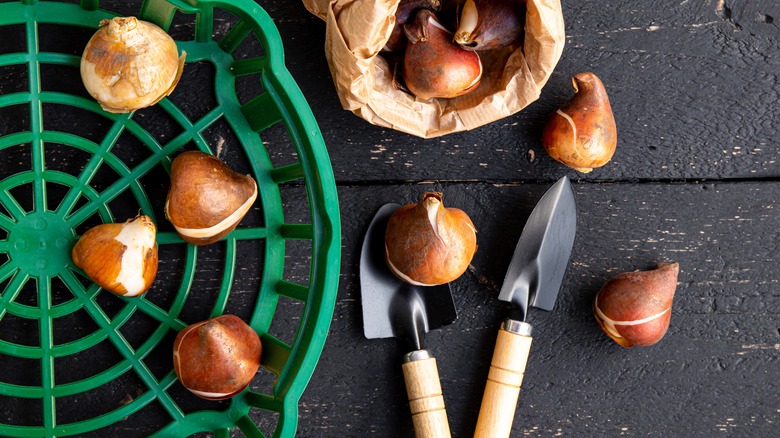
Once you've purchased your tulip bulbs and defined a space in your garden to plant them, you'll need a shovel or small trowel to dig into the soil. If you'll be planting mass beds of tulips, a large shovel will allow you to dig trenches deep and wide enough to accommodate the number of bulbs. The depth you'll aim for should be around 6 to 8 inches. When placing the bulbs in the soil, make sure the pointy end is facing upward and that each one sits around 4 to 6 inches away from its immediate neighbors. After situating your bulbs at the base of each hole or trench, cover them with soil, making sure to pack it securely over the top to prevent air from surrounding each bulb instead of soil. You can water the bulbs immediately after planting but won't need to provide any additional care until they bloom.
Choose tulip bulbs carefully
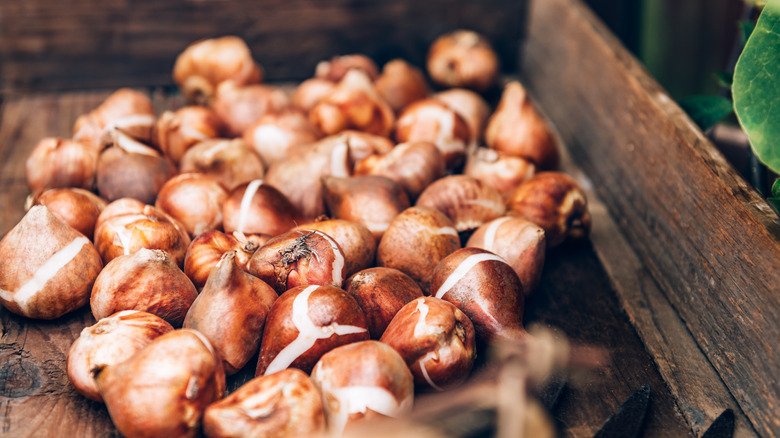
Where you buy your tulip bulbs can make or break their success. A garden center or nursery can offer you a great variety and has staff that can provide expert advice. The Washington Post provides a helpful checklist for finding the right one for your needs. Look for plenty of friendly and knowledgeable staff that is available for questions. Also, ask about any product quality guarantee they offer for your bulb purchase. It can take years of purchases and hard work to cultivate your dream garden, including your tulips. So, finding a great nursery or garden center that you can rely on long-term is key. If you don't feel like leaving your house, you can also order them online from major home improvement retailers like Home Depot.
When it comes to selecting your actual bulbs, make sure you choose tulip varieties that are designed for your climate. Look for bulbs that are dense and firm to the touch (via Midwest Gardening). A soft bulb and rotting odor are red flags that the bulb is decaying. Inspect the bulbs for damage like major bruises. Keep in mind that the bloom is already developing inside the bulb, so larger-sized bulbs will likely yield bigger blooms.
Can you grow tulips from seeds?
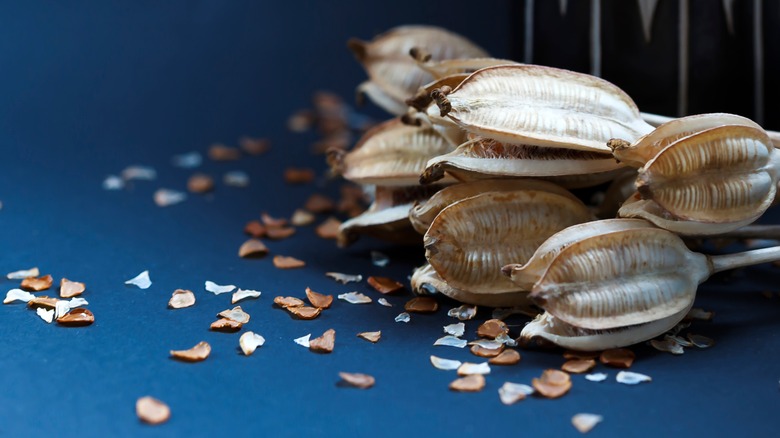
According to ProFlowers, tulips are self-pollinating and can be spread by seeds naturally. However, there's a reason most gardeners opt to use bulbs to grow tulips instead. Fall-planted bulbs usually emerge and bloom the following spring. Seeds, on the other hand, take months to germinate. This lengthy growing process might take planted tulip seeds years to emerge and produce blooms.
If you'd like to try growing tulips from seeds, you can deadhead your current crop and use their seedpods. You'll need to exercise patience and plant them correctly (via eHow). Open the pods and allow the seeds to dry at room temperature for a week. The seeds need a temperature range of 32 to 45 degrees to sprout. So, put them on a damp paper towel in an air-tight container in the fridge for 90 days. Then, plant the seeds about ¼ inch deep in moist sandy soil at the end of winter. Water them regularly when the soil dries out and wait for the seeds to germinate in a month or two. Tulip seedlings can be transplanted after getting established for at least 18 months.
Can you propagate tulips?

As Conserve Energy Future points out, tulips don't spread as quickly as other types of flowers. However, their reproductive technique allows them to populate in two ways, with and without help from humans. One, tulip blooms produce seed pods that can be spread by the wind, rain, or animal activity. The bulbs also grow new offshoots off their main root after the flowers bloom. Two to six small new bulbs will form that can eventually become mature tulips, allowing the flowers to spread.
If you want to help with this process, you can propagate your tulips by hand (via eHow). First, use a stake to mark where tulips are when they are out in the spring. This way, you can easily locate the underground bulbs in the fall. Then, gently dig up the bulbs around fall planting time. The smaller new offshoot bulbs, called bulblets, can be broken off the main bulb. Then, you can return both these separated new growths and the main bulb back into the soil. Space them a few inches apart and wait for your bigger tulip collection to emerge in the spring.
How to care for tulips
Part of properly caring for tulips means providing them with the adequate growing conditions before planting them in the ground in the fall. You'll want to make sure the area you choose receives full sunlight during the bloom period, as noted by The Spruce. Keep in mind that your garden may receive different amounts of sunlight depending on the time of year; an area that is only partially sunny in the fall may be in full sunlight come spring. As for soil conditions, you'll want to make sure your tulips are placed in a well-draining area of your garden as they loathe overly wet conditions and will likely rot and die if they sit for too long in wet soil. You also can add a bit of mulch or fertilizer when planting the bulbs to provide an extra kick of nutrients through the winter.
Tulips often need less water than most people think, especially in regions where rainfall is plentiful in the spring. As a general rule, tulips will need water every couple of weeks, either from rain or from your garden hose — just be careful not to overwater. Another important part of caring for your tulips is cutting back the green foliage of the plant once the blooming season has ended. You'll want to wait until the foliage starts turning yellow or brown to avoid removing an important source of nutrients for the bulb that will help sustain it through the dormancy period.
Varieties of tulips
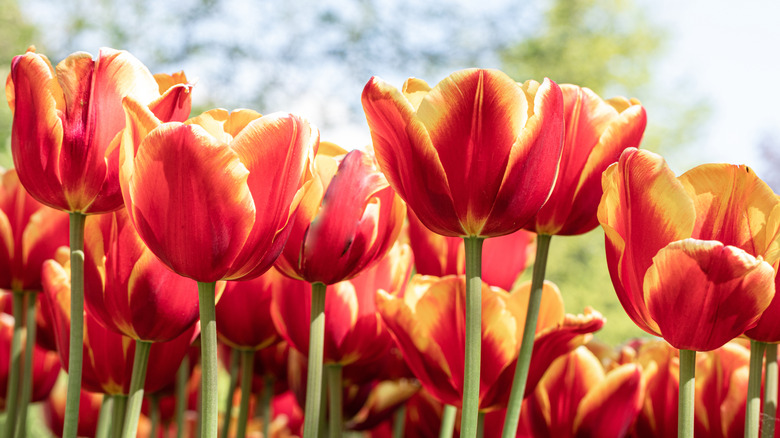
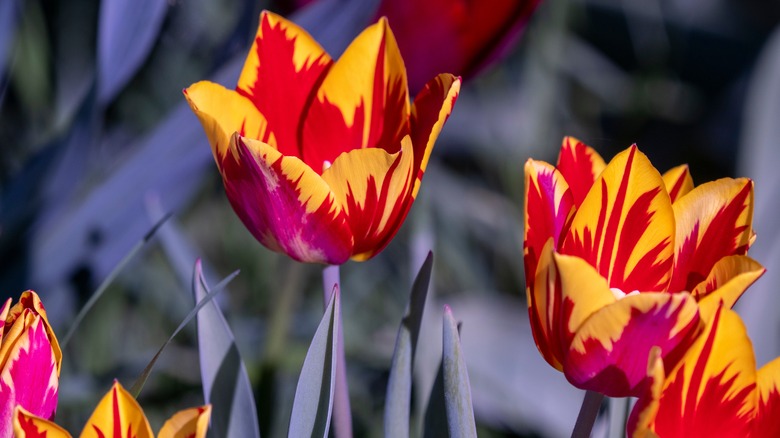
Finding the right tulip for your outdoor space is easy considering that there are more than 3,000 varieties of the plant available for purchase, as per Home Stratosphere. Tulips come in a wide variety of colors, sizes, and bloom shapes, and all originate from a very specific mountain range in Central Asia. Over the centuries, they have been manipulated by scientists to expand the number of varieties. Some hybrid varieties take things a step farther and even feature multi-colored blooms. No matter which variety (or multiple varieties!) you choose for your garden, rest assured that you will be rewarded with gorgeous blooms that will kick-start your spring in the most colorful way possible.
Among the many varieties of tulips is the stunning Queen of Night, which features dark-maroon blooms that appear almost black in color and create a powerful contrast to other lighter varieties. If dark isn't your thing, try the Apricot Beauty with its orange-pink petals that are streaked with a hot-pink accent. This variety also lets off a particularly fragrant scent that you will enjoy every time you step into your garden. The Double Sugar variety offers a twist on the traditional cupped bloom shape with its open pink and white petals that are often compared to roses. And Giuseppe Verdi is a sight to behold with its bright yellow blooms decorated with red stripes; this variety pairs nicely with the single-colored, bright-red Ad Rem variety.
When to stake tulips
If your tulips look sad and droopy, there could be a few causes. eHow UK recommends watering your tulips lightly every day to keep them happy and upright. Also, make sure the soil at the base of the tulip is very tightly packed to support the plant's roots. Be proactive when extreme weather approaches and take bulbs inside if temperatures are forecasted to dip below 45 degrees. You can prevent wind damage during storms by covering them with a plastic dome. To prevent damage from ongoing windy conditions, strategically add larger plants like bushes to your garden to act as a shield for fragile tulip stems.
If all of these efforts fail and you still have droopy tulips, your best bet might be to stake them. Sometimes this is the only way to keep varieties with large, heavy blooms from toppling over. Do this as early as possible, so you don't damage complex, established root systems (via Michigan Bulb). Carefully push a thin stake into the soil next to your tulip's stem. Loosely wrap a piece of string around the stake and the stem to secure the flower upright (via Yardener).
How to repot tulips
While typically planted in garden beds and meadows, tulips also grow nicely in pots and containers. This option is a great alternative for anyone who doesn't have a garden yet still wants to brighten up a balcony or deck with this colorful bloom. Tulips will eventually reach a point where they outgrow the confined space of a container or pot and need to be re-potted. The larger the container, the better when it comes to tulips. Extra space will provide the bulbs with the adequate amount of soil necessary to maintain nourishment through the dormant periods of the year. The container or pot should also have plenty of drainage holes to avoid bulb rot.
The best time of the year to re-pot tulips is in the fall to correspond with the normal bulb-planting season. If you haven't already cut off old growth, you'll want to do this first before digging the bulbs out of their too-small container, suggests SF Gate. The next step is to fill the new container with potting soil, leaving 6 to 8 inches of depth before placing the bulbs on top. Potted bulbs can be placed closer together than they would be in the ground, at about 1/2 an inch apart from one another. Keep in mind that the pointy end should always face upward as this is where the bloom and foliage will sprout from. Cover the top of the bulbs with soil and water occasionally during the winter.
Tulip pests and diseases
Tulips are susceptible to several pests and diseases that can threaten their chances of survival or kill them altogether. Fungal diseases are especially detrimental to tulips and are often caused by overwatering and a lack of airflow. One such disease is known as Botrytis blight, which weakens and destroys the entire tulip plant, as per Gardening Know How. Pythium root rot is another fungal disease that weakens the bulb itself and prevents the plant from growing. One more fungal disease, basal rot, is marked by the patches of mold that grow on the bulb and disfigured blooms. Treating fungal diseases requires spraying the infected soil with a fungicide to kill off the spores. Infected plants should be disposed of. The best way to avoid rot is to take care with watering; a good rule of thumb is to err on the dry side when determining your tulips' water needs.
In addition to fungal diseases, you'll want to keep an eye out for common tulip pests, which include aphids, slugs, caterpillars, and rodents, according to SF Gate. The latter likes to dig up the bulb, preventing the plant from ever growing in the spring. Insect pests feed on the various parts of the plant and can often destroy it entirely when left unchecked. Insecticides are your best bet for getting rid of an infestation. As with fungal diseases, make sure to dispose of any infected plants.
You can also deter these pests from disturbing your bulbs by adding a protective barrier. Cover the spot where your bulb is planted with a sheet of chicken wire. This protects the bulb while allowing the tulip to grow through (via Kevin Lee Jacobs). You can also plant your bulbs deeper, around 8 inches, rather than closer to the surface where they are convenient to access.
Do tulips bloom every year?
As American Meadows points out, tulips are easy to plant and typically have stunning results with their first flowering. But as the years go on, subsequent blooms can be disappointing and fail to measure up to their inaugural bloom. Tulips are technically perennials, meant to emerge each spring. However, tulips are native to areas with seasonal cycles of dry heat in the summer and cold temperatures in the winter. If your local climate doesn't mirror these conditions, it can be tough for tulips to thrive year after year. For this reason, many gardeners simply plant new tulip bulbs every fall for better chances of great results.
If you want your tulips to bloom each year beautifully without replanting, there are some strategies you can use. First, you'll have to start by planting the correct variety of bulbs (via Chicago Tribune). Darwin hybrid and Fosteriana tulips are two types that have promising returns every spring. You also want to make sure your bulbs have ideal planting conditions. Plant your bulbs deeply in well-drained soil with a neutral pH. Apply an organic fertilizer three times annually after the first year and deadhead your tulips properly to keep them as healthy as possible.
How to store tulip bulbs
The Los Angeles Times reports that one key to a thriving tulip garden is to treat the flower like an annual instead of a hardy perennial. This means that you'll have to dig them up, store them, and replant them each fall. Keep in mind that tulips love the cold winter temperatures in their native climates. So when you dig up your bulbs after the season and store them until fall, you'll need to emulate these chilly conditions.
Wait until the tulips are done blooming, and the leaves are dead (via Food52). Carefully dig up the tulip bulbs and shake off any dirt. Allow them to dry out on sheets of newspaper for a few days before moving them to the refrigerator for chilling. Store your bulbs away from any foods that release ethylene, a gas that will cause them to rot. These include common fridge staples like apples and melon. You will also need to monitor the bulbs regularly to ensure they get adequate air circulation, so they don't get moldy. Remove them from the fridge a few hours before replanting them in the fall, and cross your fingers for stunning spring blooms.
Should you deadhead tulips?
According to Conserve Energy Future, you should deadhead your tulip blooms for several reasons. Removing the blooms after their peak prompts better reproduction. Tulips spread best at the bulb. While blooms produce seedpods, this is a slower way to spread new flowers, and they are often mismatched and unpredictable. Removing the bloom before this happens allows the plant to focus its reproduction efforts on the bulb, creating a more efficient spread and consistent blooms. So, deadheading regularly every year can spur better results season upon season.
You should deadhead when the tulip begins to wither and the leaves start to yellow. However, it's important to keep the leaves intact, so they can continue to provide the bulbs with much-needed energy. The proper method of deadheading is simple. Gardening expert Monty Don tells The Daily Express, "The best way to deadhead them is simply to snap off the spent flower with the growing seed pod using your fingers. Do not cut back the stem or any foliage as this will all contribute to the growing bulbs as they slowly die back."
Reasons tulips might not bloom
Lack of blooms can be a common yet frustrating occurrence regarding tulips and other hardy bulbs. Empress of Dirt notes a few reasons this could happen and things you can do to correct the issue. First, check to make sure your bulbs aren't too shallow or deep. They should be at a depth of about two to three times their length below the surface — check your bulb packet for precise directions. If you find they are too shallow, add a little additional soil on top. They also might be too close together. If they have spread over the growing seasons to become too dense of a bunch, they might lack the resources to flower and thrive. At the end of the season, dig up your bulbs and separate any attached ones. Replant them all, spacing them further apart.
Their environment also might not be the ideal condition for them to flower. Make sure tulips have well-drained soil and avoid overwatering them. They also need direct sunlight to bloom. Trim back any barriers like shady trees to ensure they are getting adequate rays. Overfertilizing can also cause flowering issues. Never fertilize a blooming tulip; make your best effort to keep garden soil naturally healthy instead of using fertilizers.
Are tulips toxic?

The bottom line is that tulips are toxic to both humans and animals, explains the National Capital Poison Center. While humans have been known to consume tulip bulbs accidentally due to their uncanny appearance to onions, eating too much of this plant can cause gastrointestinal issues, including stomachache, vomiting, and diarrhea. It is also known to induce shortness of breath and a general feeling of weakness in the body. This unpleasant effect is not known to be fatal but may be more pronounced in children and animals. In the case of accidental ingestion, you'll want to contact a poison control helpline or your nearest emergency hospital for assistance.
Another common issue associated with tulips is a condition known as "tulip fingers," which is essentially a skin rash provoked by the chemical tuliposide. If you experience this rash, wash the affected area with water and soap. However, if the rash worsens or doesn't clear up, seek medical assistance. You can avoid skin irritations by using gardening gloves when handling tulip bulbs.
If you have young children and/or pets and are worried about accidental poisoning, there are a few precautionary steps you can take. You can consider installing a barrier around your tulip beds to prevent children and pets from getting close. Additionally, pets can be trained with positive reinforcement techniques to avoid approaching your tulips. You'll also want to make sure to store bulbs out of reach as this part of the plant is the most dangerous.