DIY Christmas Tree Collar Ideas

Christmas tree collars offer a decorative alternative to the skirt. Not only does it provide a unique touch that ties in your tree's décor, but it also helps to firmly anchor your tree and prevent tipping, as mentioned in the Pioneer Woman's blog. In fact, some collars might act as a barrier to curious toddlers or pets who might reach for the base and cause the tree to sway or slip. Plus, you won't have to worry about cleaning the skirt before storing.
Thus, we have come up with some DIY Christmas tree collar ideas that fit in with various decorative styles. However, a tip to remember is to always measure your tree's stand and base to ensure an accurate fit. If you're not sure if the collar will be properly proportioned to the tree, you can also create one that's almost as wide as the middle of your tree.
Country-style washtub
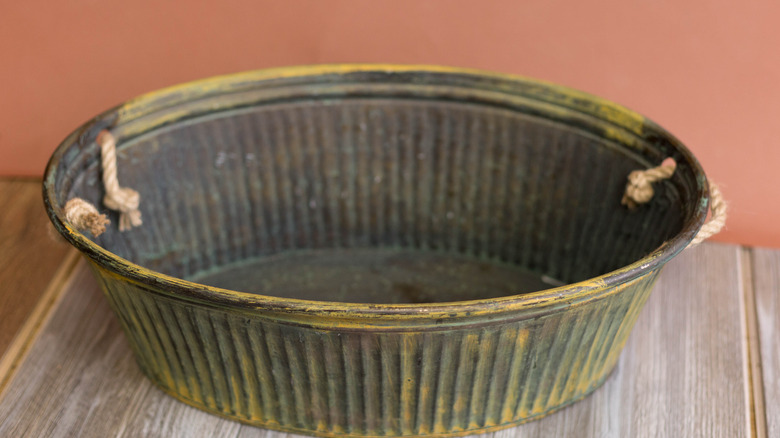
One time you can cut out a hole in the washtub without any regrets is when you're creating the ideal Christmas tree collar. This look possesses the qualities of simplicity and country-style chic all in one, as noted in Better Homes & Gardens. To create the washtub collar, you'll need a galvanized, metal tub whose bottom diameter allows enough room for the tree's base.
First, you'll turn the tub upside down and drill a hole in the bottom that will allow enough room to fit a reciprocating saw. In the second step, you'll cut the bottom piece out using the reciprocating saw. From there, the bottom piece will fall out. Finally, you'll place the tree's base inside and continue assembling your tree if it's artificial. Or you'll simply place the water container and base inside the collar and firmly anchor your tree. For an added touch prior to placing the base inside, tape stencils to your tub and paint a Christmas message along the front or decorate with snowflakes or other Christmas-related designs.
Elegant hat box

For a small to medium size tree, you can take a hat box, turn it upside down, and cut out the bottom to turn it into a Christmas tree collar. If the pattern or solid color on the outside of the box already matches or complements the ornaments and trimmings, then your DIY project would be quite simple, per Country Living. Rather than turning the box upside down, you can place the base inside if the box is wide enough.
If you see that there's plenty of room inside the hatbox — and your tree's base is still visible from the outside — you can add some large ornaments inside for a more festive look. Also, you can strategically place some stuffed animals inside the box and around the tree's stand (if you don't have pets who might mistake them for chew-toys). To add even more holiday cheer, you can also tie a wide ribbon around the middle of the box.
Tire Christmas tree collar
When searching for more Christmas tree collar ideas, have you considered using an old, bald tire? This idea might not sound appealing, but according to House Beautiful, recycling gives you a plethora of options with a bit of creativity. Plus, you're looking out for the environment.
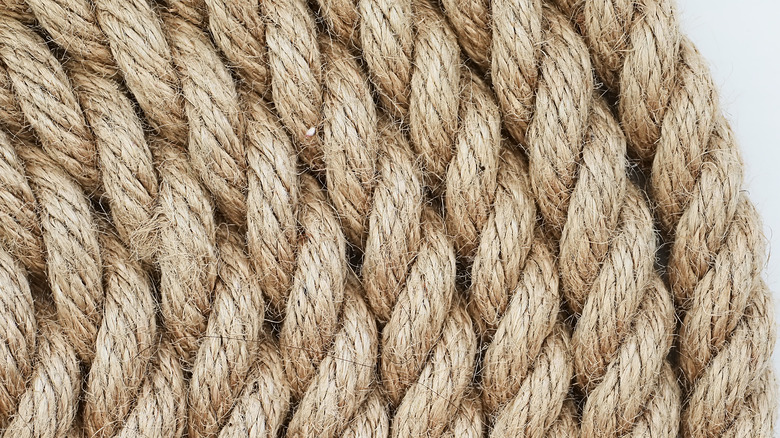
When refurbishing a tire into a Christmas tree collar, you'll need to first rinse off the tire inside and out and let it dry completely before bringing it inside. Also, you'll need to gather some jute rope or some other sturdy type and a glue gun and glue sticks. Once you have your materials ready to go, then you'll glue one end of the rope to the tire. Next, you'll start wrapping the rope around the tire, securing some parts as you go. When you reach the midpoint of the tire, you'll glue that end and then turn the tire over. Add a bead of glue to continue securing the rope and then roll it around until the rest of the tire is covered. Before setting up the tree and stand, place the collar around the base. Now your collar has a rustic appeal to complement a tree garland made from burlap or berries.
Christmas wicker basket collar

Another Christmas tree collar idea that adds a touch of rustic appeal involves a wicker basket. One great aspect about baskets is that they complement simple décor such as solid colored ornaments combined with small bows on the tips of the branches. Plus, the process of fashioning a tree collar out of a wicker basket is quick and easy, as mentioned in The Spruce.
After carefully measuring the bottom of the basket to ensure it's larger than the base and is tall enough to cover part of the stand, you will need to turn the basket upside down and cut out the bottom with a box cutter. Then, you place the base inside your new wicker tree collar and finish putting the rest of the tree together. Another variation of this project is to use a hot glue gun to attach some decorative fabric or a garland around the bottom of the collar. If you prefer the traditional Christmas colors of red and green, you can also paint the basket either color after you cut out the bottom.
Picture perfect tree collar

Picture frames prove to be quite versatile for a Christmas tree collar, as illustrated in In My Own Style. While this option is not necessarily pet friendly (if you have a pet who would try to jump over the collar) it still offers a project that reflects the warmth and personality of your family. You'll need some 8 inch x 12 inch frames. While rectangular works best for arrangement purposes, the colors and materials are a matter of preference. Additionally, you have many choices regarding the contents of the frames. You can include family photos of Christmas past or alternate photos with word art placed inside the frames. Or you can even cover them completely with plaid or another print that's associated with the holiday season. You would have to use a staple gun to secure the cloth in the back of the frame.
For easy storage and setup, you would also attach small hinges to the backs of the frames, but remember to leave a "gap" between two of them so that you can fold the frames for storage. An alternative to metal hinges is to create some made out corrugated cardboard that's cut into 1 inch x 3 inch pieces. Next, you'll line up your frames and staple two pieces of cardboard to the back of each one. Finally, you'll place the frames around the base making sure each side is symmetrical.
Upcycled lampshade

For a super-cute Christmas idea, you can take a large lampshade and transform it into your next Christmas tree collar. If the lampshade hasn't been damaged, and you still like the color or pattern, you can just place it over the base before assembling the tree. The glow of the Christmas lights will show through the lampshade to give off a festive glow. Another twist to this DIY project is to glue a wide ribbon around the top and bottom of the lampshade. You can choose a ribbon that has a cute, holiday print to accent the solid colored collar or a ribbon of just one hue for printed one.
Yet one other Christmas tree collar idea hides a lampshade whose color or pattern just doesn't coordinate with your decorations or one whose color you don't care for. However, this idea works best for a round lampshade. First, you'll carefully wrap red fabric around your lampshade and staple it to the inside around the edges. If the material is durable, you can hot glue it on a low setting or use fabric glue, according to HGTV. After that, you can add some gold or silver cord and glue it in the pattern of several x's going along the sides. When you add more embellishments along the edges, your lampshade will then resemble a bass drum. Then, you'll have a Christmas tree collar that might remind you of stories like "The Little Drummer Boy" or "The Nutcracker."