6 Easiest Ways To Clean Wicker Furniture

Whether your wicker furniture is made from natural materials (such as rattan or sea grass) or synthetic elements (a processed version usually made with resins), you want to care for it regularly. Dirt can build up in all those crevices, and the longer you ignore it the harder it becomes to remove. Additionally, indoor wicker furniture needs a vacuuming with the brush attachment about once a month to stay tidy, suggests Wicker Living. You'll find more natural wicker inside because the substance offers elasticity, making it comfortable. It's also less durable outside, where direct sunlight, rain, pollen, etc. wear it down, making slats crack and unravel (via Sunniland Patio).
Synthetic wicker or natural wicker that is used outdoors might need more cleaning time, especially if you're in a humid climate and mold or mildew set in. If that happens, a fungal remover like bleach is needed to extract the smell and allergens. Since wicker has so many weaves, you should spray it down and use a cloth, toothbrush, or other soft small item to reach all areas. It might take several tries to get the furniture in tip-top shape, per SF Gate. If your weather is drier, outdoor wicker furniture needs a gentle cleaning four times a year, according to Better Homes & Gardens. Fortunately, there are several ways to clean out dust, pollen, dirt, and other elements that try to destroy the integrity of your wicker furnishings. Here's how to keep it thriving for years.
1. Dust wicker furniture
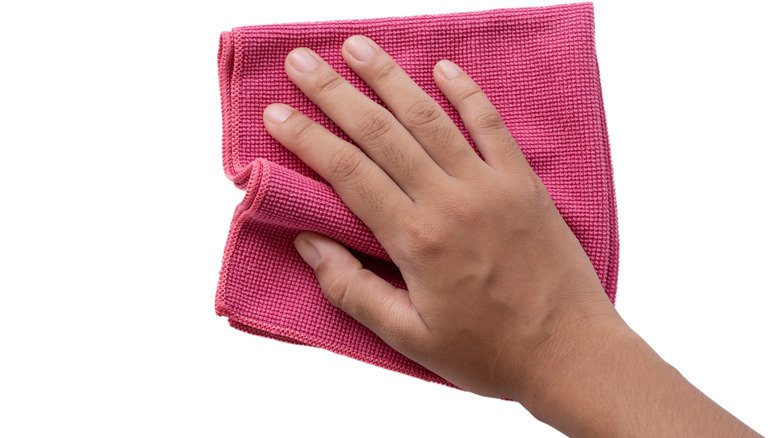
Like any furniture, wicker can get dusty. To that end, the first thing to do when tidying it is to grab a soft cloth or feather duster and get busy moving it over all those weaved spaces. Dusting is good for either synthetic or natural wicker pieces and there are several ways to accomplish it:
- For those hard-to-reach spaces, try a soft-bristled paintbrush, which can softly get into those without scratching the material.
- Some spots might require a bigger brush — like those near the furniture frame — and you can take an old toothbrush to address those stains.
- A vacuum cleaner also works for this. Use the lowest setting with the brush attachment to ensure the wicker stays damage-free (via Bob Vila).
It is important to maintain a regular cleaning schedule because according to Women's Day, the dirt does embed itself into the weave — and if you wait too long to take care of it, the grime is difficult to remove. But, don't worry if there's not too much time left on your schedule; at least once a year you should clean, repair, and condition your wicker. Synthetic wicker is more tough than natural, so it is permissible to be a bit more determined when cleaning it — especially for those tough bird droppings, says the DIY Network.
2. Wash wicker once a year

A perfect thing to add to your spring (and maybe fall) cleaning is a wipe-down. So after a good dusting, you want to moisten the fabric and lightly move it over the wicker's exterior. Be sure to go from top to bottom and get the underneath portions. You'll need to follow this with a wet cloth to remove any residual lather. If you have stains or places on your wicker where the dirt won't move — typical of outdoor furniture — add some mild dish soap (say ¼ soap to 2 cups of warm water) and rub the furniture down with a cloth before rinsing with a garden hose.
Sometimes even this isn't enough, so you might try a handheld steam cleaner. Do this on a sunny, windy day to ensure the wicker dries throughout — otherwise it may bend. You can also use a hair dryer or fan, as noted by Bob Vila. Remember to allow the wicker to dry thoroughly before putting it back into its space. Additionally, Wicker Living suggests taking more care when wetting down natural wicker pieces. Try working on no more than six inches at a time. Before moving to the next section, allow it to dry because wetting large segments might encourage bending and the furniture or accessory could before deformed.
3. Remove mold and mildew
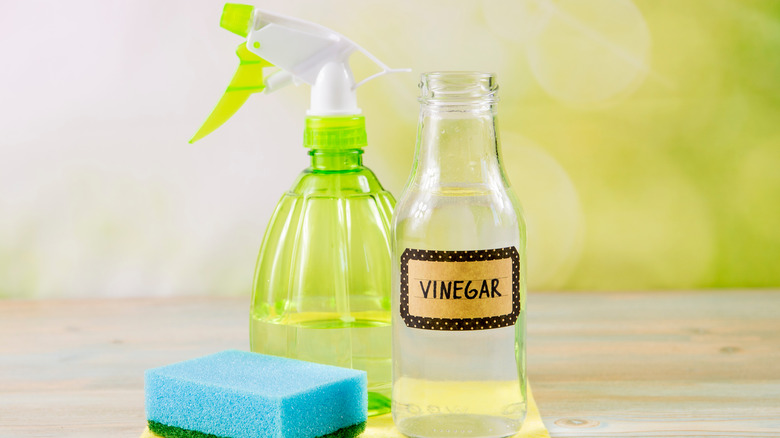
You always want to keep any furniture free of mold and mildew; do this with an easy-to-make DIY combination of 25% white vinegar and 75% water. Treat the wicker with this and then wipe it with a wet cloth. Outdoor wicker furniture might require a bit more in a cleanser, so a good combination to try is ¼ cup of liquid dish soap to 2 cups water, and 1 cup of white vinegar, per Bob Vila. Do not use anything that contains harsh chemicals or abrasive scrubbers if you choose to use a commercial cleaner for this job. If you are not gentle, your furniture might lose its finish or color, and the wicker can unravel from the base (via Wicker Living).
The arms of wicker chairs and the seat are vulnerable to mildew since they can easily become moist and may not always dry off by the next use. DIY Network suggests spraying these areas with a mixture of 50% hydrogen peroxide to 50% water, allowing it to absorb into the material before rinsing it off.
4. Repair broken slats in wicker
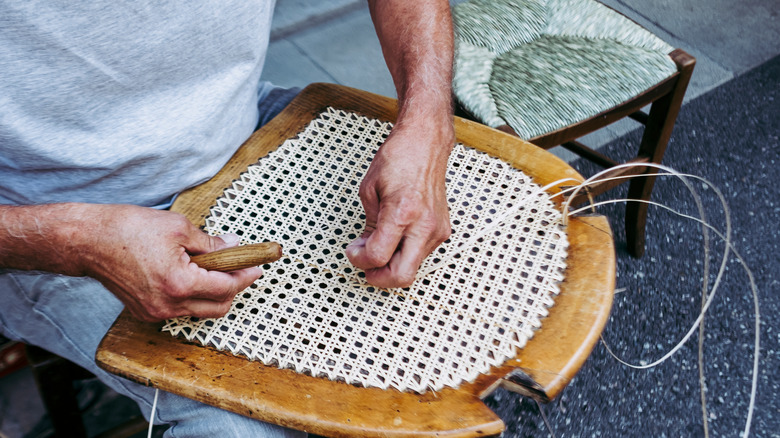
While the interweaving slats of wicker look so pretty, they are a bit fragile; if you press on them hard enough, they can break. Fortunately, regular repairs can help them from cracking further. Use a wood glue to fix these, and that should alleviate the problem. However, the best method to fix this damage is to avoid it from happening in the first place. So never use abrasive material on your wicker, such as a stiff brush or a steel wool pad. You will only damage the piece, and could potentially undermine any protective finish the manufacturer applied, like in lacquered items.
Sometimes a major repair might be necessary. If you see broken pieces, you can certainly hire a professional to fix it, but sometimes a little DIY is all you need. After all, as Better Homes & Gardens points out, all sorts of caning and reed material is available online. If you know the furniture manufacturer, you can also call customer service and see if you can obtain materials from them. Also, don't scoff at digging out the owner's manual, if you still have it. Sometimes the instructions contain guidance and can help aid your restoration process.
5. Keep wicker in proper environments

One way to keep your wicker furniture — whether it is natural or synthetic — around for a while is to acknowledge its limitations. Wicker needs care; it won't thrive in spaces that are too cold (which makes the material brittle) or in places that are too hot (which increases its elasticity). It also dislikes when moisture sits on it for long periods, which is why you should dry it well after cleaning or when someone spills something on it. Damp weather that goes on for days also encourages mildew to appear.
Keep all this in mind as you find spots for your wicker friends. Although patio furniture is made with the material is expected to live outdoors, keeping it under a porch roof or a patio awning away from the bulk of the sunlight and rain can help it reach a nice old age. Sun can cause wicker all kinds of problems from damaging its fibers to unraveling or cracking its slats, and rain may loosen its joints, weaken the fibers, or remove paint.
If you love having wicker on top your sun-covered pavers though, think about covering it when not in use or moving it during storms, advises The Spruce. You can also try rotating your outdoor furniture to give the more delicate pieces some down time, suggests Woman's Day, which also recommends rubbing some lemon oil onto natural wicker to condition it. Careful planning can help lengthen wicker furnishing's life.
6. Get a brand new life with a little paint

Nothing gives something new life like a fresh coat of paint. Besides refreshing the color, you can use this as an opportunity for a rebirth. Want purple patio chairs? Do you wish to add a little gold to your décor? Wait for a nice sunny day with soft winds and pull out the following supplies:
- Drop cloth
- Sponge
- Liquid deglosser
- Outdoor acrylic spray paint
Now, get ready for some DIY. Arrange your drop cloth on the ground, away from your home, car, and anything else that you treasure since spray paint can grab hold of the wind and end up some place unintended. Then clean the item thoroughly — you want a space free of dirt, grime, and contaminants before you apply the paint. Put on the deglosser, which will help the paint stay on the wicker. Before spraying, ensure that the piece is dry — even if you have to stop working until the next day.
Spray the wicker thoroughly, trying not to leave drips. Use the sponge to keep things even, then let it dry. Take a look and see if the color works or if you want to do a second coat. Give the wicker a minimum of one hour to dry (or more) before using. You don't want the next project to be getting paint out of your clothes, per Better Homes & Gardens.