What Is A 3-Way Switch And When Do You Need One?
We may receive a commission on purchases made from links.
A few years ago, we wrote about the important factors to identify when buying a home, and frankly, we feel we should add one more thing to the list: light fixtures. According to HomeServe, light fixtures can bump up your home value from 1% to 3%. Pretty cool, right? And if you happen to secure an updated lighting element that's dynamic, you also get more usability. A 3-way switch (aka 3-pole toggle) fits this job description.
As noted by The Spruce, a 3-way light control is employed in places requiring control at two opposite ends. Picture this: You walk into a hallway, turn on the bulbs at one end, and upon reaching the exit at the other end, you need to turn off the light. Instead of racing back to the previous regulator at the entrance, a 3-way switch has another control box at the exit. It makes life easier! But it doesn't have to be used only in hallways; this special electricity control unit can be used in any room or stairway.
Keep reading to learn what a 3-way control unit is, how to install one, how to choose the best product, which situations require that you select 3-way switches, and more.
What is a 3-Way Switch?
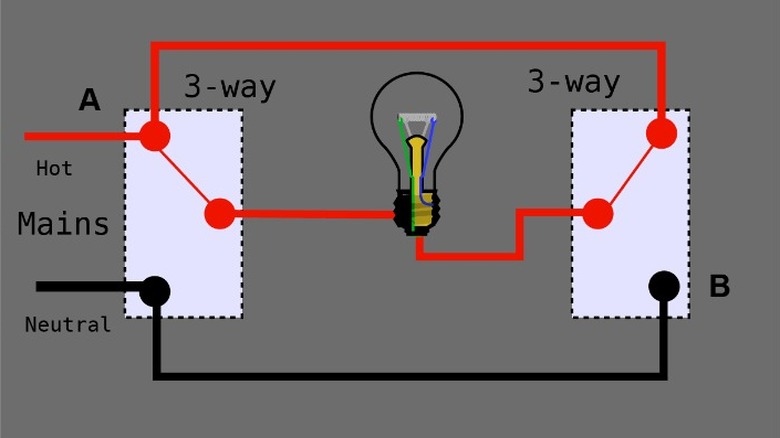
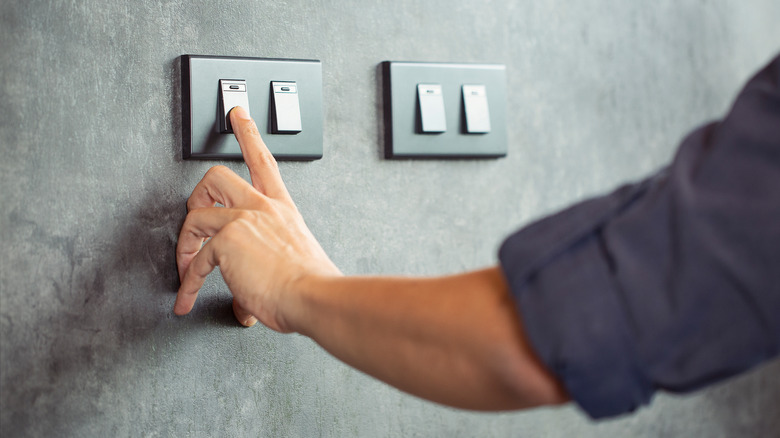
Simply put, a 3-way switch is a wall regulator that gives you access to the control of light fixtures from two dissimilar locations. Technically, How Stuff Works writes, a 3-way toggle has three terminals, where the first terminal connects to either the second or the third terminal. With this arrangement, light can be operated from two different locations. Now, while regular toggles require being connected, or not, to operate from a single regulator, a 3-way switch does not. But how do you identify a 3-way switch?
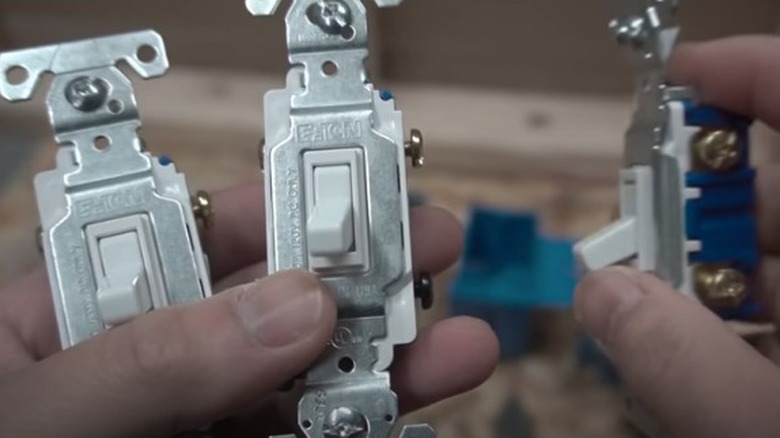
Well, The Spruce gives quite the detail by stating that there are absolutely no ON or OFF markings on a 3-way switch, unlike single-pole units. Furthermore, there are four major screw terminals on the body of a 3-way toggle. Looking further, you can observe a major ground screw, two traveler terminals, the black common terminal.
We believe the last giveaway of a 3-way regulator is the unwavering fact that if, on the two ends of the regulator, the lever is positioned up or vice versa simultaneously, the lights would come on. If they are at opposite ends, the lights stay off. Period.
How to use a 3-way Switch?

Contrary to what you might have heard, the operation of a 3-way switch is really straightforward. Technically, a 3-way control unit must create a complete circuit for an electric current to flow. Matthews puts this in simple terms by saying, "when both switches are up, the circuit is complete. When both switches are down, the circuit is complete. If one regulator is up and one is down, the current reaches a dead end, no current flows, and the bulb is off."
Aside from its intended use –– controlling light fixtures from different locations –– a 3-way switch can also be converted to a single pole. Before you do, we feel obligated to tell you that this is downright wasteful, but if it saves you a couple of green bills and the trip to the hardware store, please carry on.
As described by Hunker, a 3-way switch can be rewired into a single-pole regulator by locating the two traveler terminals. Choose the traveler terminal that is on the same side as the hot wire, then connect the hot wire to the chosen common terminal before connecting the second hot wire to the uncovered traveler. From there, all you have to do is splice the white return wires and connect them to the ground terminal.
Pros and cons of 3-way switches

Choosing between a 3-way switch, a single-pole switch, or even a 4-way switch largely depends on your intended usage and personal preferences. However, if you think you need a 3-way regulator, there are some pros and cons of installing and maintaining one.
The pros are that, according to Electrical Equipment, the 3-way regulator is rather safe and reliable and a better option for sensitive loads. It continually provides a power supply, making it an excellent choice for sensitive gadgets, electronics, and machines. This means it would be ideal in a home office setting or even in a kitchen. Also, a review on Brainly says that a three-way control reduces the chances of a power failure and increases the item life of your machines or electronic devices.
As for cons, many users have problems with 3-way switches as a result of variations in the make, wiring, care, and installation. It's difficult to DIY this project.
When do you need a 3-way switch?
The ease that comes with 3-way switches makes them great for bedrooms. By having one at the door and another at the bedside, if you forget to turn off the lights before getting into bed, you can flip the switch without moving from your comfy spot. But beyond that, there are other reasons why a 3-way switch is the right choice for your electrical needs.
3-way toggles are a good fit for low currents. Typically, they can function well at 120 volts of alternating current, writes Eaton. So you may want to rely on 3-way switches or, as an alternative, single-pole toggles such a setup. If your circuit is on a double pole breaker which, at this level, your regulator can handle about 240 VAC, you may want to ensure that your electronics and motorized appliances are within this range.
Also, since these switches are safe and reliable for sensitive loads and continually provide a power supply, they are great for use in hospitals and factories, anywhere where machines require a continuous, uninterrupted flow of power supply.
Top-tier 3-way recommendations
In terms of interior design and light fixtures, dimmers are the next big thing. My Dimmer Switch reviews some great options. If you are considering installing a 3-way switch, here are some to choose from.
The Insteon 247DD is one of the best 3-way light electricity controllers and dimmers you can find out there. This product comes with a wall switch model and dual mesh wireless technology, which reinforces its reliability. It is also voice-controlled and can accommodate an extra regulator.
Another house favorite is Lutron 3-way toggle dimmer switch. This switch can conveniently handle 150 VAC. My Dimmer Switch reviews this high-capacity switch and how it effectively operates on different kinds of bulbs: Finally, this is a control unit with which you can switch on/off halogen and LED lights together.
The last recommendation is Leviton 3-way dimmer, which is rated super easy-to-install and ergonomic by office owners. Leviton is designed for high-quality performance and can accommodate a plethora of bulb types: incandescent, halogen, LED, and even CFL bulbs. Talk about the most versatile! We also really love this product because it comes in different color choices, including ivory and light almond.
Anyway, below is House Digest's complete step-by-step guide on how to install a 3-way switch. Note that we have split this guide into two parts for the sake of clarity. The first part is an elementary knowledge for a successful wiring while the second part is the main walkthrough. Before getting started, know that calling a professional is a perfectly acceptable and safe option. If you're not a properly skilled electrician, you could injure yourself or damage your home's electrical system.
How to install a 3-way switch – part 1
To install a 3-way switch, you need two pieces of three-conductor cable and a four-conductor cable. As explained by How To Wire It, the four-conductor cable connects the two controls of your 3-way switch together, and from there, a three-conductor cable channels the connected switches to the load (a bulb, a fan, or whatever you're controlling). Finally, the second three-conductor cable connects this circuit to a power source. Working with electricity on your own always poses risks of electrocution, so be sure to do plenty of research before starting and practice safety at all times.
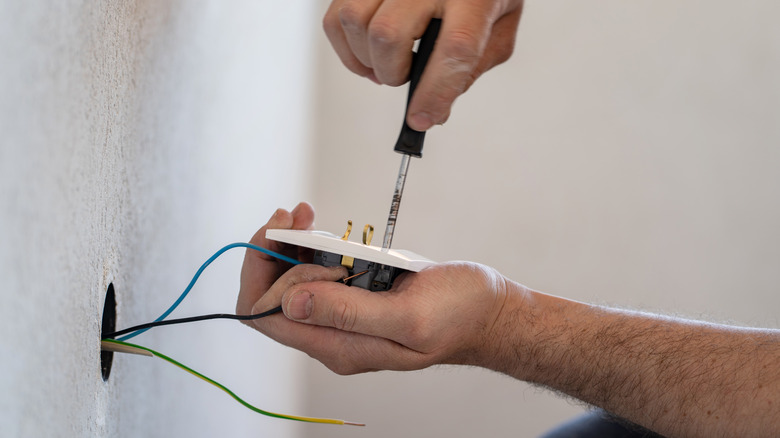
According to Ask The Electrician, a three-conductor cable is, of course, a cable of three wires in the colors red, black, and white (sometimes gray). Explaining further, Brady said the black wire (aka primary hot wire) and the red wire (aka secondary hot wire) carries electricity from the source while the white wire (aka neutral wire) completes the circuit. On the other hand, a four-conductor cable features an extra wire (mostly bare or in a green-colored insulator) for grounding.
Finally, each of the switches or terminals of a 3-way switch features four screw-ports where you are to systematically secure the wires. Along with all of the wires, terminals, and screws, you'll want to have a pair of protective gloves to wear while you change out the switches.
How to install a 3-way switch – part 2

First, we want to work with terminal A, the three-conductor cable from the power source, and the four-conductor cable as explained by How To Wire It. Secure the black "hot" wire of the three-conductor cable running from the power source to the lower-left port in terminal A. Now, from one end, take the black wire of the four-conductor cable and secure it tightly to the upper-left screw of the terminal. Also, from the same end of the four-conductor cable, take the red wire and secure it tightly to the upper-right screw of the terminal. Then, with a wire nut, join the white wire from the same end of the four-conductor cable to the white wire of the three-conductor cable coming from the power source. Finally, secure the bare or green wire of the four-conductor cable to the last port on the terminal.
Now, on to terminal B, the three-conductor wire leading to the load (bulb or fan), and the second end of the bridge four-conductor cable. First, secure the black wire of the second end of the four-conductor cable to the upper-right port of the conductor. Then, secure the black wire of the three-conductor cable (which leads to the load) to the lower-left port of the terminal. Similarly, the upper-left screw of the terminal should hold the red wire from the four-conductor cable. Finally, connect the two white wires as previously discussed in terminal A and secure the bare or green copper wire to the last port.
Complete the setup by connecting the second end of the three-conductor wire as described in the manual of the load (a fan or a bulb). And that's it; you've successfully installed a three-wire switch.
3-way switches and costs
It's important to draft out a budget before calling an electrician. It helps to know what costs you might incur when getting any kind of electrical work done. Costs can vary by area, company, and make of products, as well.
First, you need to purchase a 3-way switch that usually costs anything between $3 to $15 as priced by Walmart. However, if you're going for the special type that comes with a dimmer, those are usually priced higher. As sighted on True Value, these special 3-way control units cost anything from $25 to $100.
When it comes to the repairs or new installations, the prices largely depend on your repair guy. And while a lot of people prefer DIY, we wouldn't recommend that because of the potential risks, hidden electrical damages, and tendency to do a mediocre job, as stated by Prolectricco. Thus, you want to set aside an installation budget which Homewyse says can cost you anything from $150 to $300. However, the cost may increase if you are installing, repairing, or replacing multiple switches.
Alternatives to 3-way switches
Finally, if you feel that the 3-way controller is just not for you, the most readily available alternatives are the single-pole switch, double-pole, and 4-pole switches.
A single-pole switch can control only a single circuit, says Elesi. In other words, single-pole switches allow you to control your lights from one single location. So, when shopping for this, expect it to come with the conventional one-location ON/OFF button.
If you're thinking of one controller for two applications, then the double-pole switch is just right for you as one of its most common uses is as a light bulb and fan controller. According to Herga, the double-pole switch operates by connecting to two separate electric circuits. They essentially contain two poles that are linked together and can complete the circuit either simultaneously or staggered.
The only difference between a 3-way regulator and a 4-way switch is that a 4-way switch has four terminals plus a ground terminal and can control the lights from three different locations, writes Better Homes & Gardens. Also, for a 4-way electricity control to actually complete a circuit, it has to be connected between two 3-way switches.