How To Clean Gas Stove Burners
We may receive a commission on purchases made from links.
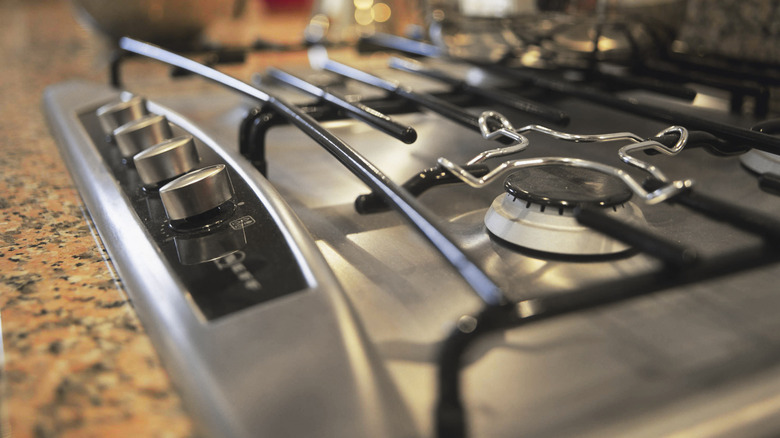
Nothing ruins a good just-cleaned-the-kitchen vibe like a gas stove burner covered in grime. It's an eyesore, not to mention a grease fire waiting to happen. However, most of us, hopeless and unsure how to even tackle the job, take to cleaning around the mess as if ignoring it will make the problem go away. A stand off with last night's calcified pasta sauce it is.
Cleaning gas stove burners isn't fun, not least because the kitchen cleaner failsafe –- vinegar elixirs -– can smell especially nasty when mixed with the sauces we spilled and singed then neglected for days. However, it doesn't have to be that way; there's no reason to let caked-on food ruin the look of a shiny kitchen, encourages Better Homes & Gardens. Even if we've failed to scrub the spillage before it gets hard and looks stained, cleaning gas stove burners is not as difficult as we think. We have plenty of smart options of manageable remedies.
1. Try Bar Keepers Friend
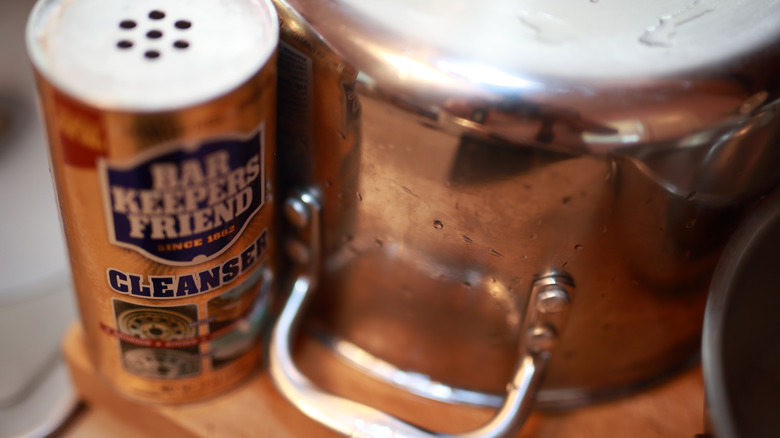
If you're afraid a powder will surely scratch the stovetop surface, don't be. Ali Bryde of @mustardseedbeginnings isn't, and her thousands of Instagram followers who turn to her for DIY work and interior design tips believe that she knows her stuff. "I love using Bar Keepers Friend," she said. "That with a wool pad or scrubbing brush gets all the grime off, then rinse with warm water."
Bar Keepers Friend can be rubbed on in powder form or as a multipurpose cooktop cleaner liquid. It also can be bought with a Bar Keepers Friend Cooktop Cleaner set that includes several sizes of brushes plus a plastic scraper –- but rub gently. Bar Keepers Friend suggests you start your cleaning process by removing the grates and burner caps and set them in your sink. Sprinkle the product all over the accessories in the sink and also your stovetop. Using a dampened sponge, rub the powder into a paste all over the stovetop, and be careful not to spill any into the holes of your gas stovetop. Let that sit for a few minutes while you do the same for burner caps and grates, rubbing the product all over each piece individually. Come back to the stovetop to wipe it down first with a wet cloth then with a dry cloth. Then rinse all burner caps and grates until all the white residue is gone. Dry well, and reassemble.
2. Soak grates and burner caps

According to Sears PartsDirect, one great way to avoid standing and scrubbing over the stove is to pull apart the pieces and soak overnight, using a gas stove burner cleaner like Kenmore's gas grate powder. It's a strong cleanser, so don't use it if your grates are enamel coated. You can check this in your owner's manual. It is environmentally safe, but can hurt the skin, so put on rubber gloves before using.
The soak they recommend starts with filling your sink with water. Then add 3 tablespoons of the powder, and let it dissolve before placing your grates and burner caps in the mixture, stirring occasionally with a plastic spoon or utensil. Take the grates and burner caps off a fully cooled stove and dunk them into the water to soak overnight. Drain the water in the morning and use a scrub brush to remove the softened grime. Also, check your junk drawer for incidentals that came with your appliance because a small packet of the cleaning powder may have come with your stovetop.
3. Consider a quicker paste soak
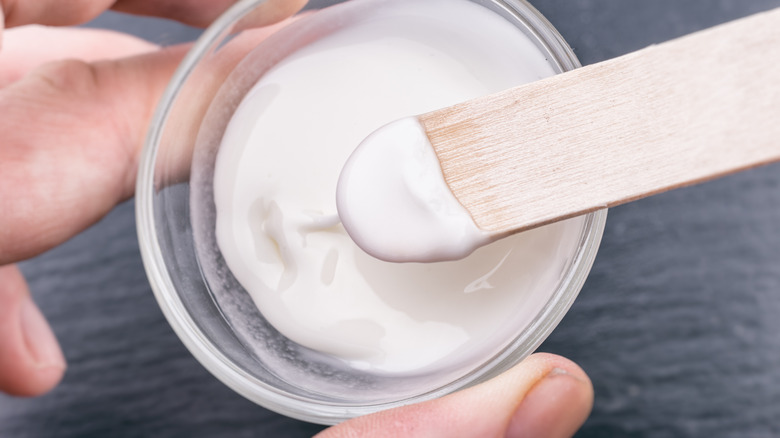
If you like the soak solution, but don't want to wait for an overnight fix, a home remedy paste concoction can speed up the process. Whirlpool suggests that a quick paste of three parts baking soda to one part water can do the scrubbing for you. To use this paste, remove grates and burner caps, then coat them with this mixture and let them set for 20 minutes. For particularly caked on food, Whirlpool recommends a 20 minute soak in hot, soapy water first, then apply the paste.
Another paste easily suited for both the gas stove burners and the stovetop itself calls for a ¼ cup dish soap, ½ cup baking soda, ¼ cup hydrogen peroxide, and a little extra elbow grease, according the Bangor Daily News. The concoction may require a good amount of scrubbing, but the extra can pay off more than you might expect, especially since the crusty burner bits may be wiped off even better than the char on your stovetop.
For this paste, remove your grates and burner caps, then drizzle the dish soap over the stovetop without getting soap into the burners themselves. Drop pinches of baking soda onto the soap. Then drip hydrogen peroxide over the baking soda and soap, generating a concoction that looks part paste, part slime, and let it soak for up to 30 minutes. For either paste, scrub gently with a scrubbing pad of your choice, then rinse with a wet sponge and wipe dry.
4. Don't neglect burner head slots
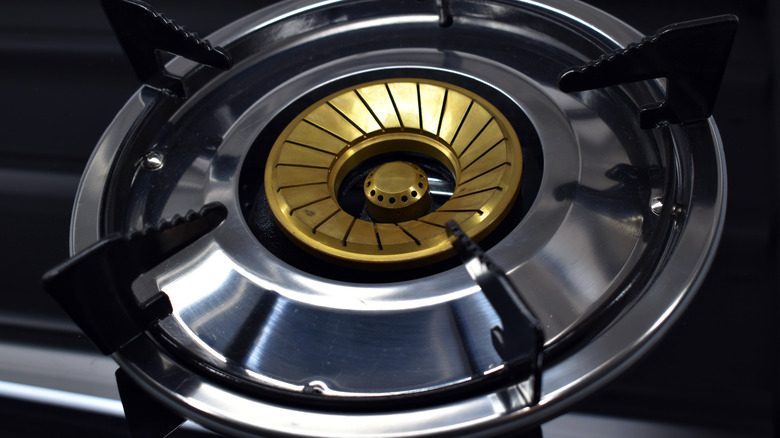
It's reasonable that our gas stove burner cleaning routine focuses on grates, burner caps and stovetop spills. However, it's the crevices in the burner head slots that make for even heating, so it's worth taking a look. Though concentrated cleaning focus on gas stove burner head slots isn't a big cosmetic bang for the buck, Sears PartsDirect still recommends taking a few steps to clean out clogs or blockages caused by food bits so that it will help keep the burner gas flowing well. Their process is simple.
Once the gas stove burner cap is removed, wipe the burner head with a dampened sponge or soft cloth. Then use a wet toothbrush to scrub over the crevices of the burner head to dislodge any stubborn grime. For that extra charred on, hard to remove food spill, Sears PartsDirect suggests that a paper clip or sewing needle will do the trick too. Finish with a dry cloth wipe down.
5. Try the all-natural winner: vinegar
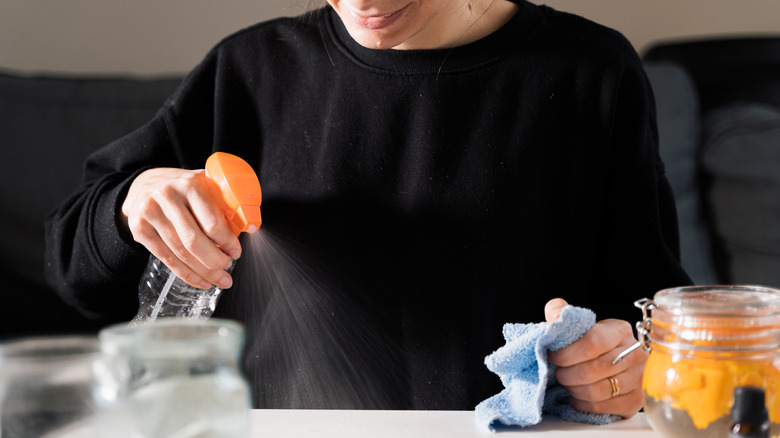
Vinegar is known for its environmentally friendly, non-toxic cleaning muscle thanks to its acetic acid that may smell bad, but cleans like a charm (via Healthline). It's strong enough to kill bacteria, but can it budge caked on gas stove burner char? According to the Bangor Daily News, yes it can, but you need the right mix.
Start with a hearty vinegar mix that includes 1 cup distilled white vinegar, ½ cup lemon juice, and 1 teaspoon baking soda. Combine the vinegar and lemon juice and pour into a clean spray bottle. Sprinkle baking soda over the stovetop and the removed grates and burner caps. Spray the lemon juice with vinegar concoction over all the baking soda-covered surfaces then wait 30 minutes. After that, wipe with a wet cloth then towel dry.
Even on dirty burners, you may surprised by the first-pass punch this mix has on gas stove burner grime, plus the lemon scent makes the whole concoction smell a lot better than plain vinegar. To avoid any staining from the vinegar, use white distilled vinegar. It has as much acidity as most over the counter cleaners (about 5%) and doesn't come with that coloring agent like darker vinegars (via Healthline).
6. Tough stains may call for tougher solutions – like ammonia

The mere mention of the word might sound too abrasive to consider, but don't be scared off by its threat of smell and harsh solvent. Handled correctly, ammonia may be the last best answer that stands between you and a de-fossilized pasta sauce spill on your gas stove burner, as noted by Bob Vila.
This method starts with removing all grates and burner caps from your stove top. Using gallon-size Ziploc bags that you can seal, put grates each in their own bag, then congregate all burner caps into their own bag. Add a ¼ cup of ammonia to each bag, which will not cover the grates or burner caps completely. The goal is to let the ammonia fumes do the work, not to soak them in the fluid. Place all bags in your sink in case of a leak and let sit overnight.
The next day, open one bag at a time. Consider opening a kitchen window for added ventilation. Remove each burner and rinse thoroughly to remove any ammonia residue. Wet wipe away any remaining food stains, pat dry, and reassemble gas stove burners to the stovetop.
7. In the end, there's Easy-Off
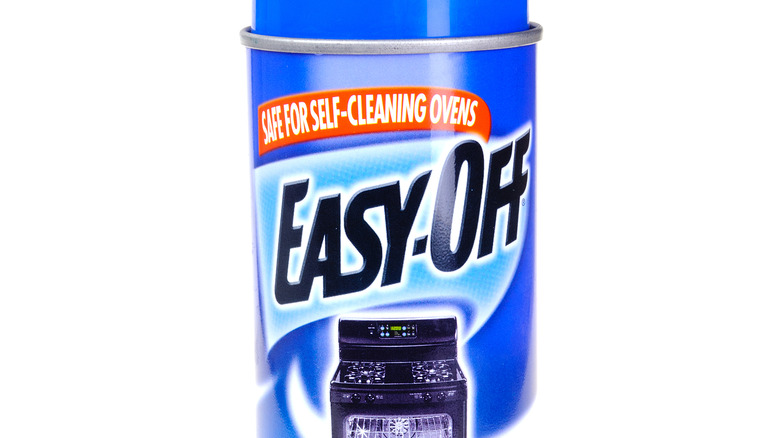
In a showdown series that evaluated multipurpose cleaners based on how easy they are to use on gas stove burners and how much elbow grease it took to remove the worst stains, Kitchn ranked Easy-Off the hands down winner. According to their testing, unless you're looking for a solution that uses only all-natural ingredients, Easy-Off's ability to cut through calcified splatters is unmatched.
Short of using a removable gas range protector to save us the headache of messy burners in the first place, Easy-Off presents a solution that really is, well, easy and seemingly lifts the grime right off the grate. Kitchn raved about the grease and fat visibly letting loose from gas stove burners and dissolving into the Easy-Off spray, which tells you when it's time to wipe everything clean. The process is as simple as spraying the product onto your removed grates and burner caps, then spray your stovetop and wait 40 minutes. Wipe with a damp cloth dipped in warm soapy water, towel dry, then reassemble all of the grates and caps to your stovetop.
No matter what cleaning solution you pick, be sure to realign burner caps correctly (via Solar). If you hear a clicking sound after your stovetop is reassembled, try removing the burner cap from the clicking burner and re-center the cap on the base. Then enjoy the resulting fresh-scented shine, knowing gas stove burner char will never again get the best of you.