How To Grow And Care For A Spider Plant
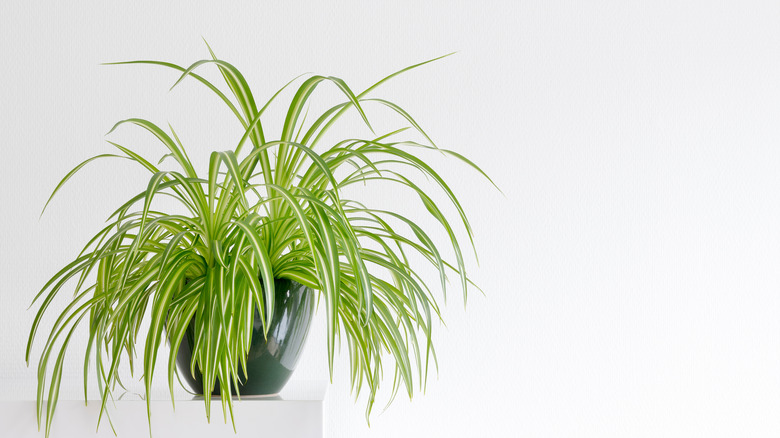
Don't let the name turn you away because the spider plant, or chlorophytum comosum, is one of the most popular and common houseplants, as well as one of the easiest to care for. The plant grows light green foliage with white stripes, and gets its common name from its growth pattern, growing in tall arches similar to the shape of a spider leg, according to Gardening Know How. It's also extremely popular due to how easy it is to propagate, as full grown plants very frequently produce "spiderettes," or little baby plants that are ready for transplanting as soon as they grow.
Care for spider plants is remarkably easy, and is a great pick for beginner house plant enthusiasts. It is also a favorite among even the most seasoned house plant experts. For those just getting into more intermediate indoor gardening skills, like propagation, the spider plant is an excellent start. Keep reading to learn how to care for this great and low maintenance plant.
How to use spider plant in garden
While spider plants are most commonly grown indoors as houseplants, they can also be grown outdoors. They grow best in zones 9 through 11, where the warmer weather allows them to grow as perennials, according to Gardening Know How. In colder climates, they can be grown as annuals. Alternatively, you can bring your indoor spider plants outdoors during the summer, making sure they aren't exposed to temperatures lower than 60 degrees.
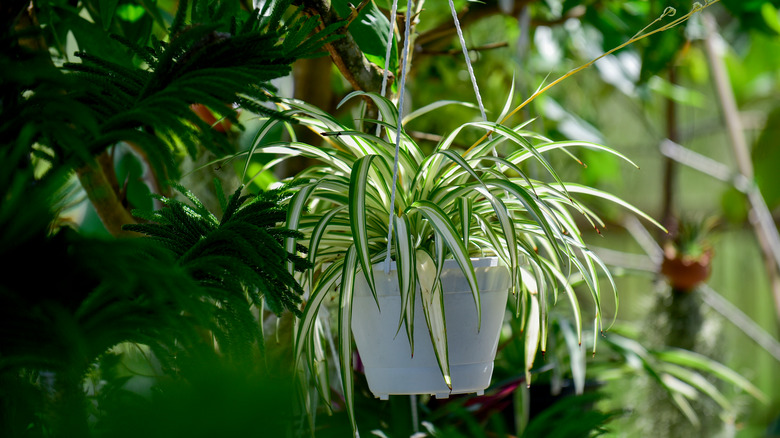
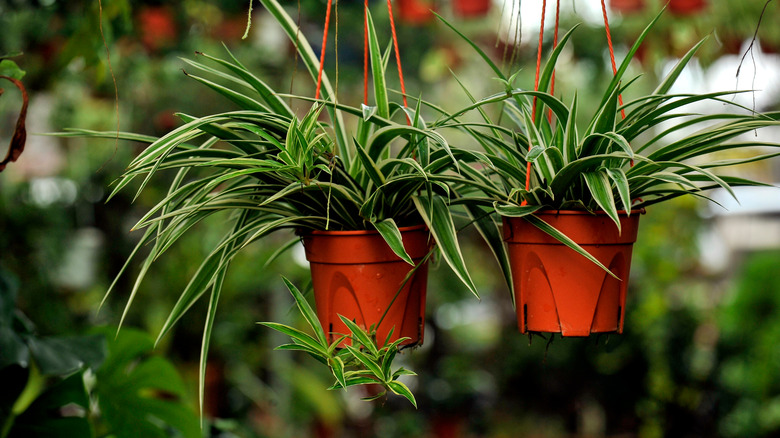
If planting spider plants outdoors, make sure they aren't exposed to direct sunlight. They are quick spreaders when planted in-ground, as the spiderettes will root themselves once they touch dirt, making them a great ground cover or border plant. They also look great as decoration in hanging pots, as they will quickly fill up the pot and trail dense foliage.
Gear Trench recommends planting spider plants alongside crops like tomatoes, beets, lettuce, and parsley. Be careful, though, as outdoor spider plants are more likely to attract pests like spider mites, aphids, scale, and whiteflies, which may spread to your crops. Make sure to avoid planting spider plants near potatoes, carrots, garlic, turnips, and any other tuber crops, as pests will be especially attracted to them.
How to grow spider plant
Growing spider plants is one of the easiest things to do. In fact, some houseplant experts advise against purchasing the plant new, as spiderettes are plentily available from mature plants. If you want to grow your own spider plant, ask a friend with a spider plant if you can have a spiderette. Alternatively, you can grow as many spider plants as you want after growing one to maturity.
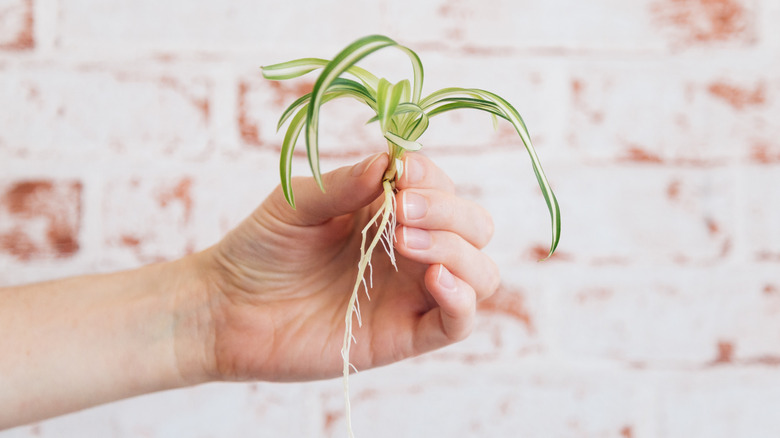
Spiderettes grow on long yellow stems that grow from the main plant, producing miniature spider plants. You can remove and propagate them as soon as you see them grow or wait until they're a little bigger. To remove them, Gardening Know How recommends cutting off the spiderette at the root it forms at the stem, keeping the roots intact for transplanting.
Spider plants can be grown in water to develop a larger root system, but they will also very quickly root in soil. Regardless, to root in water, simply add the spiderette to a glass or jar of water for a week or two until roots develop. To root in soil, simply fill a small pot with soil and add the spiderette. If you want a full plant without waiting for one to grow into a new pot size, consider planting multiple spiderettes in one larger pot.
How to care for spider plant
Spider plants are as easy to care for as they are to grow, requiring very minimal maintenance not only to survive but to thrive. The Spruce recommends either potting in hanging pots or placing them on a tall shelf or surface. Not only do they look lovely when they trail, but this helps to not crush the leaves. Spider plants prefer bright indirect light but can handle a little shade, though they may not grow as quickly or vibrantly. Avoid direct sun, as it can burn the leaves.
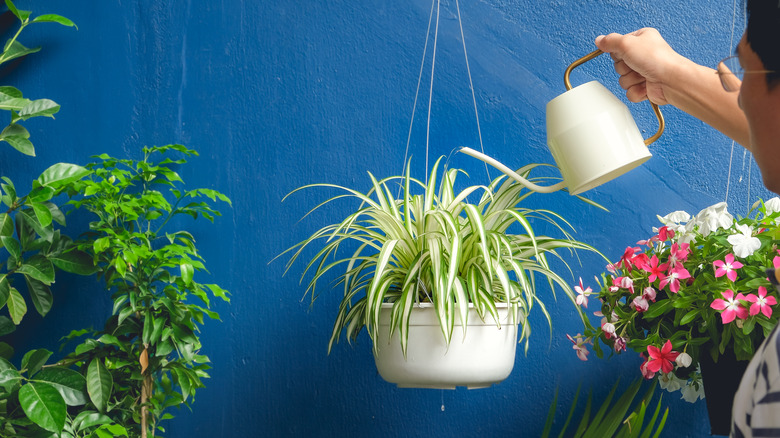
The only somewhat sensitive aspect of a spider plant is the moisture level. They prefer to be consistently slightly moist but are susceptible to root rot if left to sit waterlogged. Water when the soil feels like it's about to dry out and let drain completely. Alternatively, purchase a moisture meter. They are also sensitive to fluoride and chlorine, often found in tap water, which can cause browning tips. Filtered, distilled, or rainwater is ideal.
Spider plants like to be warm and humid, though they are not as demanding as other houseplants. Avoid placing them in drafty areas, and ensure they are in a relatively humid room. You will know they're too dry when the tips of the leaves start to brown. Mist regularly to avoid this. Support their quick growth with monthly feeding of a liquid houseplant fertilizer, but be careful not to overfeed and weaken the plant.
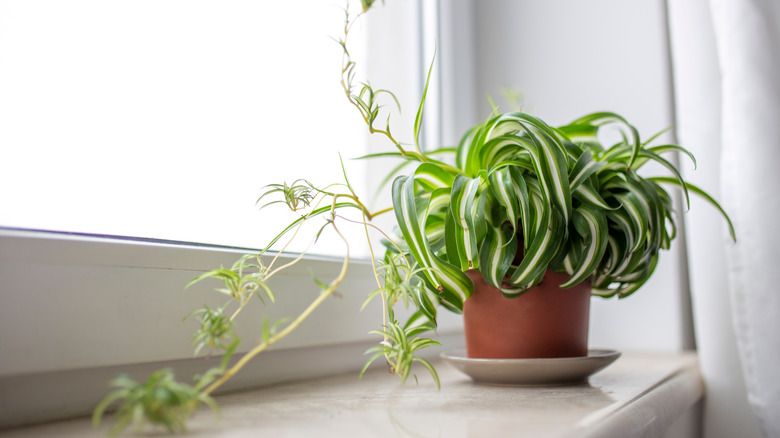
Spider plant varieties
According to Gardenine, there are more than 200 varieties of spider plants, which can generally be categorized into three categories. Those categories are variegated, nonvariegated or green, and curly. Variegated spider plants are the most common, with some kind of white striping, though the pattern depends on the species. Nonvariegated are just that, known also as "Shamrock," and are among the rarer varieties. Curly spider plants can be variegated or not but grow in curls instead of long straight leaves. They are also rarer. Here are a few of the most popular varieties per Balcony Garden Web:
-
Variegated spider plant – This is the most common spider plant, growing straight, light green leaves with a white stripe down the middle.
-
Reverse Variegated – This variety is the same as the previous species but just reversed, with the white striping on the border of the plant as opposed to the center.
-
Hawaiian spider plant – Also known as Golden Glow, this is a much smaller variety and has fainter variegation, almost looking solidly green.
-
Zebra Grass – This variety grows similarly to reverse variegated but much brighter, smaller, and rarer.
-
Bonnie – Known also as the toilet plant, this species is smaller and compact, perfect for small spaces, and grows bright and curled leaves.
Are spider plants toxic?
Not only are spider plants incredibly easy to care for and grow, but they are also non-toxic to cats and dogs, according to the ASPCA. That being said, don't encourage your furry friends to play with the plant. While it isn't fatally toxic, it can still cause minor issues, especially in cats, warns Gardening Know How. This is because spider plants produce a chemical that has a hallucinogenic effect on cats, similar in potency to catnip, possibly even related to opium. While it won't cause any fatal effects, it may cause slightly erratic behavior in your feline friend, as well as gastrointestinal upset, vomiting, and diarrhea. Be careful to keep the plant away from your cat for this reason. Dogs will also get upset stomachs from ingesting the plant but without the hallucinogenic effect.
Spider plants are entirely non-toxic to humans, though, per Den Garden, who lists them as a child-safe plant. That being said, don't be eager to eat the plant or let children eat it, as it may result in a mildly upset stomach. The hallucinogenic effect is only relevant for cats, so don't expect anything other than a bitter taste and stomach pain upon ingestion.
How to repot spider plants
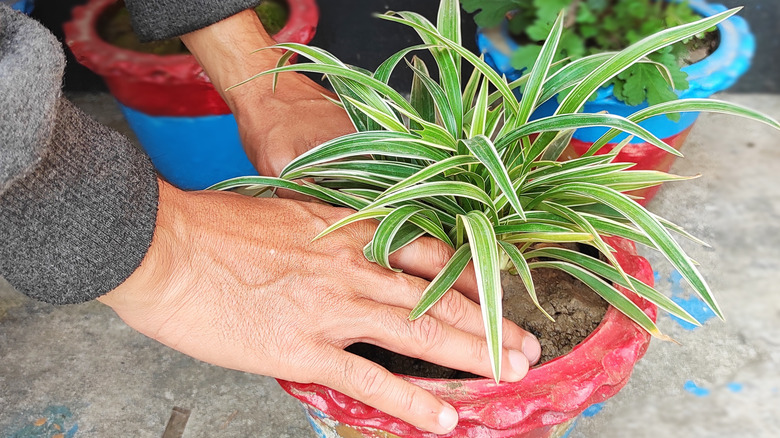
Spider plants should be repotted roughly every two to three years in the spring, advises The Spruce. They do prefer being a little root bound, according to Wild Interiors, so don't be too eager to repot. If you're wondering if it's time to repot your spider plant, look to see if the plant's roots are growing through the drainage holes and, more importantly, the top of the soil. Spider plants are relatively adaptable when it comes to soil, with any average potting mix working sufficiently. That being said, they do prefer looser, loamy soil. They also don't like high salt content, as it can turn leaves brown.
To repot, begin by removing the plant from its current pot. The roots are thicker, almost tuberous in appearance. Using your hand, gently separate the roots, massaging out as much old dirt as possible. Remove any mushy or brown roots. Fill a new pot, roughly one to two inches larger than the old pot, with a little bit of soil. Then, place the plant in the new pot, ensuring it is sitting at the same depth level as before. Once positioned, fill to the top with soil, and care for as usual.