How To Use Metal Studs In DIY Projects

What are you seeking? A Man of Steel or a house of steel? From basement walls to partition barriers, metal wall studs are simple structures you can implement with various do-it-yourself projects. Metal framing studs are typically composed of steel and offer the greatest support for non-load bearing walls or other different metal-based designs. Although cold-formed steel (CFS) might seem like a more modern approach, the concept has been around since the mid-1800s. During California's Gold Rush, metal studs were marketed as being more affordable than timber and easy to assemble for building portable iron houses. So why aren't more homes made of steel?
According to the Los Angeles Times, steel is not as accessible as wood, including building codes and finding contractors familiar with using it. Labor costs may also be higher, as metal studs can take more time to assemble if not done regularly. But why use metal studs? Compared to wood, both are solid and enduring, yet wood is prone to rot from potential water erosion. On the other hand, metal framing is lightweight and resistant to fire, mold, rust, and pests. Metal studs have also been found to be approximately 30% cheaper than wood, per Family Handyman, although there may be an expenditure from the specific tools required to help assemble them appropriately. Read on to learn how to use metal studs with your next DIY project!
Types of metal stud projects

Pick your project. There are so many DIY undertakings to consider when using metal wall studs, such as finishing your bathroom walls, a deck, outdoor kitchen, partition, storage space, tiny shed, or, more commonly, the bones of your basement walls, especially if you live in high flood zones. More importantly, steel drywall framing might be like building with your childhood Erector Set, yet the method takes time to adjust compared to working with wood, per Renovation Insider. Whatever you decide, working with metal studs offers straight and sturdy lines underneath your scheme. Steel framing is also very lightweight and relatively easier to transport and work with than wood framing.
Consider the location. Is this an outdoor or indoor project? When it comes to storms, steel buildings may resist lightning, but it all depends on the structure's height. Tall buildings and structures are more susceptible to being struck than the metal framing material itself, per Rhino Steel Building Systems. So, you can construct metal framing for an outdoor project, but don't build it too high.
Choose the right studs
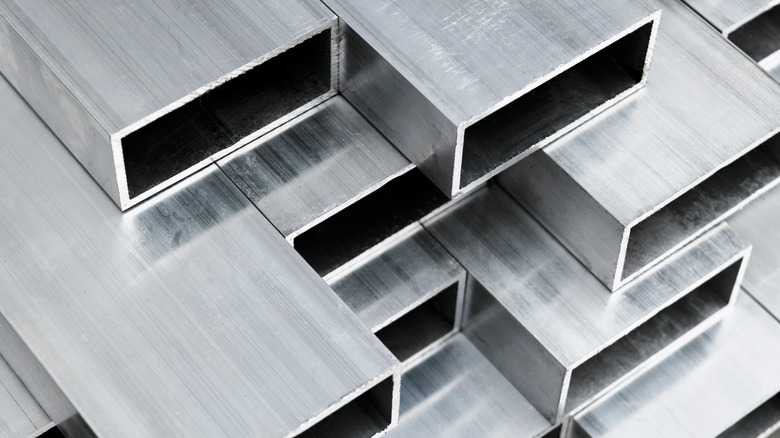
Metal stud framing consists of two cold-formed steel components: a stud (vertical) and a track (horizontal). Depending on the type of project you design, it's important to understand metal studs' various sizes and shapes. Typically, local home improvement stores may offer 25-gauge steel studs 2x4 in width and 8 to 14 feet in length, per The Spruce. To meet specific building specifications, studs are often available in other various measurements. Made of galvanized steel, metal wall framing is classified as a light gauge.
These sizes depend upon what type of structure you're building and other key factors like the location's weather conditions. Normally, lighter gauge metal studs are used for non-loading bearing walls, and heavy gauge studs like structural studs are used for load-bearing half-walls, interior walls, and partitions, per BuildSteel. Additionally, structural metal stud forms integrate heavier gauges and are used for load-bearing walls and dividers.
Types of metal framing studs

Since the early 1950s, metal framing has set the standard for commercial construction, as it needs to meet building and safety requirements for incombustibility. In addition, because of its fire-proof capabilities, its popularity has flourished among residential renovations and construction over the years, per SFGate. When choosing steel studs, there are four main types meant for non-load-bearing walls, Hunker writes, which have cross-sections that are proportionate with their lettered name (C, H, I, and U):
- C-shaped studs have a web (or center body) that creates the stud dimension, has regular punched openings, and work well with drywall. Common sizes include 1-5/8, 2-1/2, 3-5/8, 4 and 6 inches.
- H-shaped metal studs are wider and somewhat heavier than the I-shape. This material is available in 8, 10, and 12 feet measurements, but also in custom lengths.
- I-shaped studs have a web portion that intersects with the center of the flanges (or sides), which makes them nice and firm. You might have these around ducts and stairwells, per Hunker. They come in 2-1/2-, 4- and 6-inch sizes.
- U-shaped channels are used to connect your stud system on the floor and ceiling and don't include punched openings. They are available in each stud size.
Use the best tools

Whether you're new to working with steel studs or already a pro, you'll need the right tools to accomplish the job. Basic items are gloves, goggles, measuring tape, 4-foot level, and chalk line. More precise tools include aviation metal snips, plumb bob with nylon line (determines vertical level), a cordless drill, a 2-inch extension bit holder, a miter saw, and c-clamp self-locking pliers. Also, having a stud finder can help you find the right support to hang something and locate where current studs are located before the renovation, per ZirconTV's YouTube channel.
When either cutting metal studs by hand or with power tools, be sure to wear the best protective gear like long sleeves, gloves, and earplugs. Also, be certain that you are trained to use power tools when working with metal studs. If you decide to cut them by hand, use the aviation snips while being cautious of sharp metal shards that could injure the skin. Besides the potential risk of hazards, if you're a newbie, be prepared that the job may take longer than expected. Give yourself a timeline, but know that there is a learning curve, which requires time and patience, as it's something not to rush through, per The Spruce. Finally, always take extra safety precautions when working with new tools and machinery.
Installing your metal studs

Before you start, determine the dimensions of your layout, and mark them with chalk lines on the floor and walls; this will help determine the number of studs you'll need for your project. Generally, you should use one stud for every 12 inches. Measure and cut your studs if needed. Place your horizontal tracks on the floor and secure them with pan-head or flathead screws, which provide the ultimate stability, per Better Homes & Gardens. Use a plumb bob when transferring your layout to make sure everything is aligned, like the positioning of the ceiling track. Install the tracks, slide the studs into them, and then screw them down. Place the clamps onto the sides to hold the movement securely. When connecting studs, you can splice two pieces together by cutting a 2-inch slit in the center of one's web and slightly squeezing opposing flanges while sliding them together.
What about combining metal and wood studs? It can be done but is not advisable. When there is a change in the temperature and/or moisture levels, wood may change its shape by either expanding or contracting, per What Blueprint. Metal studs will maintain their form and condition through these kinds of alterations. Also, if you're including doors in the plan, make the metal stud wide enough to line it with 3/4 inches of plywood, making mounting the door frame a lot easier later. When complete, hang your drywall securely and horizontally.