3-Slot Vs. 4-Slot Dryer Outlets: A Comparison
We may receive a commission on purchases made from links.
The newer four-prong power supply cords for dryers only became the U.S. standard in the late 1990s, so a lot of homes are still set up for three-prong cords. This configuration combines neutral and ground wires and creates the potential for shock, according to Fred's Appliance Repair. In fact, because there are so many possible circumstances, most dryers simply come without cords, meaning you have to install one separately when you buy a new dryer.
Sifting through the complications can begin to sound a bit onerous. And the best path isn't even always clear to professional electricians. On the surface, things seem simple: you adapt your dryer to the receptacle in your house, unless you're willing to take on the bigger project of changing the receptacle. So, usually: a three prong receptacle dictates the need for a three-prong cord, and a four-prong receptacle means you need a four-prong cord. Right?
Well, mostly, but it depends on your situation, and the stakes are high. Doing it wrong – and sometimes even doing it "right," but imperfectly – can result in severe electrical shock, or worse. So let's get to the bottom of this.
Dryer wiring basics
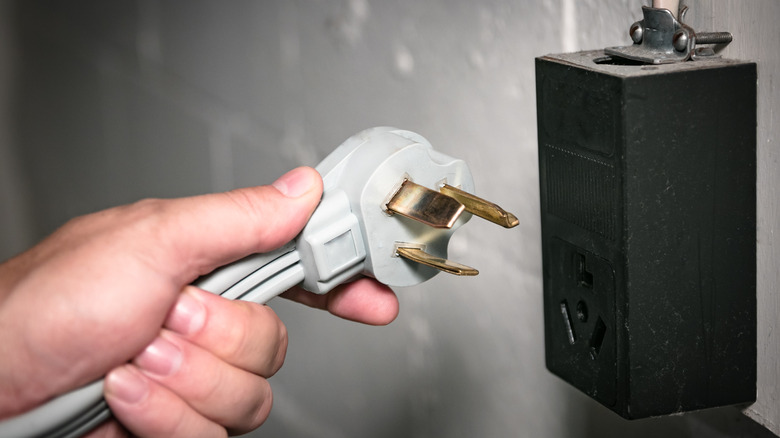
When you connect a dryer cord, you're attaching one end of a heavy-duty cable with a specialized plug on the other end. Specifically, you're attaching it to a terminal block (a set of electrical connections, usually made with screws) under an access panel on the back of the dryer, according to The Spruce. There's usually a strain relief bracket attached to the access panel or the dryer frame to protect the connections from stress when something is tugging on the cord. The plug is connected to the power outlet (technically, a receptacle).
Three-wire (and therefore three-prong) cords have two hot wires and a neutral, and four-wire cords add a ground wire that connects the chassis of the dryer to the ground rod on the far side of your circuit breaker box. When a three-wire cord is used, the neutral and ground connections in the dryer are bridged by a ground strap, typically a 10-gauge green wire or a short metal bar (via AC Works).
Dryer circuits are 30-amp dedicated circuits, meaning there aren't other outlets in the circuit, and they are typically serviced by 10 gauge wire in the walls. Obviously, the difference between three- and four-conductor receptacles is that the four-wire receptacles have a ground wire.
Why two hot wires?
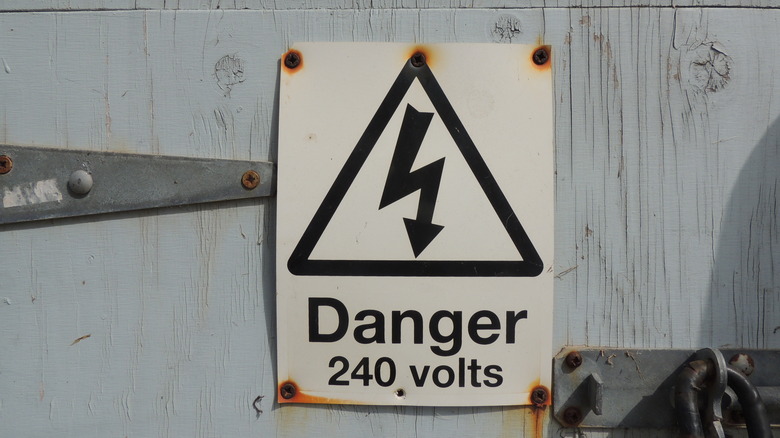
Most of us think of power cords as having either two wires (hot and neutral) or three (hot, neutral, and ground). But that's for 120-volt devices, while in the U.S., 240v equipment (clothes dryers, most heating/air conditioning units, water heaters, electric ranges, and specialized devices like welders) typically requires two hot wires, each delivering 120v in alternating cycles.
The neutral wire isn't necessary for the balanced 240v part of the load, but is included so that any 120v part of the system (timers, controls, etc.) has a return current path. Balanced 240v loads return on the hot wires because alternating current power cycles (alternates) power in both directions... 60 times per second (60 Hertz) in the U.S. During these cycles, the two hot wires take turns returning the 240v voltage. But a neutral is still required to return voltage for the 120v part of the system.
If this is confusing you, you're not alone. What you need to know is that there are three-wire dryer outlets (hot-hot-neutral configuration) and infinitely superior four-wire outlets (hot-hot-neutral-ground), and it's all a little different from a regular outlet because of the two hot wires.
It's all about grounding and bootlegging
It's important to understand the work hot and neutral wires are doing but, really, this is all about grounding. Stray current, which is the sort of thing you get when there's a short or a fault, seeks a way to earth (ground). If a ground wire isn't present (a situation known as an "open ground"), the current might very well use your body as the path. Older homes that were never upgraded with grounded wiring will still show two-prong 120v outlets. Equipment power supplies without a ground were forbidden by the National Electric Code (NEC) in 1996.
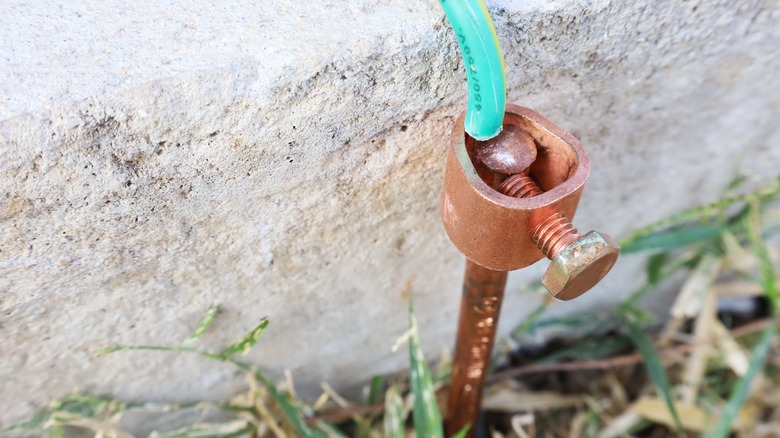
Grounding is usually accomplished by linking the ground wire to a metal rod or water pipe that makes a substantial (10 feet or so) connection to the earth. In a ground fault situation, the stray voltage should use this path back to earth and, along the way, trip your circuit breaker to disconnect power to the circuit with the fault.
The lack of a proper ground wire leads to practices like adapting three-prong devices to two-prong plugs or, far worse, the dreaded "bootleg ground." According to The Silicon Underground, a bootleg ground is a wiring scheme in which the ground wire is combined with the neutral, which puts stray current on the neutral wire and return current on the ground. We'll see why this is a bad thing in a bit.
What about GFCI?
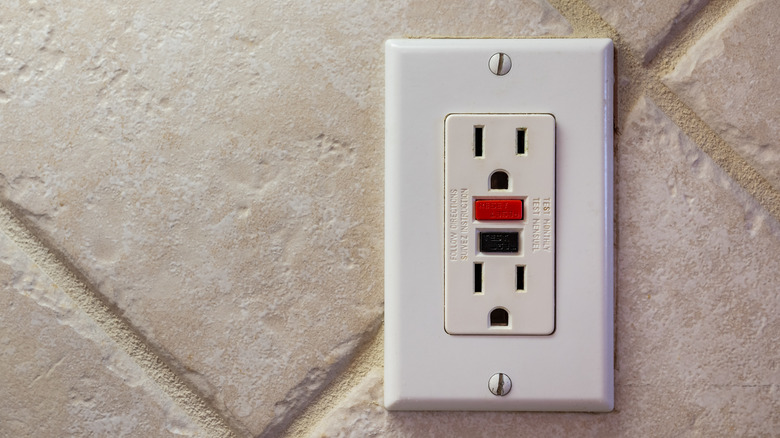
You've seen GFCI outlets with the little reset buttons, and may even be aware of GFCI circuit breakers. We don't pay much attention to them, but they're pretty important. A ground fault circuit interrupter (GFCI, often abbreviated GFI) monitors the power on hot and neutral wires to make sure the same amount of power is flowing into and out of a circuit. If they differ by as little as 4 or 5 milliamps, the GFCI will disconnect the circuit in about one-tenth of a second, according to Fine Homebuilding. During that time, you might get an electric shock, but you probably won't be electrocuted.
The GFCI feature can be built into the circuit breaker itself, or it can be part of an outlet (via Safe Electricity). GFCI outlets only protect a circuit downstream from the GFCI, which means that the section between the circuit breaker and the GFCI is not protected. The current electrical code requires GFCI protection just about everywhere in a home, including laundry rooms (via Electrical License Renewal).
Changing a cord... or not
From all this, we can conclude that four-wire dryer cords are superior from a safety point of view. You might put on a three- or four-wire cord depending on your circumstances, but you also might have the option of changing the circumstances themselves. That is, if you have a three-prong receptacle you might choose to upgrade.
This might be trivial if an unused ground wire is shoved back into the box, but it might be quite a production if you need to run new 10-gauge wire to the outlet to accommodate the ground, according to How To Wire It.
The phenomenon of finding a fourth (ground) wire unused behind a three-wire receptacle is not unusual. It's usually an artifact of a previous homeowner illegally switching out a three-prong outlet for a four-prong outlet. In that circumstance, the best path is to switch it back.
Running new wire can be frustrating or impossible, and it's often best left to a pro, if for no other reason than that they have the necessary experience. 10-gauge wire is stiff and heavy, and trying to route it through a wall unseen can be exhausting.
What about replacing a 4-prong with a 3-prong cord?

You are not required by NEC code to upgrade a three-prong receptacle to four prongs, so you might find yourself installing a three-prong cord on a brand-new dryer. Build My Own Cabin shows that this is done by bonding the neutral and ground connections within the dryer with a ground strap (which is often a white wire connected to a green screw), effectively making the neutral function as the ground wire.
This works to some extent because the neutral and ground wires are connected where your electrical service enters the building. This approach is not uncommon, but forensic electrical fire investigator Ralph Crawford writes in Quora that it's not as safe as having a dedicated ground wire. The ground wire should never carry current unless something has gone wrong (a "ground fault"), but the neutral often carries current. It's safe for the most part, but absolutely not ideal.
It all starts with the access panel

The access panel on the back of your dryer, which covers the terminal block, might seem like the least important part of this process, but it's a key to safety in at least two ways. First, it covers otherwise exposed electrical connections that could lead to shock or death if touched simultaneously. Second, it includes the strain relief clamp that protects your power cord from being pulled loose and potentially causing a short. Never omit a strain relief device, and add a new one if the original is missing.
The Home Depot offers a good pictorial guide to this process, which essentially involves unplugging the dryer, removing the screws from the access panel, removing the strain relief device, and documenting which wires are connected where. (Masking tape or a photograph work well for this.) Keep everything you remove in order, and reassembly should be a snap.
Here's a tip to keep the disassembly and re-assembly process simpler: if you don't happen to have the right nut driver around, the quarter-inch sheet metal screws used to assemble most appliances are the same size as the shafts of those all-in-one screwdrivers that accept standard driver bits (via The New York Times).
To adapt or not to adapt
If your dryer already has a cord attached but it's the wrong configuration, you might find adapters in your local home center to use in lieu of buying and installing a new cord.
Adapters that convert a three-prong plug for a four-prong outlet are not a problem. Adapters that convert four-prong plugs to three prongs don't necessarily make the appliance less safe if the dryer itself is wired correctly, but there are better options such as upgrading the receptacle to a grounded type, or upgrading the receptacle and adding a GFCI breaker, according to Ask the Electrician.
Some adapters include a separate ground wire that is attached to a nearby standard outlet. Assuming your neutral and ground wires are no longer bonded inside the dryer with a ground strap, this option can be a good alternative. It's still a good idea, if you're at all unsure, to contact an electrician.
Shopping for a cord

A quick review of offerings (commonly stocked in the stores) from Lowes, Home Depot, and Menards shows an average cost of $24.12 for three-wire cords and $25.58 for four-wire cords. Lowes generally carries third-party cords. Home Depot and Menards carry third-party cords and some manufacturer cords that can also be used for other brands.
It helps to know what you're looking for in a cord. Heavier-duty cords that resist kinking are generally better. Ring terminals that connect to your dryer's terminal block are more difficult than open spade terminals to accidentally disconnect. For these, you'll need to remove the terminal block screws entirely to install the terminals. Some retailers, such as Home Depot, describe ring terminals as "closed eyelets."
If you shop carefully you can find slightly better deals at Amazon, but items offered for sale there are not necessarily compliant with U.S. electrical code. Do your research first, and be sure that whatever you're buying is both compatible with your dryer and up to code.
Distinguishing dryer plugs from similar plugs
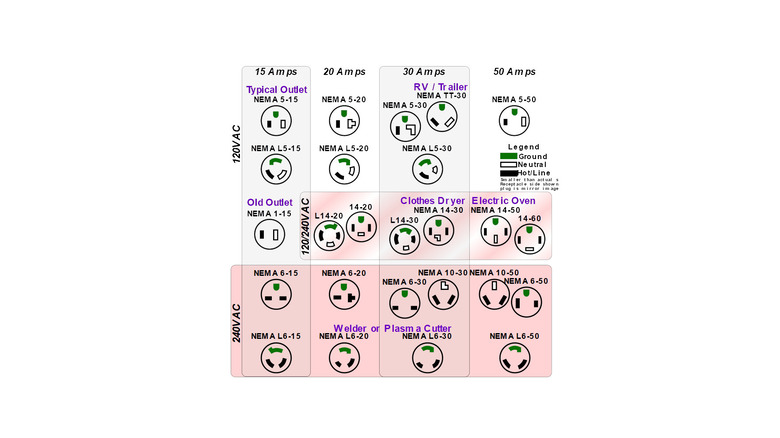
All other 240-volt appliances use special plugs, some of which are very similar to dryer plugs and receptacles. These vary by ampacity (dryer circuits are 30 amps, whereas range circuits are 50 amps). Some 20-amp circuits also include unusual prong configurations that could be confused with a dryer connection, but these are typically 120-volt and would not service an electric dryer. The reason it's important to only use a dryer plug and receptacle for a dryer is that it ensures the 30 amp capacity applies across the board, according to Ask Me DIY.
Other types of 240v devices use disconnects instead of plugs/receptacles, including water heaters and air conditioning units. Dryer plugs and receptacles will usually include an L-shaped prong or socket for the neutral conductor. Think of it as "L for laundry," and you won't go wrong. When in doubt, your best course of action is to either ask (if you're shopping in person) or read through the specifications for the plug you're purchasing, if you're ordering online.
What about gas dryer plugs?

Gas dryers, as you might expect, have dramatically lower power requirements than electric dryers. So, they generally work off a normal 15- or 20-amp 110v receptacle, the kind you might plug your laptop or phone charger into. This is because the energy-intensive work of creating heat is handled by the gas, while the electricity is only responsible for powering the motor and controls, according to Hunker.
Furthermore, unlike an electric dryer, a gas dryer doesn't require a dedicated circuit. However, it's never a bad idea to put anything with an electric motor on a dedicated circuit when you can. At the very least, having a circuit only for the room in which your dryer is located will help ensure that the system doesn't get overloaded. If you have a gas dryer, the washer and dryer can both safely be plugged into the same outlet (via Mr. Appliance).
Installing a new cord

After all that, installing a cord isn't a very big deal. Your first step will be to unplug the dryer, if for no other reason than that you'll have a hard time replacing the cord otherwise.
Take a picture of the access panel so you'll have some guidance when re-assembling; for those with difficulty in spatial reasoning, these peculiarly-shaped metal parts can be confusing to orient properly. Next, remove the strain-relief clamp and the access panel. If you're replacing a cord, take a picture of the connections at the terminal block for later reference, then remove the old cord.
From here, you'll basically have two possibilities. If you're installing a three-prong cord, have a look at it now. It should be a cable with three individual insulated wires in a row. You'll be connecting these to the three terminals in your dryer, and all you need to know is that the center wire attaches to the center terminal, according to The Home Depot. It's not a bad idea to confirm this in your dryer's manual. Finally, make sure the ground strap bonding the neutral (center) terminal to the chassis of the dryer is in place, and re-assemble.
The process is similar for a four-wire cord. Red and black (hot) wires attach to the left and right terminals, white to the center (neutral), and the green wire to the green screw. If there's a strap or wire connecting the green screw to the center terminal, remove it.
Upgrading your dryer

Is there any safety value in upgrading your dryer itself? Probably not, as you'll face the same cord issues regardless of the age of your dryer. You might experience some energy savings with a newer dryer or better reliability than with an older one. But the electrical issues remain the same.
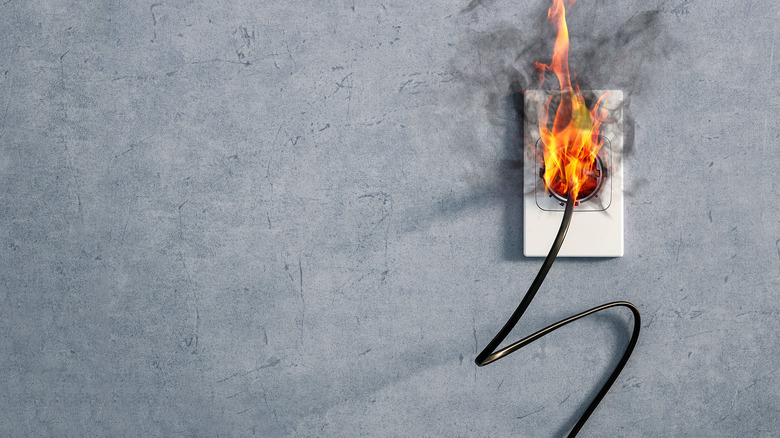
You will always discover your dryer is broken just as you need to dry clothes; why else would you be using it? On average, this happens every 10 to 15 years, according to HomeServe. Then it's time to decide whether to repair it (for an average cost of $100 to $500) or replace it (which can cost anywhere from $300 to $2,000). You can sometimes do the repair work yourself if you're honest with yourself about your limitations. Just be careful; the core reason for all this talk about dryer cords and outlets is that 240 volts of electricity is dangerous.
You should be quick to pull the "replace" trigger if your dryer is vintage, because newer models come with much higher energy efficiency, more control in the form of presets, and handy smart features. Your mileage may vary, but remember: either way, you're going to need to install a cord that works with your outlet.
What's going to go wrong?
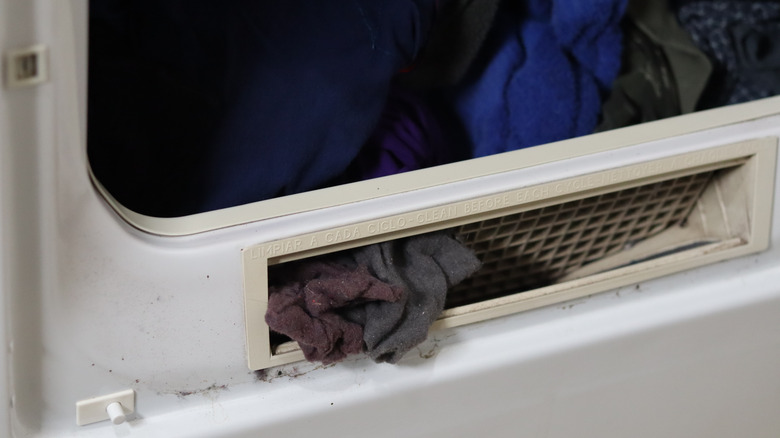
At this point, you might be asking the simplest and most valuable of questions: what's going to go wrong when I install this dryer cord? The good news: probably nothing at all. Well, probably nothing involving the cord. In a 2008-2010 report, the U.S. Fire Administration estimated that dryers caught fire 2,900 times annually, killing five Americans and costing $35 million. Of these, 15.6% were caused by all electrical failures and malfunctions combined, whereas failure to clean lint traps accounted for 34% of fires.
Professional installation and proper plugs/outlets are the only electricity-related items mentioned in the USFA's prevention recommendations. So it's worth paying attention and doing the job right. For the most part, if you don't install the cord correctly, the worst thing that will happen is that the dryer simply won't work, and you'll have to undo the work you did and try again. If that doesn't work... it might be time to call in the pros.