How To Propagate Plants Through Rhizome Or Root Division
By definition, rhizomes are neither the green shoots that push out of the ground to produce leaves and flowers nor are they the thin feeder roots that grow down into the earth to brace the plant and hold it steady. Instead, as explained by Biology Online, rhizomes are stems that grow horizontally under the ground. They are the fleshy, bulbous pieces of the plant from where both the shoots and roots originate.
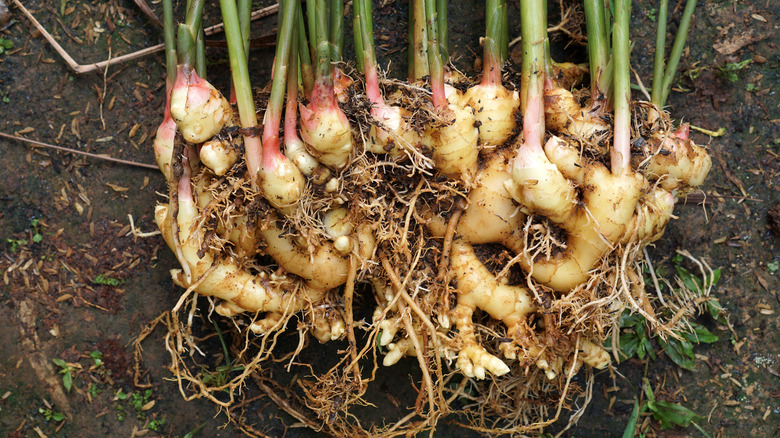
Think of the fresh culinary ginger you can find in the produce aisle of the grocery store. The part that we slice and dice to eat is the rhizome (even though it's confusingly referred to as ginger root). Now, that's just one example. It's not meant to suggest that all rhizomes are edible. They are not. Also, not all plants grow from rhizomes. But when they do, propagation by rhizome division is the quickest and easiest way to produce more plants.
Gather tools and supplies
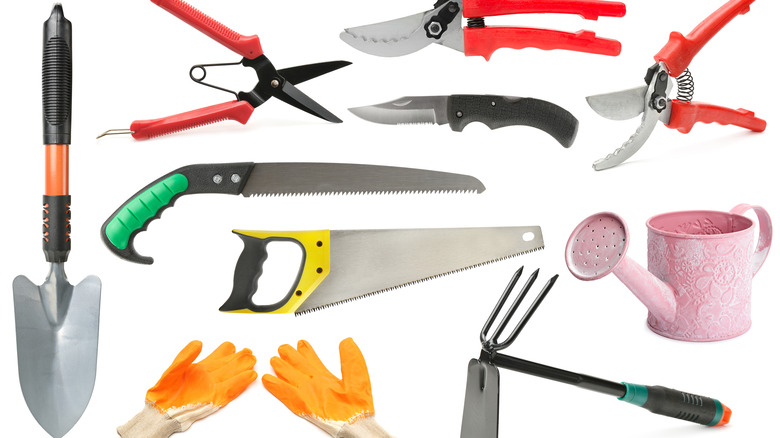
Before you get started it's important to ensure you have the proper setup. As for tools, that will include gloves; a sharp, sterilized blade or cutting shears; and a trowel or small shovel. In terms of supplies, you'll want to get a potting soil mix that is appropriate for the type of plant you're dividing. Don't skimp here if you don't have to. Your new rhizomes will basically be baby plants. Providing them with the correct soil for their growth needs will give them the best chance of thriving. You'll also need small containers for the new rhizomes and some optional slow-release granular fertilizer.
Back Garden shared a helpful list of the most common plants that grow from rhizomes. Among these are irises, snake plants, asparagus, and ferns. Canna lilies and tropical plants such as ornamental gingers and heliconias are also well known. If you have a mature plant that is ready to be divided, lay out your supplies and prepare to dig. On the other hand, you may have purchased a new rhizome. This could be a piece of culinary ginger you picked up at the market or a starter rhizome you got from a local nursery or commercial plant seller online. If that is the case, you can skip the next step and go straight to making the divisions.
Dig up the entire rhizome

For the most part, plants do not enjoy being dug up, handled, or moved around. According to the Department of Botany and Plant Pathology at Purdue University, they can go into a state of transplant shock, which can cause damage to their leaves, stems, flowers, and more. Therefore, digging up a rhizome is a step you want to take with care. For many potted houseplants, all you need to do is flip over the container and gently tap out the plant. Once the entire plant is free from the pot, brush and chip away the soil until the rhizome is exposed.
If you're working outside in the garden, remember that rhizomes that have lived in the ground for a long time will have spread to become quite large. You're likely going to need a shovel to get them out. Y Garden, via their YouTube channel, notes that a clear sign that rhizomes are ready for division is seeing them piling on top of each other and fighting for space. This part of a plant tends to be pretty resilient, but still, be careful not to cut into it before you mean to. Leaving some room between your shovel and the root ball will ensure that you're only digging through dirt.
Make the divisions
Diseases can spread through your garden via your tools, so if you haven't already cleaned your cutting implements, do so now. This is an important two-step process that will greatly cut down on the chances of infection. Clean them first by rinsing and wiping them down; then sterilizing them. IFAS Gardening Solutions of University of Florida recommends using rubbing alcohol, chlorine bleach, or a product such as Lysol.
Get to know your rhizome before making your divisions. You want each new section to include multiple eyes because, as Epic Gardening explains via YouTube, the eyes are where the new sprouts will emerge. Epic Gardening also adds that a larger piece of rhizome will yield faster growth of a new plant simply because more shoots sprouting up towards the sun equals more photosynthesis, energy, and growth. When it's time to start making divisions, know that you really only need to make a few. We're not looking to create a dozen new plants from one mother. Some rhizomes will be so easy to break into pieces that no tools will be required. If you can break them with your hands then go for it. Tougher, thicker rhizomes will need to be sliced with a knife.
Repot the original parent plant
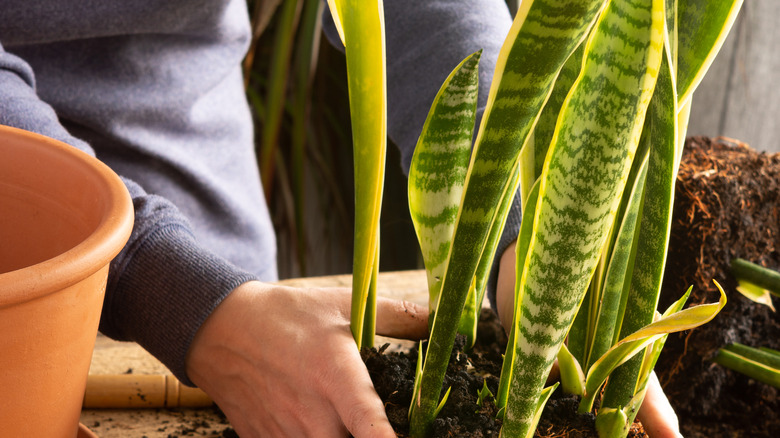
Another reason we don't need to go overboard with the cuts is that the original mature plant, or mother plant, will remain intact and alive throughout this process. It does not need to be cut up entirely or decimated to the point of irreparable damage. A healthy mother plant can be repotted so its rhizome continually grows to offer more and more cutting options. As Planterina points out on her YouTube channel, sometimes you're only going to remove a few offshoots, for instance when dividing the Sansevieria snake plant seen above.
Treat the parent plant gently because it's been through a lot. First, we ripped the entire thing from its comfy container home. And then, as if that weren't enough, we sliced and broke off pieces of its root system. At this point, the handling is coming to an end and it's time to get that plant back into the dirt. Out in the garden, it can go right back into the hole it was pulled from, provided it's still an appropriate area for optimum growth. For an indoor or container plant, it can most likely go right back into its original pot. It's important to use fresh soil though; don't just push it back in there with the old dirt and call it a day. Treat this like you would any repotting situation. Nesting with Grace suggests mixing fertilizer in with your repotting soil to kill two birds with one stone.
Plant the new rhizomes
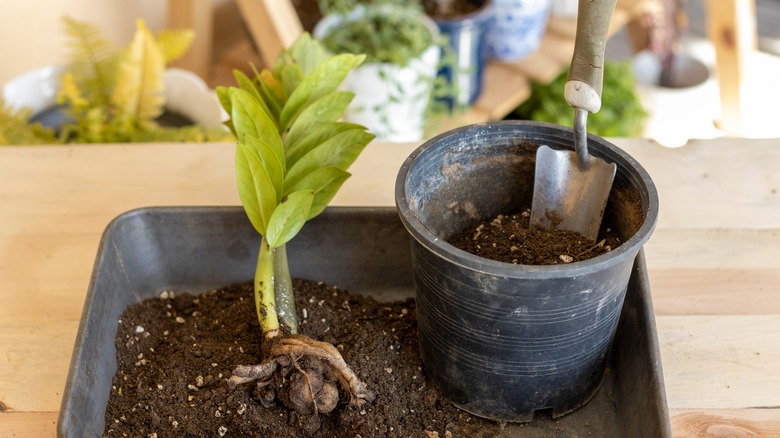
You have two options when it comes to planting your new baby rhizomes. Per Epic Gardening, you can first sprout them in water, which may make the overall process go a little faster. Or, you can immediately get them into the soil. A pot that is wider than your usual grow pot is recommended for rhizomes so they have the space they need to make do their unusual horizontal growth path under the soil. In this case, shallow is fine as well. Make sure your new containers have sufficient and unclogged drainage holes. You can also ensure thorough drainage by placing small rocks inside the bottom of your pots before filling them with a growing medium. This provides a bit of a catch-all area in case the plant receives too much water and it's not draining out of the bottom quite fast enough.
Grab a plant-specific potting soil and fill each new container to about the halfway point. Rhizomes do not need to be planted too deeply under the soil, but it is important to make sure they're fully covered. Give each one a decent soaking, checking for drainage as you water. Then move them to a warm, sunny spot. Most rhizomes will send shoots up above the surface of the soil within a few weeks. Once your seedlings are a few inches tall, they'll probably be ready to be transplanted in to your garden or repotted in larger containers.