How To Deep Clean Your Kitchen

Everyday cleaning is important; however, you need more than your daily routine to truly get all the dirt and grime out of your kitchen. Crumbs, spills, and pet hair love to hide under appliances and in the corners of your counters. Getting rid of all those things helps keep down the risk of germs and bacteria — not to mention, a clean kitchen just feels good to walk into. It's simply more pleasant to cook, bake, and entertain in a space that looks ready to create.
According to Kathleen's Cleaning Service, it's best to deep clean your kitchen once a month or at least four times a year, depending on how much use and dirt it sees. In this article, we'll discuss how to deep clean your kitchen so you can get your supplies gathered and the appliances, counters, and every other area ready to go ... and give yourself some peace of mind.
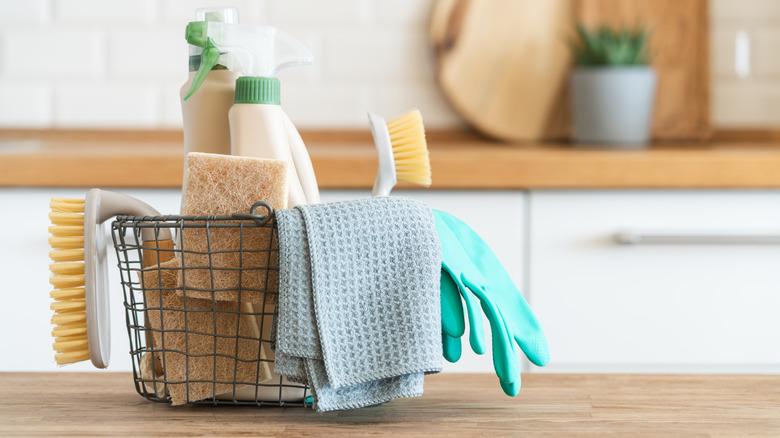
Make a list and gather supplies
Are you a list maker, or do you fly by the seat of your pants? For many people, every goal starts with a list, whether it's a major task like changing careers, or a simple one like deep cleaning the kitchen. According to Workast, there are psychological reasons checklists encourage productivity and make us feel good. That reason is: dopamine. Workast goes on to tell us that our brains release dopamine when we complete tasks. Crossing off "mop the floors" with your Sharpie does more than tell you the floors are clean. That blacked-out item says you're making progress — and progress makes us feel good.
Make a list before you begin, both of what you want to accomplish on your deep cleaning day, as well as what supplies you'll need. Include decluttering, cleaning out old food, and cleaning each appliance, counters, windows, and floors. Gather items such as your usual household cleaners (glass cleaner, disinfecting spray, floor cleaner, bleach, baking soda), a mop, and plenty of rags. Cross items off as they're completed or collected. Let yourself feel a sense of accomplishment as you strike through each job on that to-do list.
Set aside the day and play some music

Deep cleaning the kitchen makes for a long day. It's not exactly an exciting job, so do what you need to do to keep the momentum going. For many people, the only encouragement needed is the right playlist and a good speaker.
According to Medium, when we listen to music, our brain releases dopamine and makes us feel energized and focused. Who knew cleaning day would have so many benefits? Take advantage of things that make you feel like you can conquer Mt. Everest (even if it's just the kitchen floor) so you're less likely to quit halfway through. You know what music gets you going, so create a powerhouse cleaning day playlist.
Also, set aside plenty of time for your immaculate kitchen day. Don't plan on completing this dirty task in a couple of hours — it's a big project, even if the kitchen is small. Put it on the calendar and don't keep putting it off.
Create a space to collect items
Part of deep cleaning the kitchen is emptying everything out so you can clean every nook and cranny. You need a spot nearby to dump everything you're pulling out. Within the collection space should be separate piles to keep items sorted. Wayforth recommends the four-pile method: donations, stuff to keep, trash, and things to sell. Using the four-pile method from the start is more efficient than creating a mountain of objects to go through later.
You'll be surprised at what you might find as you clean out cabinets, pantries, and underneath appliances. Some finds might be great, such as that organic basil you thought you'd lost or the cutest little cookie cutter you can now put back in your collection, while other "treasures" will be quickly added to the trash pile. Either way, consider how much you've missed long-lost items when you find them. If you haven't used a kitchen tool for a few years, would it be better served if donated? Whatever your method, don't try to deep clean the kitchen without going through everything and clearing out space.
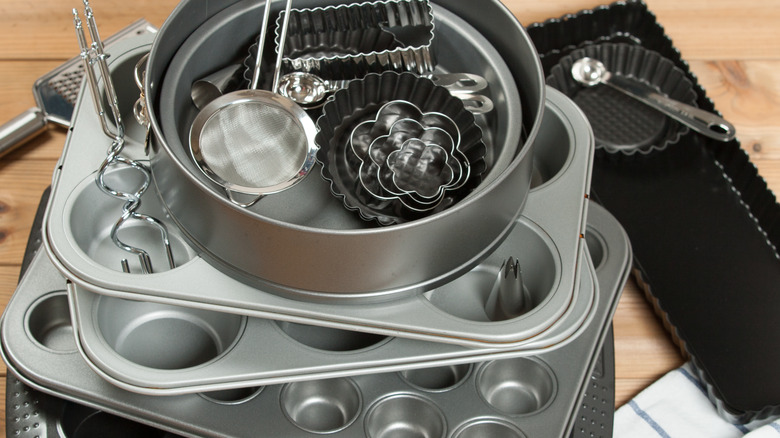
Clean and organize the cabinets
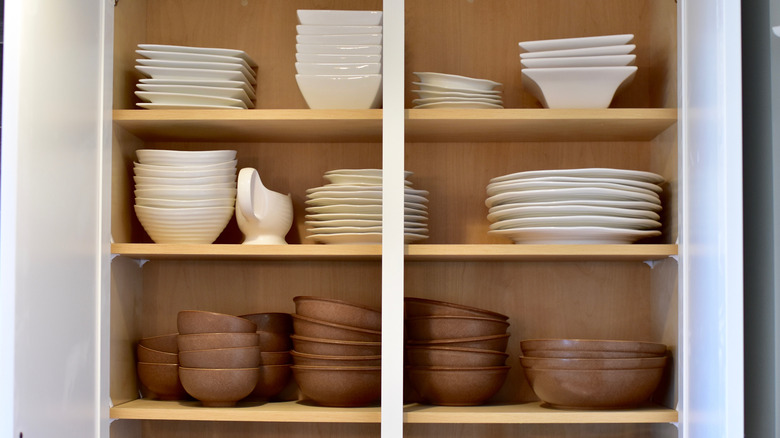
Now that the cabinets have been searched for unwanted items, continue to completely empty them, adding to one of the four piles. It's helpful to start with those small cabinets way up high that you never use. Those are the places in kitchens where surprises and mystery items are found. You know, like the weird Jell-O mold Aunt Marge gave you.
Once everything is empty, take a bucket of warm, sudsy water and a clean rag, and wipe out the cabinets. Let them dry completely, then start putting items back in an organized fashion, or first, line the cabinets. According to Clean and Scentsible, lining cabinets and drawers helps hide stains or scratches and also prevents future ones. You can find cabinet lining materials at any home goods store. If you choose to use liners, do that before putting items back. If you're happy with the way your cabinets flowed, it's pretty simple to just do what you did before. If not, eyeball what you have and plan how you'd prefer to use the cabinets this time, before putting stuff away.
Lastly, close all the doors and wipe down the cabinet frames, doors, drawers, and hardware with a damp rag.
Empty the pantry and toss old food
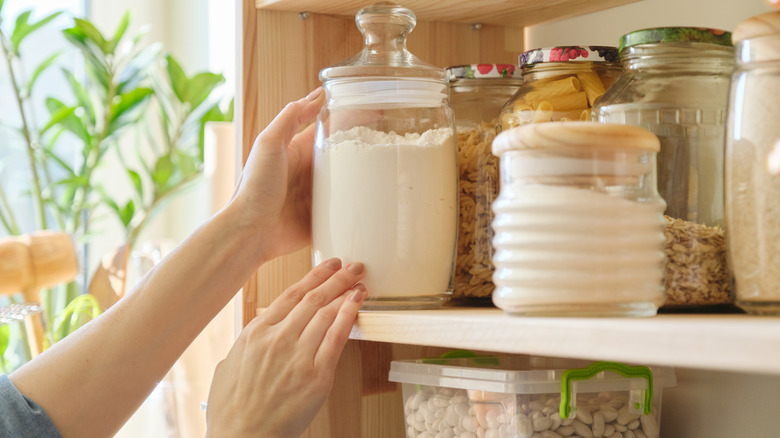
Pantries are unique because they are usually full of food, rather than dishes and utensils. Clear everything off, one shelf at a time. Throw away those opened bags of chips and boxes of crackers that have become stale. If you find multiple packages of the same food items, condense them if you can, to save space.
Invest in a package of clothespins to use in your pantry. They make great chip clips and also work well to seal up bags of cereal and snack items to keep them fresh a bit longer.
Read all the expiration dates, especially if you know an item has been lost at the back of the pantry for a while. Keep in mind that not all expiration dates have the same meaning. According to Consumer Reports, there are three types of labels for expiration dates we may be overreacting to: "best if used by," "sell by," and "use by." These warnings have to do with companies wanting consumers to enjoy their product while it's at its best, and don't indicate unsafe food. The sure way to tell if food is any good anymore is with smell and taste.
Once the shelves are empty, clean them with warm, soapy water, allow them to dry, then return the saved products to their shelves.
Say goodbye to leftovers and hello to a new refrigerator

Do you ever find you save leftovers only to throw them away a week later? Or even worse, do you find them a month later when it's deep cleaning day? The results look like a child's science experiment. Grab a garbage bag (or two) and take items out of the fridge one at a time. Here's where your senses come in handy. Ditch the opened foods that have expired or just don't look or smell right. Keep the ones that are still good and set them aside.
Next, use your memory to figure out how old each leftover item is. According to the Mayo Clinic, we should toss leftovers at the three- to four-day mark. After that, you risk food poisoning. Once you've taken care of last week's meatloaf and everything else that should be thrown out, wash each shelf with hot, soapy water and pull out the drawers if possible, to wash them in your sink. Wipe everything dry and put your refrigerated items back in the fridge, along with a dish of fresh baking soda to collect daily odors. On the outside of the refrigerator, use glass cleaner to bring back the shine. If you have a stainless steel appliance, use a stainless steel cleaner.
Wipe up the splatters and shine the stove and microwave

Microwaves left unclean create a mess that eventually has to be chiseled away. And how about the oven and stovetop? Splatters from frying bacon or drippings from the overflowing lasagna leave a nasty problem. Let's start with the microwave. Remove the inside tray and wash it in your sink with hot water and dish soap. While that dries, use your reliable bucket of clean, soapy water and a clean rag to wipe out the inside and outside of the microwave. Close it up and clean the outside with glass cleaner or stainless steel cleaner. Next, let's move to the oven.
Oven cleaners are harsh on your lungs and the environment. Try a natural oven cleaning method, such as baking soda, instead. According to Arm & Hammer, you can combine ½ cup baking soda and 3 cups water to make a paste. Remove the oven racks and rub the paste on all the messes in the oven (use a spatula or gloved hand), let it sit for 15 minutes then wipe away. Lastly, wipe it all down with a wet rag or paper towels, using a 3:1 ratio of water to vinegar. Shine the outside of the oven as you did the microwave.
Wash the stovetop as usual and bring the grates to your sink for a good scrubbing with water and dish soap. Dry cast iron grates immediately to avoid rust.
Clear the clutter and clean the counters
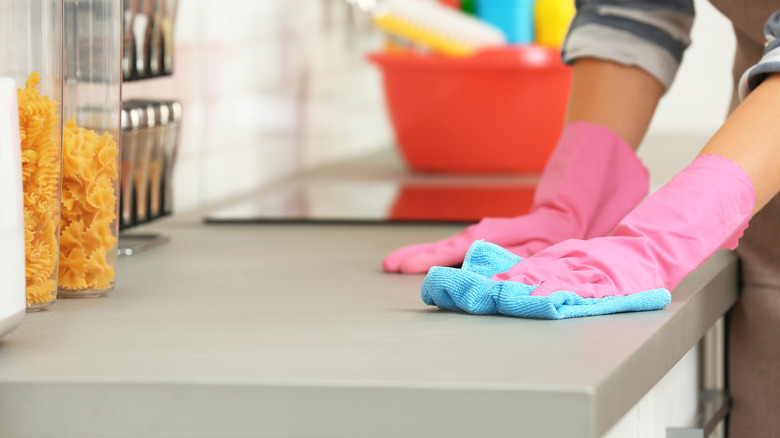
You probably wipe down your countertops a few times a day. That's great, but not enough to get the gunk hiding under small appliances and in the corners. Your first step is to take everything off the counters and set it all on your table or some other spot. Use a clean rag and soapy water to thoroughly clean the counters. This time, you should be able to get every part of your counter, including the corners and areas you don't usually see. Let them air dry, or towel dry them.
For quartz, marble, and granite counters, there are sprays made specifically to shine them. Or, as long as your counters are sealed, you can use your handy glass cleaner, which makes just about anything shine. Formica counters are a bit tougher to make sparkle, but according to Hunker, there are Formica polishes on the market which work like furniture polish for your kitchen counters. They recommend avoiding the ones that contain silicone, as they can leave unwanted streaks.
No more sticky floors and baseboards

Many of us judge when it's floor washing day by the way our feet stick to the kitchen floor. Kitchens see more floor messes than any other place in the house thanks to meal prep, snack time, and plenty of drips and spills. Grab your broom and mop and tackle the grimy floor. Start with a good sweeping to collect crumbs and pet hair.
Next, use the hose attachment on your vacuum cleaner to suck all the dust off the baseboards. Wash your baseboards before the floors so you can work your way down. Use some — you guessed it — sudsy, warm water and a clean rag to wash the baseboards. Once they dry, according to PROHousekeepers, you can wipe them down with a dryer sheet to help repel future dust. Who doesn't love a good cleaning hack?
Now, with the mop of your choice, wash the kitchen floor with an appropriate cleaner, such as Murphy's oil soap for wood floors or Pledge multi-surface floor cleaner for other floor materials. Consider getting down on your knees with a wet rag to get the corners clean.
Clear the drains and make the dishwasher and sink sparkle
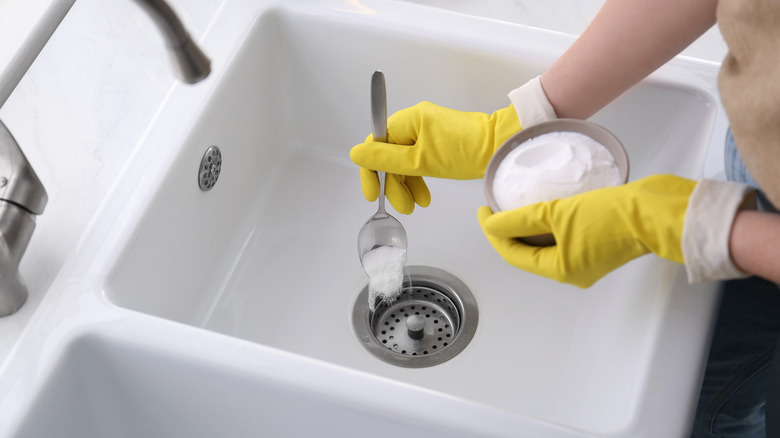
Even if your sink and dishwasher run smoothly, they may be collecting small particles in the drains that eventually build up. It may be the grossest part of the deep clean, but getting that gunk out of there will keep your sink and dishwasher running like new. For the sink, it's the garbage disposal that might suddenly stop working or cause a clog if left unchecked.
According to Home Made Simple, when cleaning the disposal, first disconnect the power first. Next, clean the splash card by wiping it off, then look into the disposal with a flashlight for anything that shouldn't be there. If you see an object, remove it with tongs, not your fingers. Turn the power back on and dump some ice cubes down the disposal and run it so the cubes can do the cleaning. Finish up by pouring 1 cup vinegar and ½ cup baking soda down the disposal and let it sit for about 15 minutes, then flush with water. Wash your sink with a disinfectant spray or some Bar Keeper's Friend to remove tough stains.
For your dishwasher, there are once-a-month deep cleaners to throw into the dishwasher and let them do the work, such as Cascade's dishwasher cleaner. Lastly, shine the outside of your dishwasher and sink with glass cleaner or stainless steel cleaner.
Light fixtures, outlet covers, and switch plates
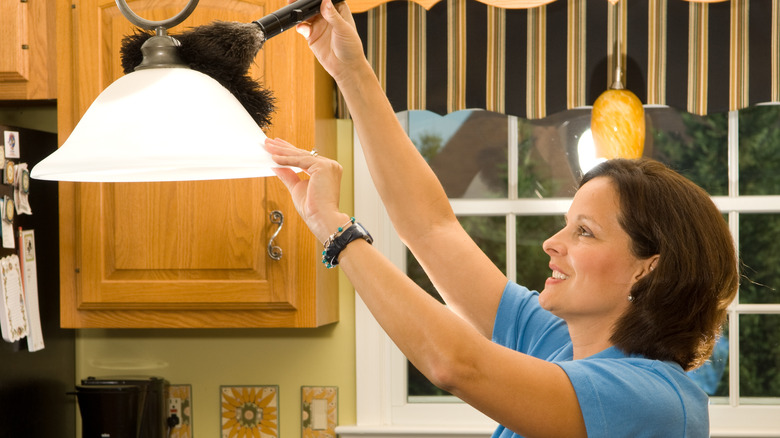
You may not realize how much dust and grease collect over the months on your light fixtures, outlet covers, and switch plates. Grease and dirt have a way of quietly floating through the air and landing in places we don't notice. To clean your outlet covers and switch plates, turn off the power and use a screwdriver to remove the screws and covers. Wash all the covers in a sink full of soapy water, then completely dry before replacing them.
Light fixtures are a bit more work. According to Destination Lighting, the dust and grime that build up on your fixtures can weaken the brightness of your lights, making them as much as 30% dimmer. Clean your kitchen fixtures by removing any covers after the power is off. Wash light covers in clean, soapy water and dry thoroughly. For chandeliers and fixtures with other attached parts, wipe each part down with a damp rag.
Clean all the seating areas

If you have an eating area with a table and chairs, or barstools around an island or breakfast bar, they need some attention on deep cleaning day.
Like most homes, your table has probably collected some stuff. Start with decluttering and put everything in its proper place. Wash your tabletop as usual with soapy water. For chairs and stools, remove seat covers if possible and throw them in the wash. For all others, wipe down the seats with a damp cloth.
One of the dirtiest parts of kitchen seating is the feet of the barstools and chairs. They collect a lot of dust, pet hair, and all kinds of grime. Carefully flip each one over and grab some wet paper towels. Wipe the bottoms of each chair or stool to get the feet clean. After they're dry, now is the time to protect your floors from the sliding of chairs and stools. According to Lakeland Furniture, you should place a rug under barstools, or use some kind of protectors that attach to the feet, such as felt pads with adhesive, or sliders nailed to the bottom of the feet. Those methods work for chairs, as well.
Take down window coverings and clean the window

Not every kitchen has a window, but if yours does, now is the time to take down any window treatments and get them clean. Spray blinds off outside with a garden hose and let them dry in the sun, or carefully wipe off each slat with a wet rag and let dry. Toss curtains and valances in the washing machine. After that, it's time to clean the glass of the window.
Kitchen windows see some extra grease and dirt, so you'll enjoy the results after cleaning. According to Family Handyman, the best cleaning solution for windows is still the old reliable vinegar and water mixture. They recommend mixing one part white distilled vinegar and two parts water, with a squeeze of lemon juice. Wipe this solution on your kitchen window with a clean rag, and then squeegee it off for a super clean window. Don't forget to wipe down the window trim and window sill as well, with a damp cloth.
Keep up with daily cleaning

Way to go! Deep cleaning day is done and your kitchen looks fantastic. Now, it's time to make a schedule to help you and your family keep up with the daily cleaning of the heart of your home. Schedules help keep us on track, but they don't have to rule your life. Keep your schedule for cleaning the kitchen loose and flexible so you don't stress out if you're a day off. Think of it as more of a guide so everything gets done in a reasonable amount of time.
According to The Kitchn, there are five spots to try to clean every day: the sink, counters and stovetop, the kitchen table, your sponge, and spot clean floors, refrigerator, and cabinets as needed. Keeping up with these small tasks daily will help you maintain the beautiful job you've done when deep cleaning. It will also help make deep cleaning a bit easier.