The 5 Best Fence Options For Your Backyard Garden

We may receive a commission on purchases made from links.
You've planned your perfect garden space. You know exactly where to plant the tomatoes for best sun exposure and you added their favorite marigold companions to the mix. You watered and tended your seedlings, all of which flourished into gorgeous mature plants offering up delectable fruit. And then — almost overnight, everything is gone. In the morning it becomes evident that your beautiful garden has been invaded by the local fauna. Rabbits and deer seem to have eaten it all while trampling healthy plants to their untimely demise. It's enough to make you scream.
Instead of cursing the otherwise delightful wildlife that inhabits your neck of the woods, it's time to install a fence around your garden in order to keep your four-legged neighbors from coming back. Look no further; we're here to help. Below you'll find five options for garden fences you can DIY over a weekend with only a few tools and some easy-to-find materials that may already exist on your property. Add a dash of elbow grease and you'll be rockin' and rollin' with a new fence before Monday comes around.
For most of these options, you'll fare better with a tool designed specifically for digging fence post holes than you would a standard shovel. There are manually operated post-hole diggers and battery-powered augers, which are potentially cumbersome, but they allow you to dig faster. Both of these types of tools can be rented from home improvement centers like Lowe's or Home Depot.
1. Wood and wire fence
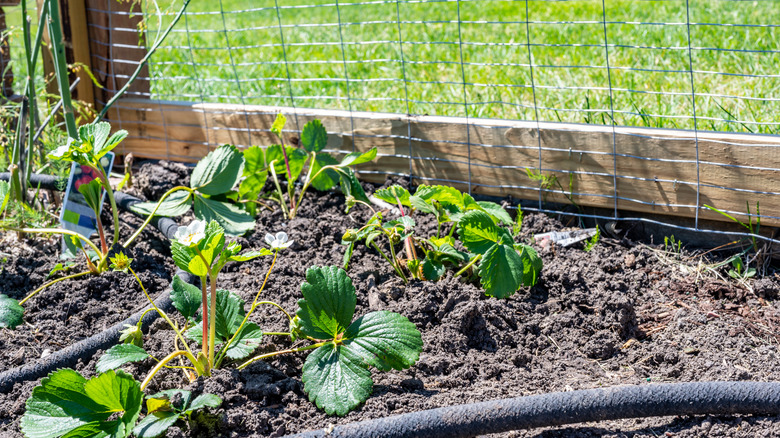
Using a combination of wood framing and wire for a mesh-like fence is a straightforward and effective way to go. Merrypad shares some tips to build a 6-foot tall wood and wire fence. Using a post hole digger, dig evenly spaced holes in a simple rectangular pattern around the existing garden. Standard untreated pine is a perfectly acceptable option for the posts as long as it is sealed to protect it from the elements. Cedar or pressure-treated wood can be used as well, though they will be more expensive.
Some types of wire may be too thick and unbendable to simply wrap it as one piece around all of the posts, so pieces can be cut to size and attached between each post. For a more malleable choice, try chicken wire. It's important to note that the wire should be buried straight down into the ground at least a few inches to stave off small critters with a penchant for digging. Furthermore, Merrypad suggests installing an additional layer of netting around the bottom of the fence. From the ground up, 18 inches should suffice. Keep any part of the netting or fencing that you don't use attached and bury it under the ground just to make it a little more difficult for anyone to sneak in. A simple gate will finish the project off nicely.
2. Pallet fence
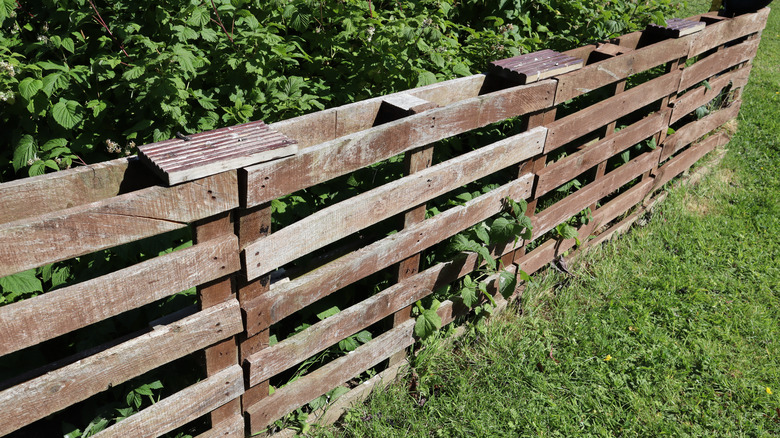
What's the best part about building a pallet fence? It'll cost you next to nothing because pallets are regularly given away for free. In fact, there's actually a website with a page called Pallet Classified Ads which will tell you exactly when and where you can find free pallets close by. Even if you can't snag any free ones and you're stuck buying some, they're dirt cheap.
The second best thing about a pallet fence is how easy it is to build as each pallet is essentially already a fence. All you need to do is connect a bunch of them together around your garden and close it off with a swinging door. To follow this simple fence plan by Morning Chores, you'll need either some 3-inch bolts, roofing nails, or stakes. You'll also want to get a hinge and latch combo for the door panel.
First, map out your perimeter and line up the pallets. Next, decide how you would like to attach them to each other (via bolts, nails, or stakes). For the door, attach the last pallet on one side by the hinge, and on the other side install the latch. Finally, much like with the wood and wire fence, it's a good idea to add a layer of critter-proof netting or chicken wire to the bottom and bury a few inches of it into the ground.
3. Horizontal slat fence
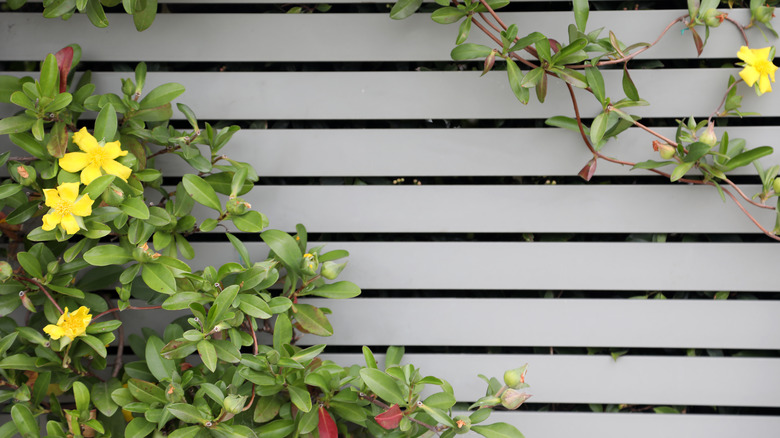
A horizontal slat fence is an improvement in terms of visual appeal but it can be completed for a weekend DIY project. Before heading to the store for lumber, make sure you measure the length of each side of your garden so you know how much wood you'll need. A pro tip from Home Depot's YouTube how-to video is to purchase a little extra wood to account for potential mistakes as you go.
Home Depot recommends digging your post holes to 6 inches below the frost line. To help with future drainage, they also say to pour crushed gravel into the holes before setting your post beams. As you fill in the holes around your posts, you can add fast-drying concrete and water to help keep them secure. From there you need to attach horizontal boards with deck screws, starting 2 inches from the bottom and working your way up the posts. If you don't have a proper saw at home, you can have the wood slats cut to size when you purchase your lumber.
The amount of space between the slats is up to you, depending upon how much light you want to let in or how much privacy you want to keep from escaping. Using spacers as you attach the slats will help keep everything even. If you're adding a gate, there are kits that will come with everything you need to get the job done.
4. Tied bamboo fence
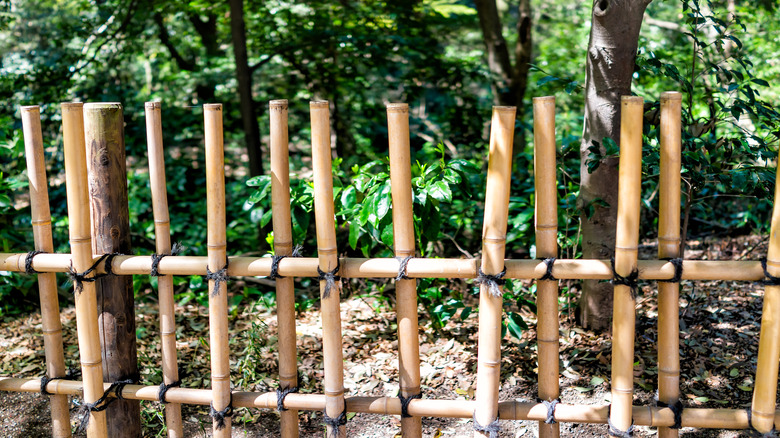
Bamboo is incredibly fast-growing and often considered invasive. In fact, if there's any bamboo at all near your house, then there's likely to be a lot of it. Per Gardener's Supply Company, you can use bamboo canes to build an array of structures for your garden including a simple fence, a trellis, an arbor, or towers and tripods that can be used to support climbing vines and top-heavy plants like tomatoes. You'll be on your way with a few common tools and some patience, while you learn the traditional Japanese style of tying knots.
Since there will be a significant amount of space between the poles, a tied bamboo fence will not be the end-all answer to your pest-related woes. It's a decorative option that will clearly define your garden from the rest of your yard while keeping large animals, including household pets, away from your plants.
To construct a tied bamboo fence, you'll need a shovel, level, drill, hammer and nails, and something to tie the canes together. Start by digging post holes at least 12 inches into the ground. When inserting the posts make sure they are straight and level with each other. Hemp twine works great for tying bamboo canes together in a lattice pattern, although important spots like corners or door frames may require reinforcement with wire or nails.
5. Woven branch fence
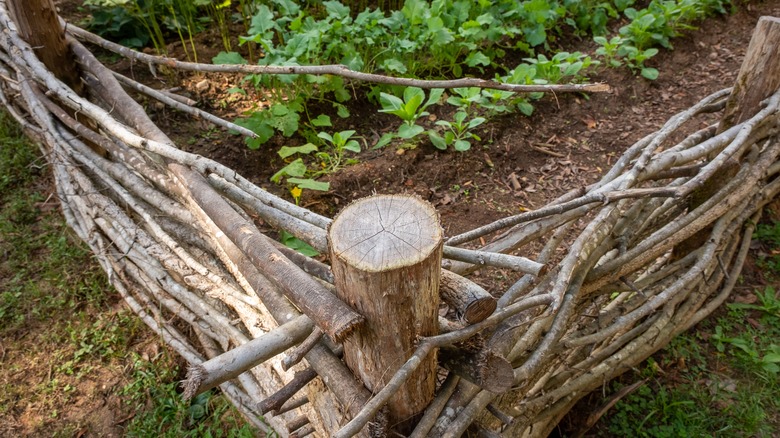
The beauty of a woven branch fence is in its natural appearance, like something out of a fairytale. This is a particularly great option if you live in or around forested areas and will be able to collect fallen branches over time. The folks at the Farm Dream offer an easy-to-follow tutorial on how to build this all-natural fence via their YouTube channel. They were lucky enough to receive heaps of trimmed willow branches from a neighbor, but whatever you're able to eco-consciously amass from nature is going to work beautifully.
As best you can, separate your branches into piles from thickest to thinnest. The thickest branches can be pounded into the ground with a rubber mallet and used as post beams at the corners as well as spaced out a little less than 2 feet apart for the walls. From there, the thinnest of your branches will be the easiest to braid because they'll be the most flexible. Starting from the bottom and slowly working your way up, weave the branches between the posts so they sit on top of each other and form the walls. With each new branch, alternate whether you start the weave, either in front of or behind the first post. It's normal for the branches to be different lengths; remember you're working with nature and this is not supposed to be a perfectly symmetrical fence in the end.