The Easiest Way To Fix A Ceiling With Water Damage
The easiest way to repair a ceiling with water damage is to summon a pro, but that is certainly costly and it may not even be necessary. If the leak is small and the collateral damage is minimal to moderate, a DIY approach may be all that is needed. Either way, it is imperative to address the problem as soon as possible to avoid an escalation of it. Beyond the aesthetic imperfections, structural issues and mold or mildew infestation are potential outcomes of ignoring a leak. First things first: Determine the source and severity of the damage. Establishing the origin may be easier said than done, however, as water is apt to flow some distance away from the source, per Roto-Rooter.
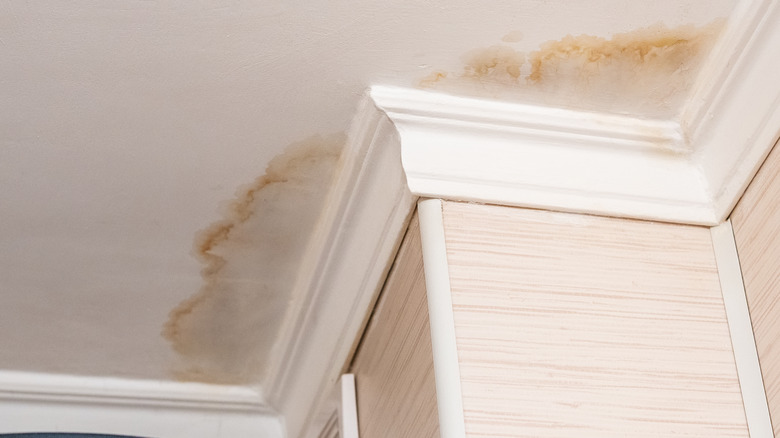
A coffee-colored stain on the ceiling or walls may be the first sign of trouble when the leak penetrates into the interior drywall. The more seriously drywall is compromised, the greater the chance of serious damage up to and including ceiling collapse. Electrical wires, switches, and outlets may need to be replaced, as well as insulation. Mold and mildew can arise within 24 hours, and that threat has to be squelched.
Dealing with a ceiling leak and making the subsequent repairs seems daunting. However, an expensive professional fix can be avoided and you can make the repairs yourself if the leak is relatively contained and caught early. Just be sure to take safety precautions, and have a helper if possible.
DIY steps for leak repair
After you identify and stop the leak, the affected part of the drywall may have to be removed. A small area can be restored by scraping away the damage using a putty knife. Sodden drywall will simply crumble to the touch and can be cleared away. You may also have to peel off wet drywall tape and replace it. The now-exposed area should then be dried out for 48 hours, according to True Value, using a dehumidifier or fan.
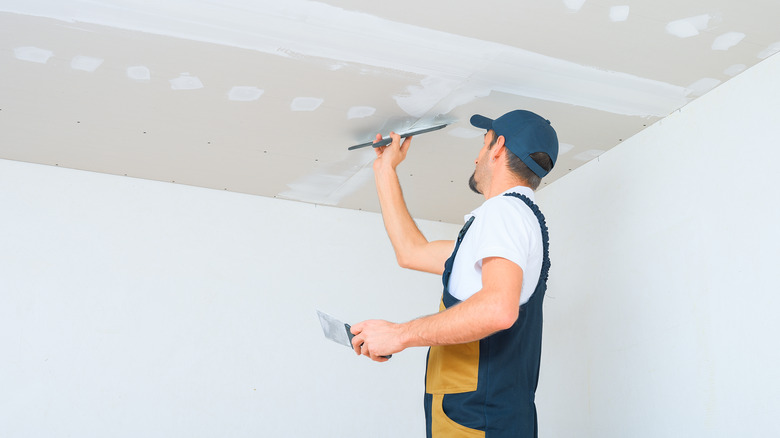
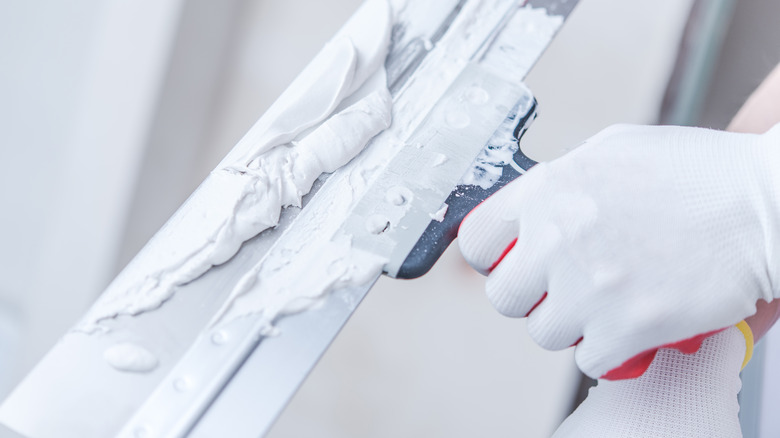
Next, patch it with a separate piece of drywall. Constellation recommends using a gypsum-based joint paste (aka drywall mud) to cover and fortify any repairs. Fiberglass tape can be used in tandem with the mud to prevent future cracking. Smooth the paste, and once dry, the fixed section is ready to be sanded, coated with a stain sealant, and painted.
If the water damage to one's ceiling is not extensive, such repairs are fairly minimal and don't require a plethora of equipment. However, as you are likely to be working overhead, and possibly manipulating heavy pieces of drywall, having an assistant is a bonus.
Prevention is better than cure
Proactive prevention can thwart future problems. The roof is a prime suspect as the source of ceiling leaks. It should be inspected routinely, especially after storms with high winds and heavy precipitation. Ice dams need to be attended to. Upstairs rooms or appliances also need to be monitored. Rooms that are generally not used should be inspected for leaks too.
Averting ceiling leaks before they occur makes economic sense. Do-it-yourself repairs are a thrifty option, but still may be time-consuming and cost a bit. Hiring a professional contractor to do the deed will save time and effort, but will also put a bigger dent in your bank account. Water Damage Advisor estimates the cost of fixing a leaky ceiling to be close to $100 a square foot, depending on the type of repair. A professional drywall or sheetrock job costs the least to repair, compared to fixing a leak in a plaster or popcorn ceiling. If possible, doing it yourself is the way to go.